Action’s Payload in React Redux
Last Updated :
02 Apr, 2024
In the realm of React Redux, understanding how actions and their payloads work is fundamental to efficient state management. Actions serve as messengers that convey information from your application to the Redux store, triggering state updates. Among the key components of actions is the payload, which carries data to be processed by reducers.
This article elucidates the significance of action’s payload and how they function within the React Redux ecosystem.
Introduction to Action’s and Payloads
In Redux, actions are plain JavaScript objects that describe changes in an application’s state. These actions are dispatched from components and are the only source of information for the Redux store. The Redux store then passes these actions to reducers, which specify how the state should change in response to the actions.
Action payloads, within this context, refer to the additional data attached to actions. While actions themselves serve as triggers for state changes, payloads carry the necessary data to enact those changes. They provide context and specificity to actions, allowing reducers to understand what kind of state update is required.
Understanding How Action’s and Payloads Work
Action’s payload carries the data necessary to update the application state. They are vital because they provide the necessary information for reducers to determine how the state should be modified. Without payloads, actions would lack specificity and would be unable to convey the necessary details about the state change.
For instance, in a Notes application, an action to create a note might include a payload containing the details of the note to be added, such as title, description, tags, and date. Without this payload, the action would lack the information needed for the reducer to accurately update the state with the new note.
Structure of Action’s and Payloads
Action payloads typically follow a simple structure. They are often plain JavaScript objects with key-value pairs representing different pieces of data. The structure of the payload depends on the specific requirements of the application and the nature of the state update it intends to perform.
For example, a payload for creating a new note might include keys like title, description, tag and data, each corresponding to the respective details of the note being created.
Passing Payloads to Reducers
Once an action with a payload is dispatched, the Redux store forwards it to the appropriate reducer. Reducers receive both the action type and the accompanying payload. They then use this information to determine how to update the application state.
Reducers typically employ a switch statement to handle different action types and their payloads. Based on the action type, the reducer extracts data from the payload and applies the necessary modifications to the state.
Use Cases
Practical examples can help illustrate the usage of action payloads in React Redux applications. Some common scenarios include:
- Adding Items to shopping cart.
- Deleting items from the shopping cart.
- Creating a note in the Notes app.
- Filtering data based on the user preferences.
- Updating user profile information.
In each of these examples, action payloads play a crucial role in conveying the necessary information for state updates.
Best Practices
When working with action payloads in React Redux, it’s essential to adhere to certain best practices to ensure clean and efficient code:
- Keep payloads concise and focused on the necessary data.
- Use descriptive key names in payloads to enhance readability.
- Avoid nesting payloads deeply, as it can make them harder to work with.
- Consider using action creators to encapsulate the logic for creating actions with payloads.
Features of Action’s Payload
Understanding the features of action’s payload is essential for building robust and efficient applications. Let’s explore the some key features of action’s payload:
- Data Transport: Payload carries information alongside with actions.
- Flexibility: Payload can contain various data types and structures.
- Efficiency: Payload keep actions lightweight and focused on state changes.
- Enhanced Readability: Well-structured payloads improve code readability.
Steps to create a React and Redux Text App:
Step 1: Create a React application using the following command:
npx create-react-app text-app
Step 2: After creating your project folder i.e. text-app, move to it using the following command:
cd text-app
Step 3: Once you are done creating the ReactJS application, install redux using the following command:
npm install react-redux @reduxjs/toolkit
Project Structure:
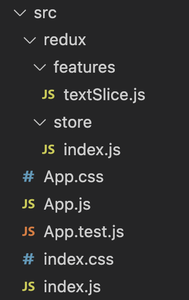
Project Structure
Explanation:
- These integrated codes demonstrate the implementation of Redux action’s payload within a React and Redux application.
- The Redux setup involves creating a store with configureStore and assigning a slice reducer, textReducer, to handle text state updates. This reducer, defined using createSlice, contains actions for setting and clearing text.
- In the React component, named App, useDispatch is utilized to dispatch actions, such as setText, which updates the text state with the payload passed from the input field.
- The handleChange function captures user input and dispatches the appropriate action, ensuring that the payload (the typed text, capitalized) is sent to the reducer for state modification.
- This integration exemplifies the role of actions and payloads in managing state within a React Redux application, emphasizing their importance in facilitating communication between components and the Redux store.
Example: In this example, we’ve implemented an input box that dynamically updates the header text as we type into it. See the code example below:
CSS
/* filename - ./src/App.css */
.container {
  display: flex;
  flex-direction: column;
  justify-content: center;
  margin-top: 50px;
  align-items: center;
}
.input-box input {
  background-color: transparent;
  color: white;
  outline: none;
  width: 200px;
  height: 30px;
  font-size: 24px;
  text-align: center;
}
h2 {
  color: whitesmoke;
}
input::placeholder {
  color: #aea7a7;
}
// filename - ./src/index.js

import React from 'react';
import ReactDOM from 'react-dom/client';
import './index.css';
import App from './App';
import reportWebVitals from './reportWebVitals';
import { Provider } from 'react-redux';
import store from './redux/store';

const root = ReactDOM.createRoot(document.getElementById('root'));

root.render(
    <React.StrictMode>

        {/* wrapping the app inside store provider */}
        <Provider store={store}>
            <App />
        </Provider>

    </React.StrictMode>
);

reportWebVitals();
// filename - ./src/App.js

import './App.css';
import {
    useDispatch,
    useSelector
} from 'react-redux';
import {
    setText
} from './redux/features/textSlice';


function App() {

    // creating the dispatch method and fetching the text state
    const dispatch = useDispatch();
    const { text } = useSelector(state => state.text);

    // whenever we type any data on the input
    const handleChange = (event) => {
        dispatch(setText(event.target.value?.toUpperCase()));
    }

    return (
        <>
            <div className='container'>
                <h2>
                    Text: {text}
                </h2>
                <div className='input-box'>
                    <input type="text" name='text'
                        onChange={handleChange}
                        placeholder="Enter text" />
                </div>
            </div>
        </>
    );
}

export default App;
// filename - ./src/redux/features/textSlice.js

import { createSlice } from "@reduxjs/toolkit";


// initial global state of the app
const initialState = {
    text: ""
}

// create a slice object
const textSlice = createSlice({
    name: "text",
    initialState,

    // creating reducers to manipulate state
    reducers: {
        setText: (state, action) => {
            state.text = action.payload;
        },
        clearText: (state, action) => {
            state.text = "";
        }
    }
});


// exporting actions and reducers
export const { setText, clearText } = textSlice.actions;
export default textSlice.reducer;
// filename - ./src/redux/store/index.js

import { configureStore } from "@reduxjs/toolkit";
import textReducer from "../features/textSlice";


// create a store for the redux application
const store = configureStore({
    reducer: {
        text: textReducer
    }
});

export default store;
Output:
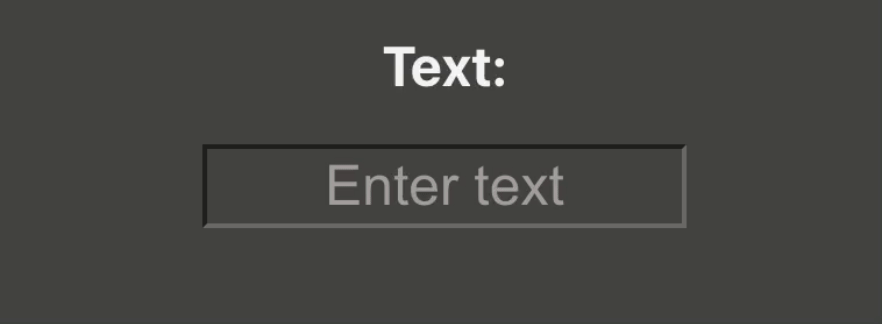
Output of the above implementation
Share your thoughts in the comments
Please Login to comment...