What is Velocity Draw in HTML5 ?
Last Updated :
21 Feb, 2023
Velocity.js is a JavaScript animation library that we used to create some great animations with HTML5. It provides a set of features for manipulating and animating elements in a web page or our display browser. The Velocity Draw or Velocity.js feature is not a specific part of the library, but a general term used to describe using Velocity.js to create visual animations on an HTML5 canvas. We use Velocity to perform various animations on our web page. In this article, we will discuss what is Velocity Draw in HTML5, along with understanding the various techniques to implement it.
Before we proceed, first we will discuss some Property values of Velocity Draw to understand the basic concept of velocity Draw of HTML5.
- opacity: Opacity shows the image brightness generally 0 to 1, we can adjust opacity with the help of Velocity Draw in HTML5.
- size: We can reduce the size of the image by using velocity Draw in hTML5.
- position: We can also set the position of the image according to our needs by using velocity draw in HTML5. We need to only set the left and right positions of the image which we want.
- zoom: We can also do zoom-in and zoom-out images by using velocity Draw in HTML5, we need to set the zoom-in and zoom-out values in our code.
These are some basic functionality of Velocity Draw that we can perform in HTML5. We see some examples of velocity by using different approaches.
Approach 1: Animate element opacity
In this approach, one button will operate the opacity operation and set one id in the <button> tag. Also, create a function to change the opacity by using the getElementById() method.
Example: This example describes the basic use of the Velocity Draw in HTML5. Here, we take the decimal number input ranging from 0 to 1.
HTML
<!DOCTYPE html>
<html lang="en">
<head>
<meta name="viewport" content=
"width=device-width, initial-scale=1.0">
<style>
.responsive {
width: 500px;
}
</style>
</head>
<body>
<img src=
id="image"
class="responsive"
alt="gfg_img"><br>
<input type="text"
id="opacity"
placeholder="0 to 1">
<br><br>
<button onclick="changeOpacity()">
Click Here
</button>
<script>
function changeOpacity() {
var image = document.getElementById("image");
var opacity = document.getElementById("opacity").value;
image.style.opacity = opacity;
}
</script>
</body>
</html>
|
Output:

Animate image opacity
Approach 2: Animate element size
In this approach, we created the first two buttons for changing the image size and another one for changing the image to normal size. We use the onclick() function to operate the animation size in the image and set the height and width in which form we want to change our image size.
Example: This is another example that describes the use of the Velocity Draw in HTML5. Here, we are animating the element size.
HTML
<!DOCTYPE html>
<html lang="en">
<head>
<meta charset="UTF-8">
<meta http-equiv="X-UA-Compatible"
content="IE=edge">
<meta name="viewport" content=
"width=device-width, initial-scale=1.0">
<style>
.responsive {
width: 500px;
}
.gfg{
margin-left: -300px;
}
</style>
</head>
<body>
<img src=
id="image"
class="responsive"
alt="gfg">
<button class="gfg" onclick="changeImageSize()">
Change size
</button>
<button onclick="change()">
Normal size
</button>
<script>
function changeImageSize(){
var img = document.getElementById("image");
img.style.height = "300px";
img.style.width = "300px";
}
function change(){
var img = document.getElementById("image");
img.style.height = "400px";
img.style.width = "500px";
}
</script>
</body>
</html>
|
Output:
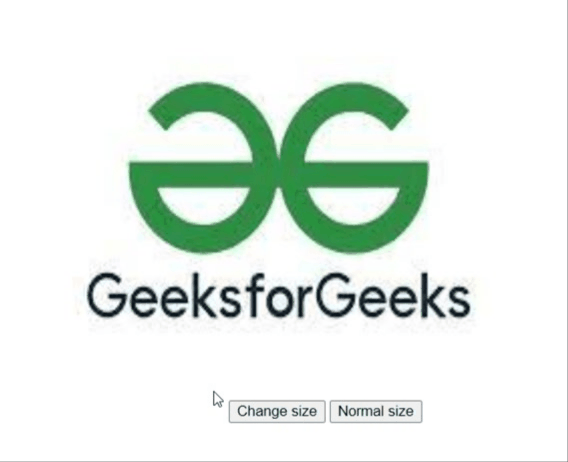
Animate image size
Approach 3: Animate element position by using a mouse
In this approach, we created a mouse function in velocity.js and for position animation, we use offset-x and offset-y which will operate the animate position on the display screen and we fit our image by using a CSS background URL.
Example: This example describes the basic use of the Velocity Draw in HTML5. Here, we are animating the element position by using a mouse.
HTML
<!DOCTYPE html>
<html lang="en">
<head>
<meta charset="UTF-8">
<meta http-equiv="X-UA-Compatible"
content="IE=edge">
<meta name="viewport"
content= "width=device-width,
initial-scale=1.0">
<style>
body{
background-image: url(
}
</style>
</head>
<body>
<script>
document.onmousemove = function(){
var x = event.offsetX;
var y = event.offsetY;
document.body.style.backgroundPositionX = -x + "px";
document.body.style.backgroundPositionY = -y + "px";
}
</script>
</body>
</html>
|
Output:
Animate image position
Approach 4: Animate the image by using Zoom in and Zoom out
In this approach, we create the first <img> tag and set our image to display screen. We created a function in JavaScript and set zoom + 5 and zoom – 5, we can set anything according to the need of the size we want to zoom in and zoom out our image.
Example: This example describes the basic use of the Velocity Draw in HTML5. Here, we are animating the image by using Zoom in and Zoom out.
HTML
<!DOCTYPE html>
<html lang="en">
<head>
<meta charset="UTF-8">
<meta http-equiv="X-UA-Compatible"
content="IE=edge">
<meta name="viewport"
content= "width=device-width,
initial-scale=1.0">
<script src=
</script>
<style>
.btn{
margin-left: -13%;
}
</style>
</head>
<body>
<img id="image" src=
alt="gfg">
<button class="btn"
id="zoom-in">
Zoom In
</button>
<button class="btn1"
id="zoom-out">
Zoom Out
</button>
<script>
$(document).ready(function(){
var zoom = 100;
$("#zoom-in").click(function(){
zoom += 5;
$("#image").css("width", zoom + "%");
});
$("#zoom-out").click(function(){
zoom -= 5;
$("#image").css("width", zoom + "%");
});
});
</script>
</body>
</html>
|
Output:
Share your thoughts in the comments
Please Login to comment...