What is the significance of the componentDidMount lifecycle method?
Last Updated :
13 Feb, 2024
Every React Component has a lifecycle of its own, the lifecycle of a component can be defined as the series of methods that are invoked in different stages of the component’s existence. In this article, we will dive into the componentDidMount and see the significance of it.
Prerequisites:
What is componentDidUpdate lifecycle method?
The componentDidMount() method allows us to execute the React code when the component is already placed in the DOM (Document Object Model). This method is called during the Mounting phase of the React Life-cycle i.e after the component is rendered.
Syntax:
componentDidMount()
Significance of componentDidMount lifecycle method
- Initialization: componentDidMount is a crucial lifecycle method in React that gets invoked after a component has been successfully inserted into the DOM (Document Object Model). This makes it an ideal place for initializing state, fetching data from an API, or setting up subscriptions.
- Asynchronous Operations: It is particularly useful for handling asynchronous operations such as data fetching. Since it runs after the initial render, it ensures that the component is already in the DOM, providing a suitable moment to initiate asynchronous tasks without blocking the initial rendering process.
- Interacting with the DOM: If your component needs to interact directly with the DOM or other JavaScript frameworks, componentDidMount is the appropriate stage for such operations. This ensures that the component is fully rendered and accessible.
- Integration with External Libraries: When integrating React with external libraries or non-React code, componentDidMount allows you to safely initiate these integrations. It guarantees that the component is mounted and ready for interactions, reducing the risk of issues related to timing and order of execution.
Steps for Creating React Application:
Step 1: Create a react application using the following command.
npx create-react-app foldername
cd foldername
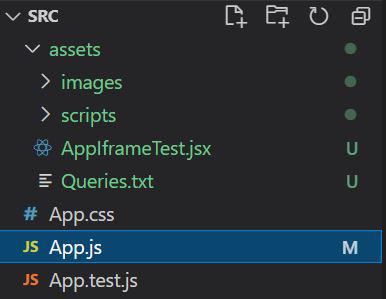
Project Structure:

The updated dependencies in package.json file will look like:
"dependencies": {
    "@testing-library/jest-dom": "^5.17.0",
    "@testing-library/react": "^13.4.0",
    "@testing-library/user-event": "^13.5.0",
    "react": "^18.2.0",
    "react-dom": "^18.2.0",
    "react-scripts": "5.0.1",
    "web-vitals": "^2.1.4"
}
Example: In this example, we are going to build a name color application that changes the color of the text when the component is rendered in the DOM tree.
Javascript
import React from 'react';
class App extends React.Component {
constructor(props) {
super(props);
this.state = { color: 'lightgreen' };
}
componentDidMount() {
setTimeout(() => {
this.setState({ color: 'wheat' });
}, 2000);
}
render() {
return (
<div>
<h2 style={{ color: 'green' }}>GeeksForGeeks</h2>
<h2>
What is the significance of the
componentDidMount lifecycle method?
</h2>
<p
style={{
color: this.state.color,
backgroundColor: 'rgba(0,0,0,0.88)',
textAlign: 'center',
paddingTop: 20,
width: 400,
height: 80,
margin: 'auto'
}}
>
GeeksForGeeks
</p>
</div>
);
}
}
export default App;
|
Step to Run Application: Run the application using the following command from the root directory of the project:
npm start
Output:

Share your thoughts in the comments
Please Login to comment...