Vue.js Vuex
Last Updated :
27 Apr, 2021
Vuex is a state management library for Vue applications. It serves as a single source of truth in the whole application and centralizes the flow of data to various components. As we know passing props can be tedious for complex applications with many components, Vuex makes this interaction very seamless and scalable.
Prerequisite:
Select default installation settings.
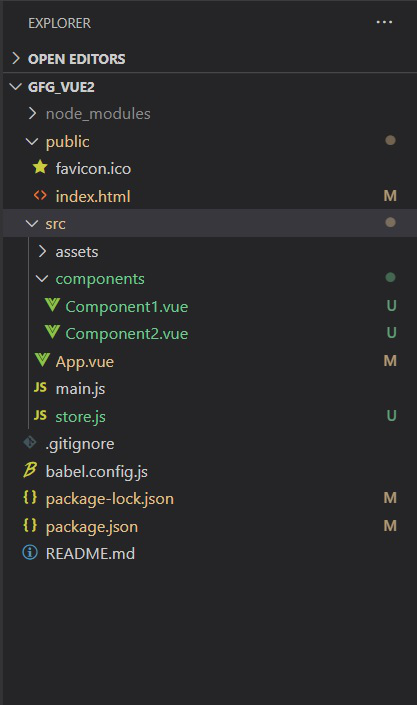
Project Structure: It will look like this.
Adding Vuex to your Application
-
To add Vuex to the Vue.JS project you can either do it through CDN links or preferably add it by running the following in your terminal in your project directory:
npm install vuex –save
-
And then import it in your required JS file using
import Vuex from 'vuex'
Vuex: Vuex has 3 fundamental parts for its functioning:
- State: The state object in the Vuex store is where the data of our application components are stored. These can be accessed into individual components by importing Vuex store and then using ‘store.state.storedVariable’ inside the methods.
- Mutations: State variables can be accessed anywhere but the only way they can be changed is via committing mutations. Mutations have a string type and a handler, and handlers are defined in the store where we perform actual state modifications.
- Actions: Actions are similar to mutations only that they actually commit the mutations. This might seem redundant as mutations could have done this task too but there’s a reason – mutations are synchronous operations as it involves changing of state variables whereas actions can perform asynchronous operations
Syntax
import Vue from 'vue'
import Vuex from 'vuex'

Vue.use(Vuex)

export default new Vuex.Store({
    state: {
        // Define state variables as properties here
    },
    mutations: {
        // Mutation handlers (pass state object)
    },
    actions: {
        // Actions (pass context object)
    }
})
Example: We’ll use the same example as we used in event-bus and $emit/props (here) explanations.
At the core of every Vuex application is a store. It is the container that holds our application’s state. They are reactive and can only be changed by committing mutations thus preventing any component to change state implicitly.
Store.js
import Vue from 'vue'
import Vuex from 'vuex'
Vue.use(Vuex)
export default new Vuex.Store({
state: {
n: 0
},
mutations: {
change_n(state) {
state.n++
},
},
actions: {
change_n(context) {
context.commit('change_n')
}
}
})
|
App.js
<template>
<div>
<Component1></Component1>
<Component2></Component2>
</div>
</template>
<script>
import Component1 from './components/Component1.vue'
import Component2 from './components/Component2.vue'
export default {
name: 'App',
components: {
Component1,Component2
}
}
</script>
<style>
</style>
|
Component1.vue
<template>
<div class="component1">
<h1>You have clicked {{ labeltext }} times</h1>
</div>
</template>
<script>
import store from '../store';
export default {
name: "Component1",
computed: {
labeltext () {
return store.state.n
}
}
};
</script>
<style scoped>
.component1 {
display: block;
background-color: green;
height: 15em;
text-align: center;
color: white;
padding-top: 5em;
}
</style>
|
Component2.vue
<template>
<div class="component2">
<button @click="count">Click</button>
</div>
</template>
<script>
import store from '../store';
export default {
name: "Component2",
methods: {
count() {
store.dispatch('change_n')
},
},
};
</script>
<style scoped>
.component2 {
display: block;
background-color: grey;
height: 15em;
text-align: center;
padding-top: 5em;
}
</style>
|
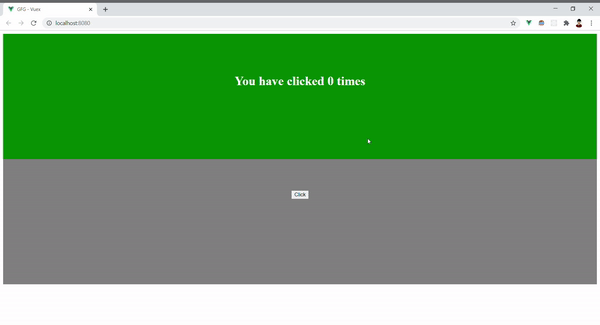
Output:
Share your thoughts in the comments
Please Login to comment...