Mapping coordinates from 3D to 2D using OpenCV – Python
Last Updated :
08 Jun, 2023
Mapping 3D coordinates to 2D coordinates is a common task in computer vision. This process involves transforming 3D points in a virtual space to their corresponding positions on a 2D image plane. In this article, we’ll show you how to perform this task using OpenCV in Python programming.
OpenCV is an open-source computer vision and machine learning library that provides a large collection of algorithms and tools for image and video analysis. With OpenCV, we can perform operations such as object detection, face recognition, and image segmentation, among others.
Next, we’ll define the camera matrix, which represents the intrinsic parameters of the camera. The camera matrix is a 3×3 matrix that contains information about the focal length, principal point, and aspect ratio of the camera. The following code shows how to define the camera matrix:

Here, ‘fx’ and ‘fy’ are the focal lengths of the camera in the x and y directions, and ‘cx’ and ‘cy’ are the principal points in the x and y directions, respectively.
Once we have defined the camera matrix, we can use it to map 3D points to 2D points. This process involves transforming 3D points in the world coordinate system to 2D points in the image plane. The following code shows how to perform this transformation:
Syntax:
cv2.projectPoints(points_3d, rvec, tvec, camera_matrix, dist_coeffs)
where,
- points_3d – is a 3D point in the world coordinate system.
- rvec – Rotation Vectors
- tvec – Translation Vectors
- camera_matrix – The physical parameters of the camera.
- dist_coeffs – It is a vector of distortion coefficients.
Here is a code example of mapping 3D coordinates to 2D coordinates using OpenCV in Python:
Python3
import numpy as np
import cv2
fx = 800
fy = 800
cx = 640
cy = 480
camera_matrix = np.array([[fx, 0, cx],
[0, fy, cy],
[0, 0, 1]], np.float32)
dist_coeffs = np.zeros((5, 1), np.float32)
x, y, z = 10, 20, 30
points_3d = np.array([[[x, y, z]]], np.float32)
rvec = np.zeros((3, 1), np.float32)
tvec = np.zeros((3, 1), np.float32)
points_2d, _ = cv2.projectPoints(points_3d,
rvec, tvec,
camera_matrix,
dist_coeffs)
print("2D Point:", points_2d)
|
Output:
2D Point: [[[ 906.6667 1013.3333]]]
In this example, we have defined the camera matrix with a focal length of 800 in both x and y directions, and a principal point at (640, 480). We have also defined a 3D point with coordinates (10, 20, 30) in the world coordinate system. By using the ‘cv2.projectPoints’ function, we have mapped this 3D point to a 2D point with coordinates (906.6667, 1013.3333).
Intrinsic and Extrinsic parameters of the camera
The intrinsic parameters of a camera define its internal characteristics, such as the focal length, image sensor size, and principal point coordinates. These parameters are fixed for a particular camera and do not change with the camera’s position or orientation.
The most important intrinsic parameter is the focal length, which determines how much the camera can zoom in or out. The principal point coordinates define the center of the image, where the optical axis intersects with the image plane. The image sensor size determines the field of view of the camera.
The extrinsic parameters of a camera describe its position and orientation in 3D space. These parameters include the rotation and translation vectors, which determine the camera’s position and orientation relative to the 3D scene being imaged.
When we perform a perspective projection of 3D points onto a 2D plane, we need to take into account both the intrinsic and extrinsic parameters of the camera. This allows us to accurately map 3D points onto the 2D image plane.
Special cases in the Camera Matrix
When the camera matrix is equal to the identity matrix, it means that there is no distortion or scaling in the image. This is a special case known as the pinhole camera model, where light passes through a single point (the pinhole) to form an inverted image on the opposite side of the camera.
Distortion coefficients are used to correct lens distortion, which can cause images to appear warped or curved. When the distortion coefficients are set to zero, it means that there is no distortion to correct for.
In some cases, it may be appropriate to use an identity camera matrix and zero distortion coefficients. This is typically done when the camera has already been calibrated and the distortion is minimal, or when a pinhole camera model is appropriate for the task at hand. However, in most cases, some degree of distortion correction is necessary to ensure accurate mapping of 3D points to the 2D image plane.
Let’s take an example of a 3D graph i.e. paraboloid and we choose some random points on it and then map it to the 2D plane using this method.
Python3
import numpy as np
import cv2
focal_length = 500
image_width = 640
image_height = 480
intrinsic_matrix = np.array([
[focal_length, 0, image_width/2],
[0, focal_length, image_height/2],
[0, 0, 1]
])
rvec = np.array([0, 0, 0], dtype=np.float32)
tvec = np.array([0, 0, 100], dtype=np.float32)
u_range = np.linspace(-1, 1, num=20)
v_range = np.linspace(-1, 1, num=20)
u, v = np.meshgrid(u_range, v_range)
x = u
y = v
z = u**2 + v**2
points_3d = np.stack([x, y, z], axis=-1).reshape(-1, 3)
points_2d, _ = cv2.projectPoints(points_3d,
rvec, tvec.reshape(-1, 1),
intrinsic_matrix,
None)
img = np.zeros((image_height, image_width),
dtype=np.uint8)
for point in points_2d.astype(int):
img = cv2.circle(img, tuple(point[0]), 2, 255, -1)
cv2.imshow('Image', img)
cv2.waitKey(0)
cv2.destroyAllWindows()
|
Output:
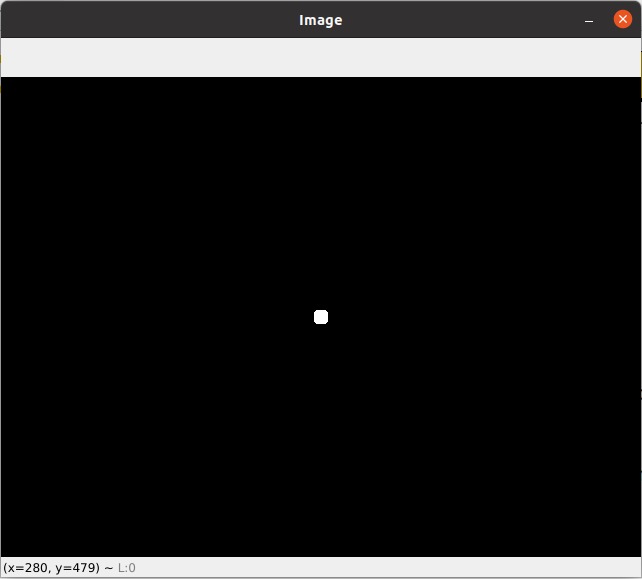
Mapping coordinates from 3D to 2D using OpenCV
The above code demonstrates how to generate 3D points on a paraboloid, and then project them onto a 2D plane using intrinsic and extrinsic camera parameters.
- First, intrinsic camera parameters are defined, including the focal length, image width, and image height, and then the intrinsic matrix is calculated.
- Next, extrinsic camera parameters are defined with a rotation vector rvec and translation vector tvec, representing the position and orientation of the camera relative to the paraboloid.
- A set of 3D points on the paraboloid is generated using a meshgrid, and then projected onto the 2D plane using the cv2.projectPoints function. The resulting 2D points are then plotted on a black image using circles.
- Finally, the resulting image is displayed using cv2.imshow, and the window is closed when a key is pressed.
Share your thoughts in the comments
Please Login to comment...