how to use validate_comma_separated_integer_list in django
Last Updated :
02 Oct, 2023
A validator is a callable that takes a value and raises a ValidationError if it doesn’t meet the criteria. Validators can be useful for re-using validation logic between different types of fields. In this article, we will learn how to use ‘validate_comma_separated_integer_list’ validator in Django.
Required modules
Use of validate_comma_separated_integer_list in Django
To start the project please use these commands
django-admin startproject queryexpressionsproject
cd app
To start the app use this command
python manage.py startapp app
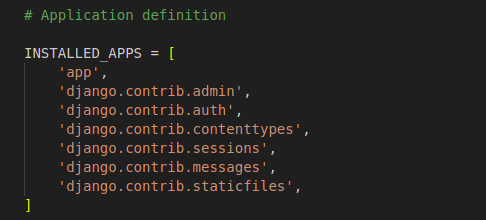
Now add this app to the ‘settings.py’
Setting up the Files
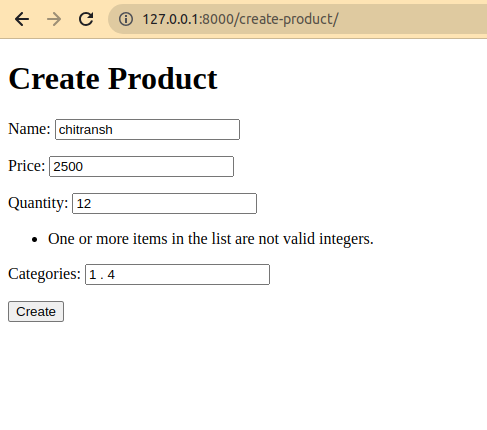
model.py: This code defines a Django model for products with fields for name, price, quantity, and categories. It also includes a custom validator to ensure that the categories field contains a comma-separated list of valid integers. If any of the integers are not valid, a validation error is raised.
Python3
from django.db import models
from django.core.exceptions import ValidationError
def validate_comma_separated_integer_list(value):
values = value.split(',')
for val in values:
try:
int(val)
except ValueError:
raise ValidationError("One or more items in the list are not valid integers.")
class Product(models.Model):
name = models.CharField(max_length=100)
price = models.DecimalField(max_digits=10, decimal_places=2)
quantity = models.PositiveIntegerField()
categories = models.CharField(max_length=200, validators=[validate_comma_separated_integer_list])
def __str__(self):
return self.name
|
form.py: In the products/forms.py file, create a new form class or update an existing one. This form is used to collect data from the user.
Python3
from django import forms
from .models import Product
class ProductForm(forms.ModelForm):
class Meta:
model = Product
fields = ['name', 'price', 'quantity', 'categories']
|
views.py: Below is the working of each function:
- This home function defines a simple view called home. When a user visits the homepage of the application, it returns an HTTP response with the text “Hello World!”.
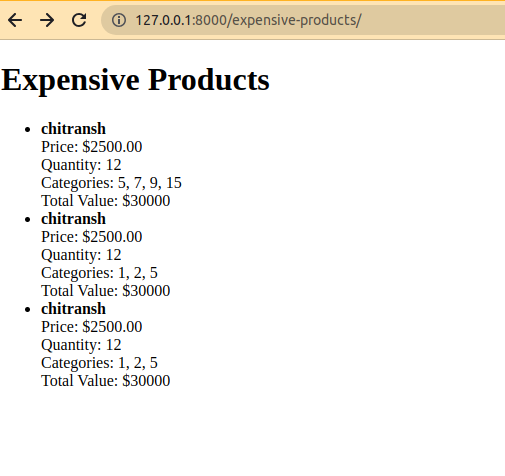
- This function defines a view called expensive_products. When a user visits this page, it calculates the total value of products by multiplying the “price” and “quantity” fields and filters for products with a total value greater than $1000 using Django query expressions. It then renders the index.html template, passing the expensive_products queryset to be displayed in the template.
- This function defines a view called create_product for creating a new product. When a user submits a form with a POST request, it validates the form data using a ProductForm. If the form is valid, it saves the product to the database and redirects the user to the expensive_products view. If it’s not a POST request, it renders the index2.html template with the ProductForm to allow the user to create a new product.
Python3
from django.shortcuts import render
from .models import Productfrom django.shortcuts import render
from django.http import HttpResponse
from django.shortcuts import redirect, render
from django.db import models
def home(request):
return HttpResponse('Hello World!')
def expensive_products(request):
expensive_products = Product.objects.annotate(
total_value=models.ExpressionWrapper(
models.F('price') * models.F('quantity'),
output_field=models.DecimalField())
).filter(total_value__gt=1000)
return render(request, 'myapp/index.html',
{'expensive_products': expensive_products})
from django.shortcuts import render, redirect
from .forms import ProductForm
def create_product(request):
if request.method == 'POST':
form = ProductForm(request.POST)
if form.is_valid():
form.save()
return redirect('expensive_products')
else:
form = ProductForm()
return render(request, 'myapp/index2.html', {'form': form})
|
index.html: The index.html template to display the categories for each product.
HTML
<!DOCTYPE html>
<html>
<head>
<title>Expensive Products</title>
</head>
<body>
<h1>Expensive Products</h1>
<ul>
{% for product in expensive_products %}
<li>
<strong>{{ product.name }}</strong><br>
Price: ${{ product.price }}<br>
Quantity: {{ product.quantity }}<br>
Categories: {{ product.categories }}<br>
Total Value: ${{ product.total_value }}
</li>
{% endfor %}
</ul>
</body>
</html>
|
index2.html: This template renders the product creation form.
HTML
<!DOCTYPE html>
<html>
<head>
<title>Create Product</title>
</head>
<body>
<h1>Create Product</h1>
<form method="post">
{% csrf_token %}
{{ form.as_p }}
<button type="submit">Create</button>
</form>
</body>
</html>
|
urls.py: In products/urls.py to include a new URL pattern for the product creation view.
Python3
from django.urls import path
from . import views
urlpatterns = [
path('hello/', views.home, name='home'),
path('expensive-products/', views.expensive_products,
name='expensive_products'),
path('create-product/', views.create_product,
name='create_product'),
]
|
urls.py: Include the ‘products’ app’s URLs in the project’s main urls.py file.
Python3
from django.contrib import admin
from django.urls import path, include
urlpatterns = [
path('admin/', admin.site.urls),
path('', include('app.urls')),
]
|
Deployement of the project
Run these commands to apply the migrations:
python3 manage.py makemigrations
python3 manage.py migrate
Run the server with the help of following command:
python3 manage.py runserver
Output

Share your thoughts in the comments
Please Login to comment...