How to Use Storage Spaces in Windows 11/10?
Last Updated :
17 May, 2024
Windows 11 PCs can suffer from drive failures, causing essential data loss. To address this issue, Windows 11 introduces a feature called Storage Spaces, which allows users to group physical drives into a single logical storage pool. This feature allows users to expand the pool, add more drives, and protect data with different protection levels. In this article, You’ll get to know how to use Storage Spaces in Windows 11/10.
Best Ways to Use Storage Spaces
Features of Storage Spaces in Windows
Windows Storage Spaces lets you pool multiple drives into one in Windows 11 and 10. You can create virtual spaces from these pools, format them with your chosen resiliency, and use them as regular drives.
- Simple: A non-resilient space that’s useful for temporary data.
- Two-way mirror: Stores two copies of your data on two separate drives.
- Three-way mirror: Stores three copies for higher fault tolerance.
- Parity: Uses parity information to rebuild data in case of a drive failure.
1. Create a storage pool and storage spaces in Windows
Creating a storage pool and space in Windows is akin to building a foundation for a house. It’s the initial step that allows you to consolidate various physical disks into a single virtual entity, providing a streamlined approach to managing diverse storage resources efficiently.
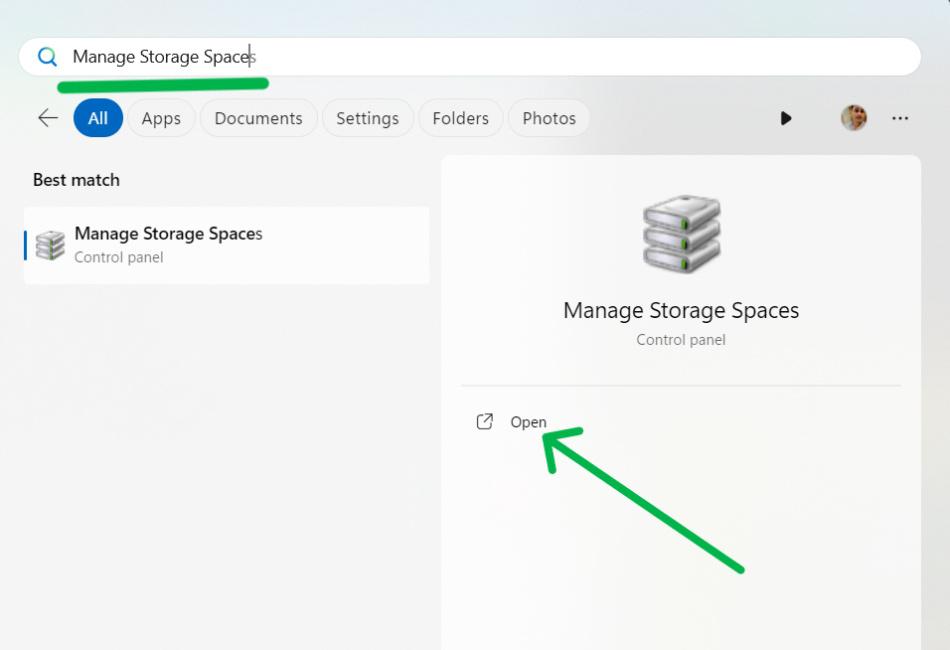
Step 1: Press Windows Key + R to open the search bar
Step 2: In the search bar input type “Manage Storage Space” and hit the enter button to open it.
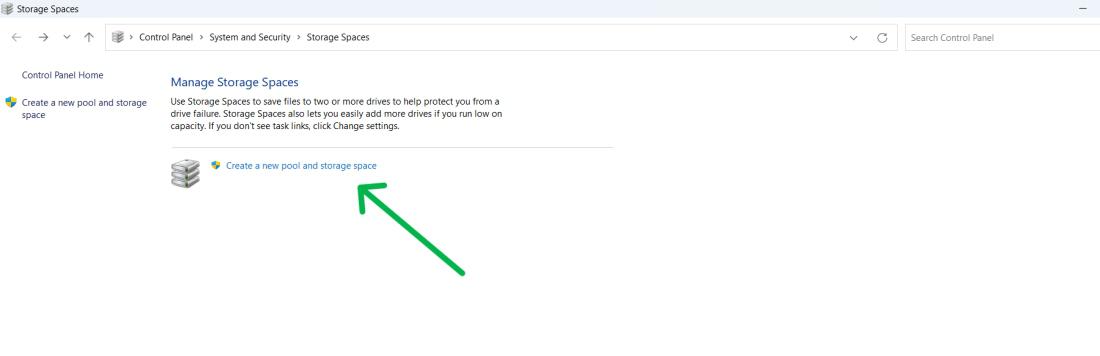
Step 3: Then, Click on the “Create a new pool and storage space“
Step 4: Choose the drives for your pool and click ‘Create Pool’. Remember, this will erase all existing data on the drives.

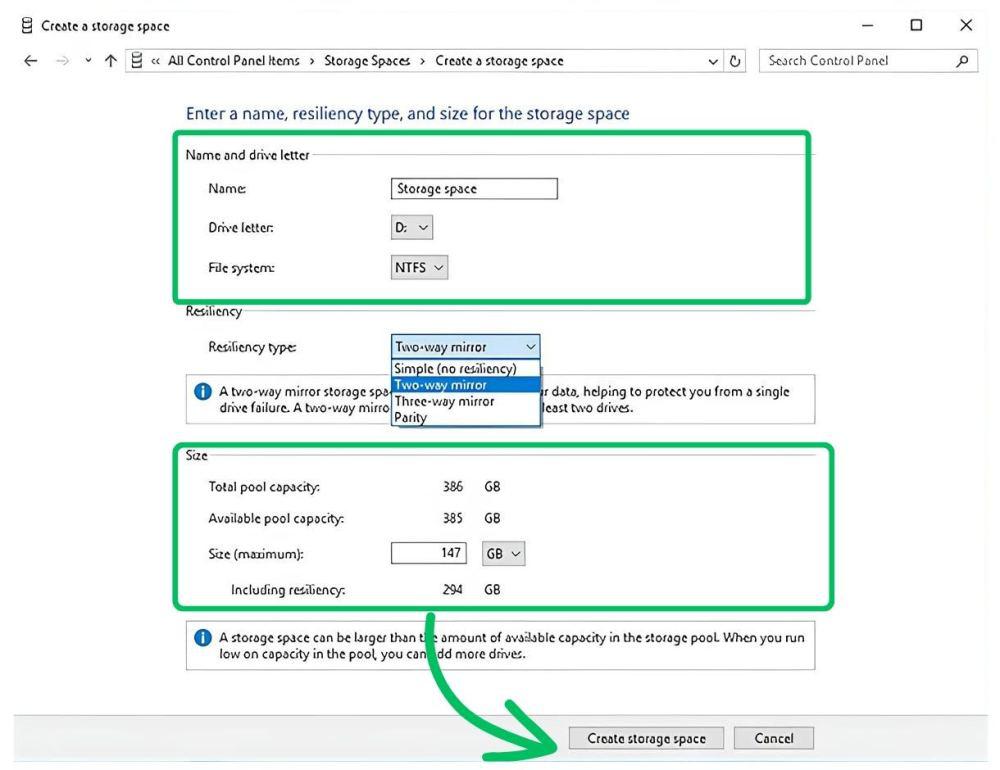
Step 5: Create the Storage Space in Windows.
- Choose a descriptive name for the virtual drive.
- Select the drive letter and file system (NTFS or REFS).
- REFS (Resilient File System) maximizes data availability and protects against errors.
- Pick the resiliency type for the storage space.
Step 6: Allocate Size:
- Select the size you want to allocate.
- You can choose any size, regardless of available physical space.
- Receive alerts when it’s time to add more storage.
Step 7: Click the “Create storage space” button to complete the process.
2. Create multiple storage spaces in Windows
Creating multiple storage spaces in a single pool allows you to designate distinct areas for various data types, much like rooms in a house serve different purposes. This method provides the flexibility to sort and secure your data, customizing each space to fit specific storage needs and resiliency levels.
Step 1: Press Windows Key + R to open the search bar
Step 2: In the search bar input type “Manage Storage Space” and hit the enter button to open it
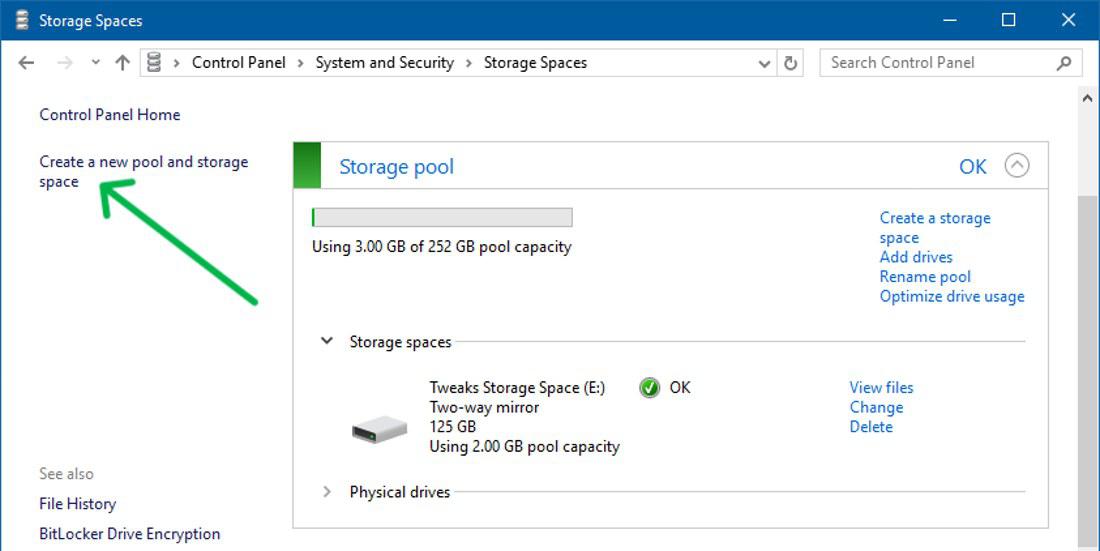
Step 3: Click on the “Create a storage space” on the left side pane
3. Resize Storage Spaces Window
Resizing storage spaces lets you adjust the room’s size to meet your changing needs. This method gives you the flexibility to expand for new data or reduce capacity, all without interrupting the current setup.
Step 1: Press Windows Key + R to open the search bar
Step 2: In the search bar input type “Manage Storage Space” and hit the enter button to open it.
Step 3: Click “Change” under the storage space.
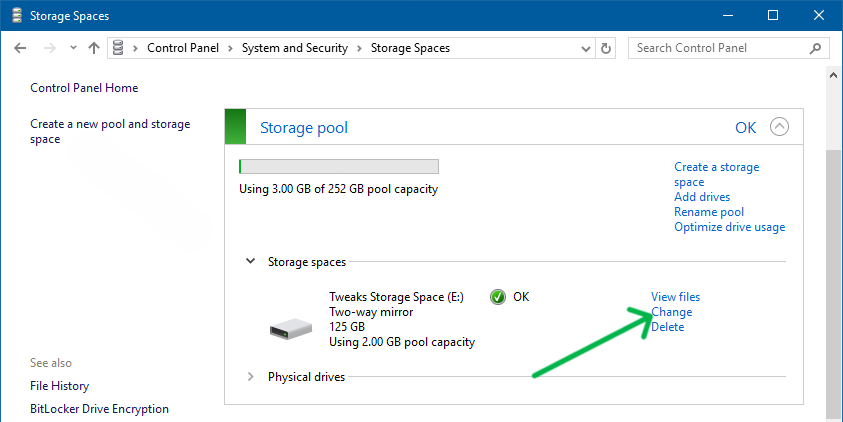
Step 4: Modify name, drive letter, or size.
Step 5: Click “Change storage space” to finish.
How to optimize drive usage
Optimizing drive usage ensures that your storage pool operates at peak efficiency, much like a well-organized home runs smoothly. This process redistributes data across all available drives, enhancing both performance and data protection.
Step 1: Press Windows Key + R to open the search bar
Step 2: In the search bar input type “Manage Storage Space” and hit the enter button to open it
Step 3: In Storage Spaces click the Optimize drive usage from the storage pool
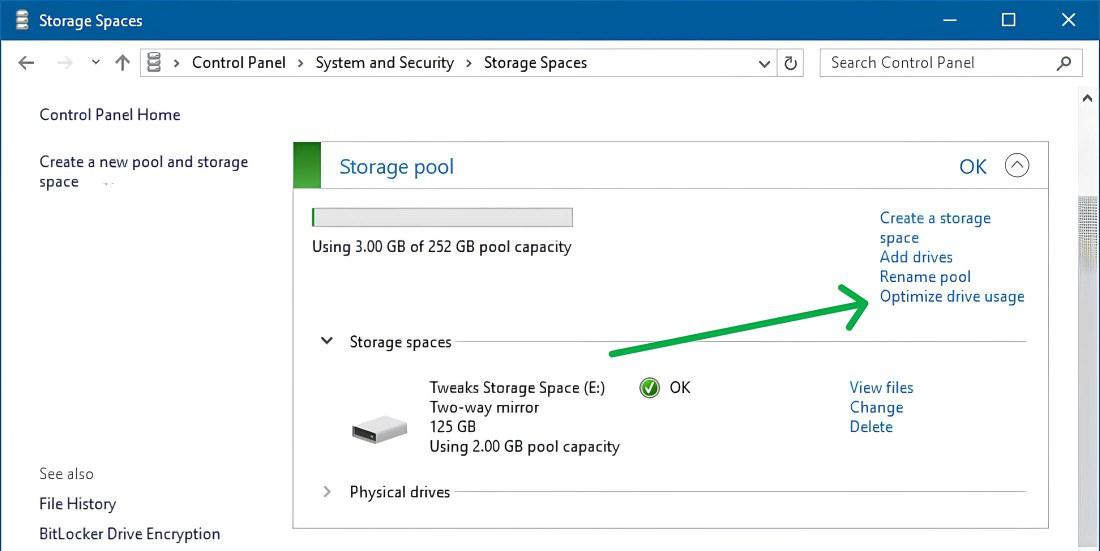
Step 4: Then,On the bottom click on the “Optimize drive usage“
How to Delete Windows Storage Spaces
Deleting storage spaces in Windows can be necessary when it’s time to repurpose or decommission storage resources. This method is like clearing out a room before a renovation, allowing you to reclaim space and redirect it towards new uses or configurations.
Step 1: Press Windows Key + R to open the search bar
Step 2: In the search bar input type “Manage Storage Space” and hit the enter button to open it
Step 3: In Storage Spaces click the “Delete” from the storage pool
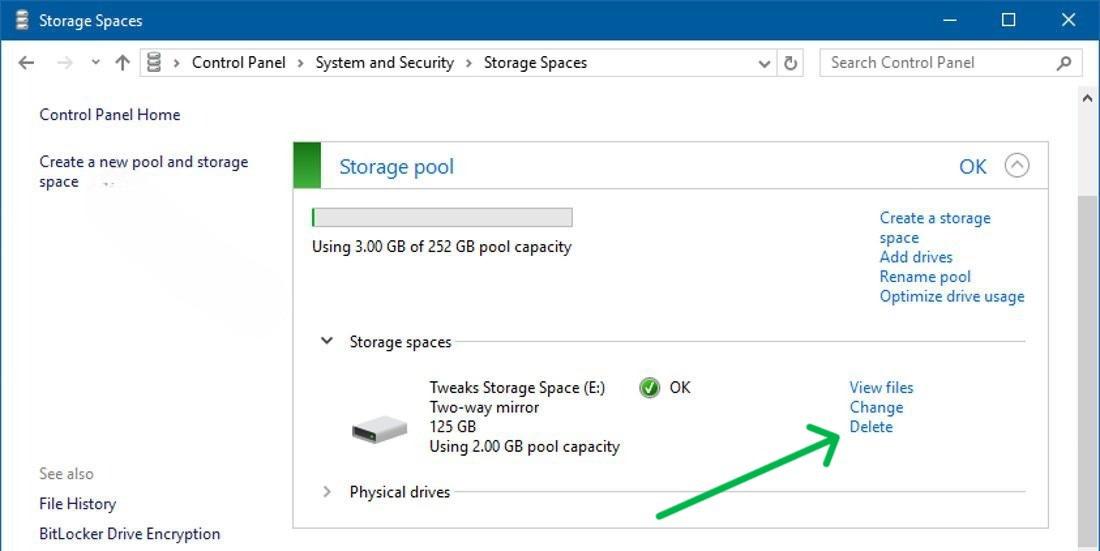
Step 4: Then, click the “Delete” to finish the process.
Conclusion
In Conclusion, Windows Storage Spaces offers a flexible way to handle storage on Windows 11 and 10. By mastering its features, you can neatly arrange and safeguard your data. From crafting storage pools to adjusting space sizes and enhancing drive performance, Storage Spaces provides an intuitive platform for managing your storage needs effectively. So This is how you can Use Storage Spaces in Windows 11/10?
How to Use Storage Spaces in Windows 11/10 – FAQs
What is storage space on a computer?
Storage space on a computer refers to the capacity available for storing data, including files, documents, applications, and the operating system. It’s where all your digital information is stored, ranging from photos and videos to system files and software programs.
How do I check my Windows storage space?
To check your Windows storage space, you can follow these steps:
- Press the Windows Key + R to open the search bar.
- Type “Manage Storage Space” in the search bar and press Enter.
- In the Storage Spaces settings, you can view details about your storage, including available space, used space, and the drives/partitions contributing to the storage pool.
How to Use Storage Spaces in Windows 11?
Follow these steps to use Storage Spaces in Windows 11:
- Press Windows Key + R, type “Manage Storage Space” in the search bar, and hit enter.
- Click “Create a new pool and storage space.“
- Select drives for the pool and click ‘Create Pool’ (existing data will be erased).
- Create Storage Space:
- Name the virtual drive.
- Choose NTFS or REFS.
- Select resiliency type.
- Allocate Size
- Choose desired size.
- Receive alerts for more storage.
- Click “Create storage space” to finish.
How do I use storage sense in Windows 11?
Follow these steps to use storage sense in Windows 11
- Open Settings by pressing Win + I or from the Start Menu.
- Navigate to System and click on Storage.
- Use the toggle to enable Storage Sense.
How do I change storage space in Windows 11?
Follow these steps to change storage space in Windows 11
- Press Windows Key + R to open the search bar.
- Type “Manage Storage Space” and hit enter.
- Click “Change” under the storage space.
- Modify name, drive letter, or size.
- Click “Change storage space” to finish.
Share your thoughts in the comments
Please Login to comment...