How to Take a Screenshot on Chromebook
Last Updated :
28 Jul, 2023
Take a screenshot of your Chromebook Screen
- Press Shift + Ctrl + Show windows
- Select Screenshot
- Choose a Screenshot Option
- Click Capture
- Screenshot Captured
- Screenshot Copied to Clipboard
In the fast-paced digital world we inhabit today, visual communication plays an important role in our everyday interactions. Whether you’re sharing an important piece of information, capturing a memorable moment, or seeking assistance with a technical issue, screenshots have become an indispensable tool. For Chromebook users, mastering the art of taking screenshots is not only essential but surprisingly simple. Chromebooks, with their streamlined design and user-friendly interface, offer a range of methods to effortlessly capture what’s on your screen. In this comprehensive guide, we will walk you through various techniques on how to take a screenshot on a Chromebook, empowering you to express, share, and troubleshoot with ease. Say goodbye to cumbersome third-party applications and embrace the power of built-in screenshot functionalities on your Chromebook.
Shh… It may be a bit different from your Mac or PC, but it’s easy to do.
How to take a Screenshots on Chromebook with Keyboard
The quickest method to take a screenshot on a Chromebook is to simultaneously press the Control (Ctrl) and Show Windows keys. This action captures a shot of your entire screen. The “Show Windows key” is located on the top row of the keyboard, you can find an icon resembling a window with two windows stacked behind it. It’s often located where the F5 key would be on a Windows PC.
Important Note: These universal Chromebook keyboard shortcuts apply to all models. But in some Chromebooks you will see a dedicated Screenshot key, marked by a little camera icon. In this case press the camera button instead of using the short keys.
Another quick way to take screenshots on a Chromebook: To open the Screen Capture toolbar on your Chromebook, you’ll need to press a three-key shortcut combination: Shift + Ctrl + Show Windows
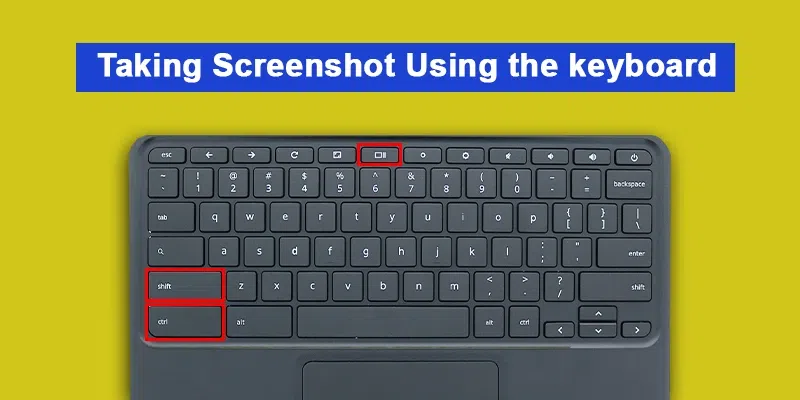
Press Ctrl + Show windows key combination or Press Shift + Ctrl + Show Windows
How to take Screenshots on a Chromebook without Keyboard
For many Chromebook users, remembering shortcut keys can be a challenge, leading them to seek alternative methods for capturing screenshots. Fortunately, Google has addressed this issue by introducing a shortcut button directly in the Quick Settings panel, eliminating the need to recall specific key combinations. To access this feature, simply click on the time icon on Chrome’s Shelf, and the Quick Settings menu will appear. From there, a single click or tap on “Screen Capture” will launch the screenshot toolbar, making the process of capturing screenshots effortless and stress-free.
Step 1: Open Quick Settings and Select Screen Capture
Navigate to Quick Settings menu, click on the clock positioned in the lower-right corner of your screen. Now, locate and click on the Screen Capture icon.
Note: Upon clicking the Screen Capture icon, a small menu will appear at the bottom of your screen. This menu displays various icons representing different types of screenshots you can take on your Chromebook.
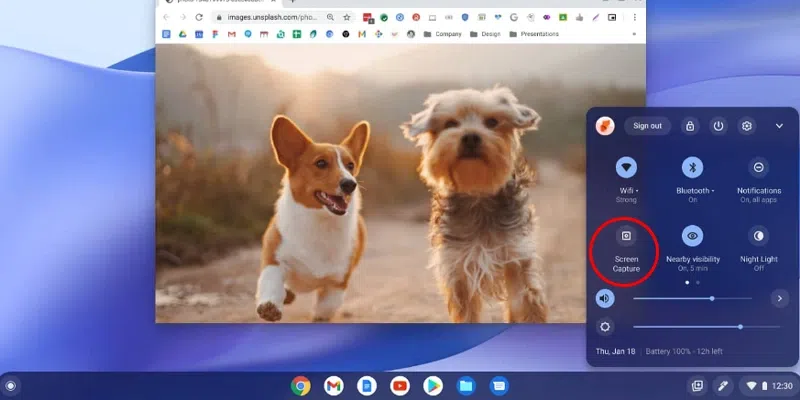
Quick Settings > Select Screen Capture | Pic Credit: Google
Step 2: Select the Screen Size to Capture
Once you click the screen capture tool, you’ll be presented with options to choose from. You can decide whether you want to capture the entire screen, a single window, or a specific part of your screen.
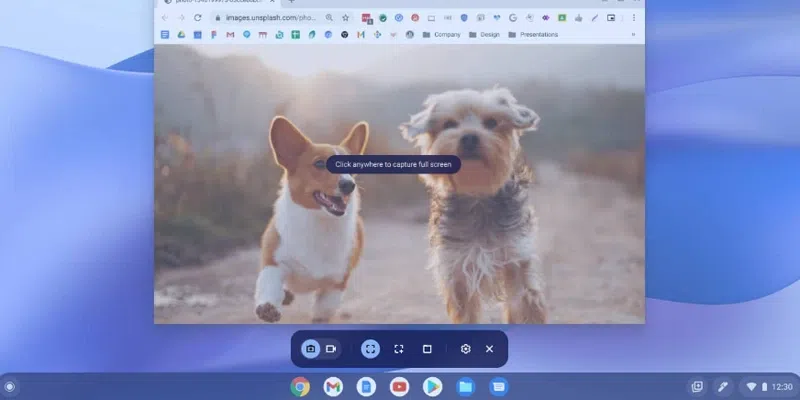
Select Screen Size > Click Anywhere on the screen | Pic Credit: Google
Step 3: Make Screen Selection and Capture the Screen
Once you’ve determined the screen size you want to capture, click on “Capture” to initiate the screenshot.
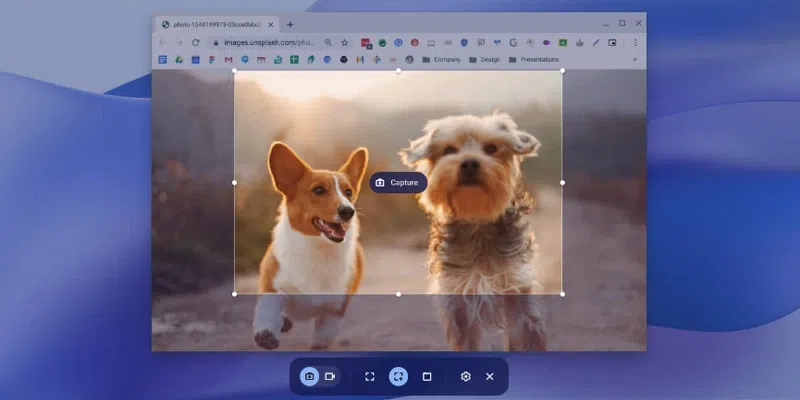
Make a screen selection > Capture the Screen | Pic Credit: Google
Step 4: Screenshot Captured and Copied to Clipboard
After capturing the screen, the screenshot will appear on the right-hand side of your screen and will be automatically copied to your clipboard.
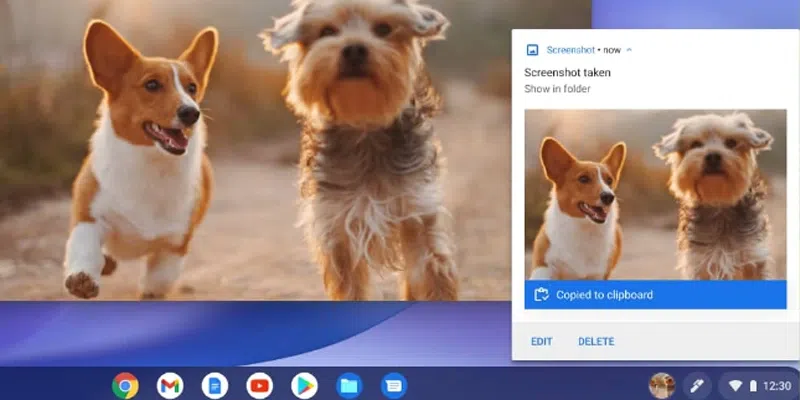
Screenshot Captured > Copied To Clipboard | Pic Credit: Google
Conclusion
Mastering the art of taking screenshots on your Chromebook opens up a world of possibilities for efficient communication and problem-solving. The ease and simplicity of the built-in screenshot functionalities eliminate the need for external applications, saving you time and effort. Whether you’re documenting important information, collaborating with colleagues, seeking technical support, or preserving cherished memories, Chromebooks offer a diverse array of screenshot methods to cater to your specific needs.
Share your thoughts in the comments
Please Login to comment...