Different ways to take Screenshot on Windows using Keyboard
- Use Print screen key to take a minimized or full-screen capture screenshot
- Use the game bar to take a screenshot on Windows
- Alt + Prt Sc (print screen button) screen capture
- Windows + Print Screen screen capture
- Use the Snipping Tool to take a screenshot on Windows
- Using the Snip & Sketch to take a screenshot
In todays era where everyone has access to Laptops and PC, the ability to capture a snapshot of what’s displayed on your screen has become an indispensable skill. Whether it’s to document a technical issue, share a momentous achievement, or simply communicate an idea more effectively, knowing how to take a screenshot on a Windows system is a fundamental tool. From the straightforward utilization of the Print Screen key to capturing multi-display setups, this article will delve into the various methods and techniques for capturing screenshots on Windows. By the end of this guide, you’ll be well-equipped to effortlessly capture and share your screen content, making your digital interactions more engaging and informative.
How to use the Snipping Tool in Windows
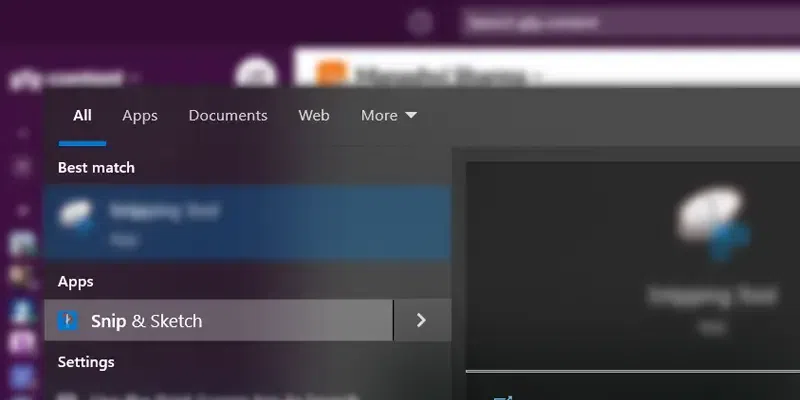
Step 1: Click on Search Bar and Type Snipping Tool
Find the search bar, enter “Snipping tool,” and once you spot the option, select it to open the Snipping Tool application.
Quick Tip: If the search bar is not visible, simply right-click on the taskbar, then hover over “Search,” and finally, click on “Show Search Box.”
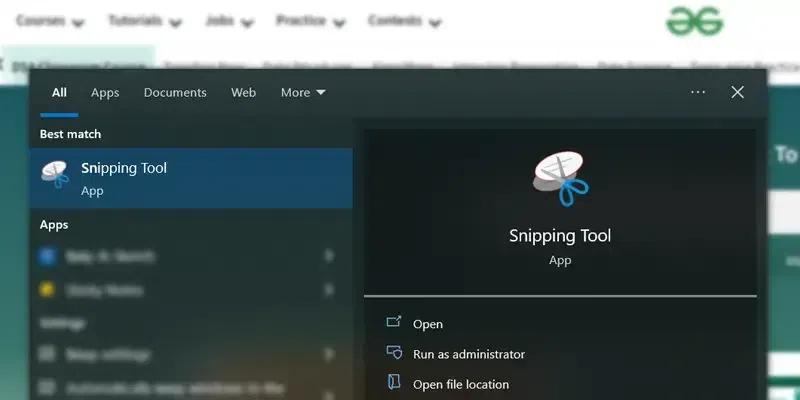
Open Search Bar > Type Snipping Tool
Step 2: Select the Mode of the Snip
Now a new Snipping tool window will appear. Now choose the desired “snip mode” you want to use, such as a free-form snip, a rectangular snip, a window snip, or a full-screen capture.
Know more about all modes:
- Rectangular screen snip mode: Click and drag to create a rectangle on the screen, and the area within the rectangle will be captured as the screenshot.
- Free-form snip mode: Click and draw the shape you want, but remember that the screenshot will be taken as soon as you release the right-click button.
- Window snip mode: Click on the specific window you want to capture, and the tool will take a screenshot of that particular window.
- Full-screen snip mode: Click on the full-screen snip, and the tool will capture a screenshot of the entire screen.
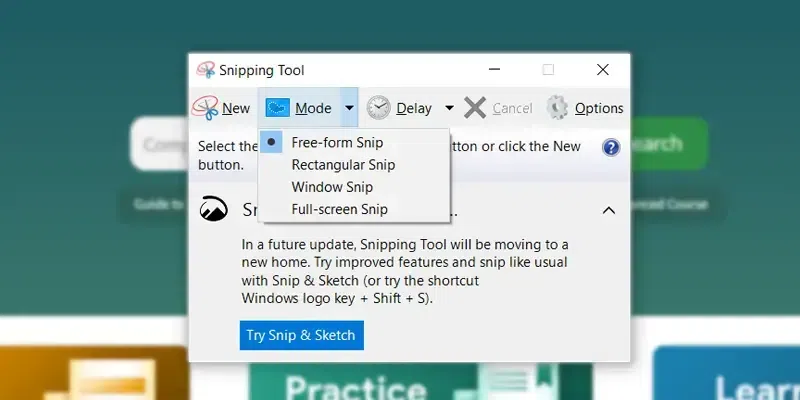
Select the Mode of Snip from the Drop Down option
Step 3: Choose No Delay or Delay in Taking Screenshot (Optional)
The Snipping Tool also has the option to set a delay in taking a screenshot, allowing you to take screenshots after a certain amount of time. Click on delay to set the time in seconds you will like to wait before taking the screenshot.
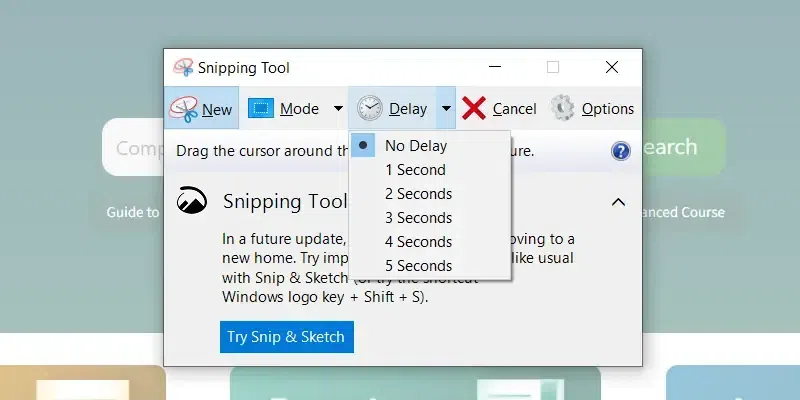
Choose No Delay or Select Seconds Delay up to 5 Seconds
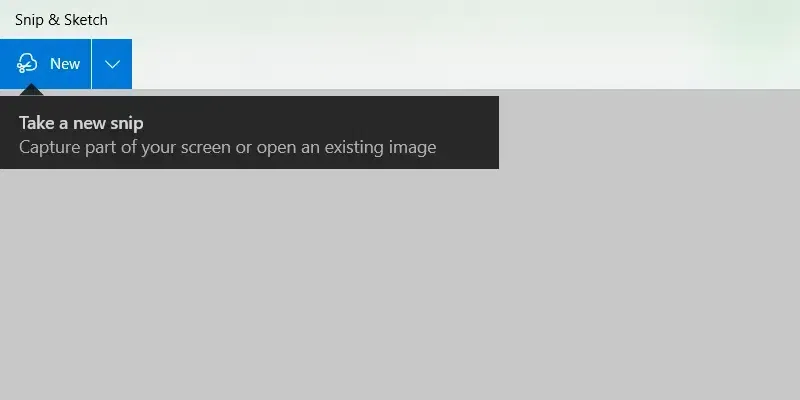
Step 4: Click on New
Once you are ready to take the screenshot, navigate to the top right of the screen and click on “New”. You will notice that the screen will fade out and the cursor will turn into a cross (+).
Note: If you selected the delay option, the screen will fade after the selected amount of seconds.
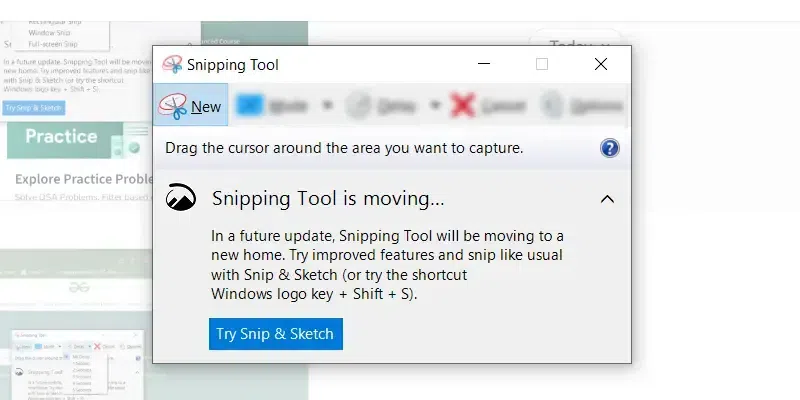
Select New in Snipping Tool
Step 5: Save the Screenshot
After capturing the screenshot, a fresh Snipping Tool window will pop up, allowing you to either save the screenshot or copy it to the clipboard with the below options.
- To save the image as a file, click on File > Save as and choose your desired location for saving.
- Sending the screenshot via email can be done by clicking on File > Send to > Email recipient or as an attachment to an email.
- Printing the screenshot is as simple as clicking on File > Print.
- To copy the screenshot to your clipboard, click on Edit > Copy.
Helpful Tip: If you want to edit the screenshot to draw attention to a specific part of the screenshot you can use Pen or Highlighter function.
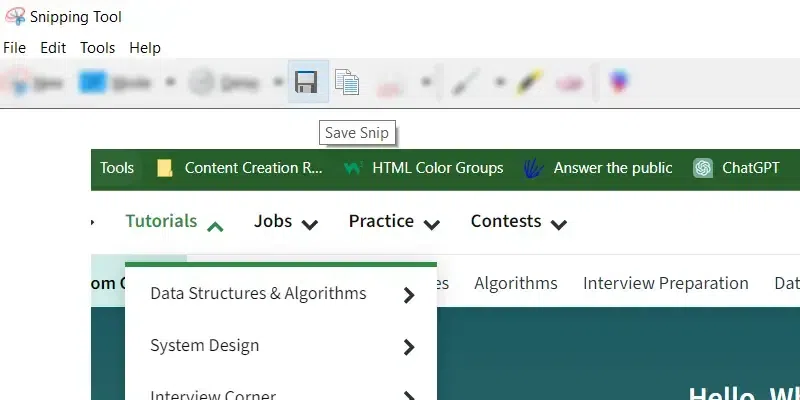
Save Snip by Clicking Save Button
How to take a Screenshot on Windows Using Print Screen
Step 1: Press Prt Sc Key
For Windows users looking to capture a screenshot, using the Print Screen key is among the simplest and globally recognized methods. Simply press the Print Screen Key or Prt Sc key on your keyboard to instantly capture an image of your entire screen.
Note: If you are using multiple displays or extended displays, this action will automatically capture a screenshot covering the entirety of all connected displays within a single image.
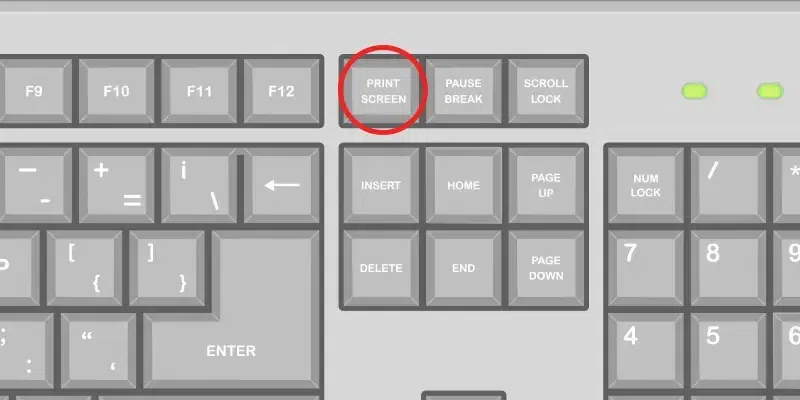
Press Prt Sc Key on your Keyboard
Step 2: Save the Screenshot
This process will copy the screenshot to your clipboard, enabling you to share it with others through the use of Ctrl + V or the paste option. If you wish to save the screenshot, open the Paint application on your Windows system, paste the screenshot there, and save it for later sharing with the intended recipient.
How to Easily Take Screenshots in Windows 10 and Windows 11
Step 1: Press the Windows key + Print Screen key
To capture the entire screen and have the screenshot saved automatically, just press the Windows key + Print Screen key together. When you press both the keys, your screen will briefly get dim, signaling the successful capture of the screenshot.
Note: When working with multiple displays, the screenshot will be consolidated into a single image.
Quick Tip for Keyboards with ‘Fn’ Key:
- To capture the screen, press Fn + PrtScn (or Print Scrn). The captured image is copied to the Clipboard, and you can paste it into a document or image processor using Ctrl+V or Right-Click > Paste.
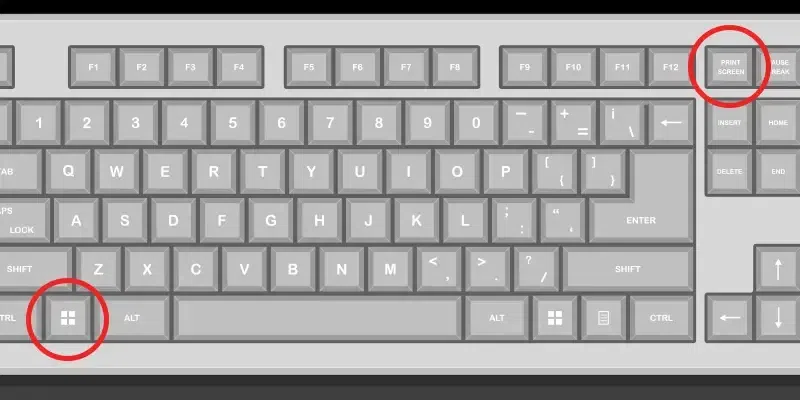
Press Window Key and Prt Sc Together to take a screenshot
Step 2: View Your Saved Screenshot
The screenshot will be automatically saved to the Pictures > Screenshots folder on your computer.
How to take a Single Screenshot with Two Monitors
Step 1: Press Alt + Print Screen Key
If your focus is on capturing a single active window rather than the entire screen, you can make use of the keyboard shortcut Alt + Prt Sc (print screen). To precisely capture the desired active window and avoid capturing unintended ones, you must first click on the screen to select it. Subsequently, press either Alt + Prt Sc (print screen button). This action will copy the captured image to your Clipboard, allowing you to conveniently paste it into other applications or documents.
Quick Tip:
If you want to save the image as a file, you can also do it with a keyboard shortcut.
Just by pressing the Windows key (the one with the Windows logo) along with the Prt Sc (print screen key), you can effortlessly save the image as a file. By default, this file is stored in the directory path: C:\Users<user name>\Pictures\Screenshots.
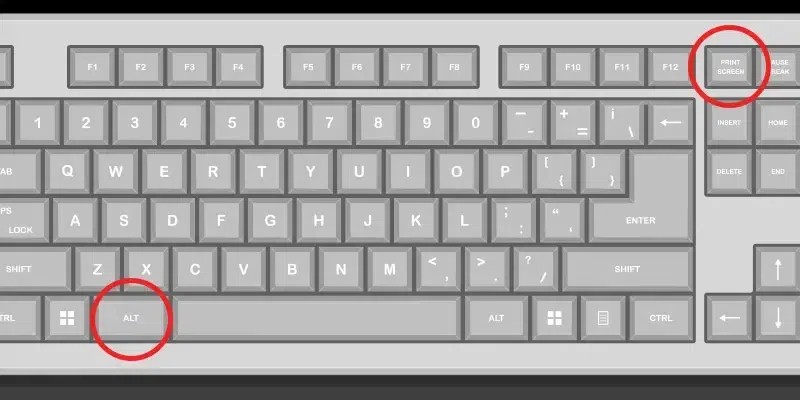
Press Alt + Print Screen Key
How to take a Screenshot Using Xbox Game Bar
To access the Game Bar overlay, simply press the combination of the Windows Key + G (windows key G). Upon pressing the designated key combination, you’ll observe the screen dimming, and the Game Bar overlay will become visible. Navigate to the upper left corner of the gamer bar overlay and to capture the screenshot, click on the Camera icon within this window.
Note: The captured screenshot will be saved as a PNG file, and it will be stored in the “C:\Users\Username\Videos\Captures” directory.
Quick Window 11 Tip:
The Game Bar also serves as a tool for screen recording in Windows 10 and Window 11. This functionality can be particularly advantageous when engaged in gaming or when you need to document a step-by-step procedure on your computer.
- Press Windows Key + G (Windows Key G) on your keyboard. This should open up the Game Bar. If it doesn’t, here’s how to enable it:
- Go to the Start Menu
- Click on the cog icon to open Settings
- Click on “Gaming”
- Make sure the switch at the top labeled “Record game clips, screenshots, and broadcast using Game bar” is toggled to On
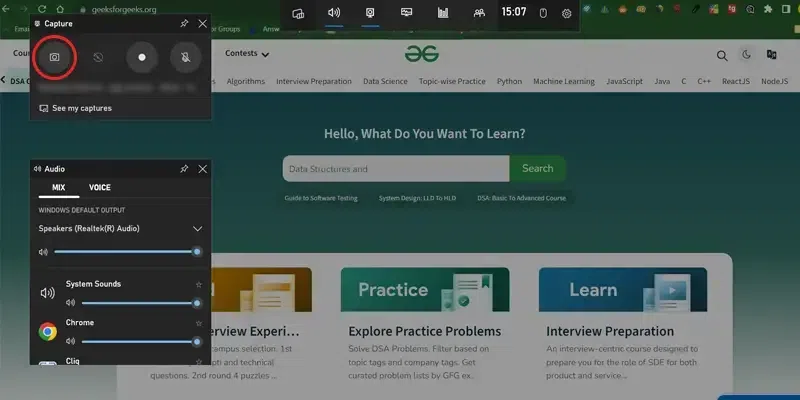
Press Windows Key + G to open Xbox Game Bar > Select Camera Icon to Take a Screenshot
How to Use Snip and Sketch to Take Screenshots on Windows 10
Step 1: Open Search Bar and Type Snip and Sketch
Snip & Sketch Keyboard Shortcut: To activate Snip & Sketch, use the keyboard shortcut Windows Key + Shift + S.
Step 2: Select New and Choose the Mode
Now click on New and select the mode: Window Snip, Fullscreen Snip, Rectangular Snip or Freeform from the drop down.
You can capture any of the following types of snips using the snip sketch tool:
- Free-form snip: Draw a free-form shape around an object.
- Rectangular snip: Drag the cursor around an object to form a rectangle.
- Window snip: Select a window, such as a dialog box, that you want to capture.
- Full-screen snip: Capture the entire screen.
Step: 3: Save the Screenshot
Your snippet will now be visible within the Snip & Sketch window. Click on the Copy icon to generate a duplicate of the snippet. This can be useful if you wish to modify the screenshot while retaining the original version. Alternatively, choose the Share button to distribute the snippet to others. The available sharing choices will depend on your applications and preferences, but they could encompass emailing contacts, sharing via Bluetooth or Wi-Fi, using instant messaging, and posting on social media platforms.

How to Save A Screenshot on Snip and Sketch
Conclusion
Whether you’re someone experienced with Windows or just starting out, learning the technique of taking screenshots is a crucial ability that’s valuable to acquire. The extensive advantages it provides in activities like resolving issues, creating documentation, collaborating, and exchanging information are immensely significant. As technology keeps influencing how we operate and communicate, the skill to adeptly capture and communicate visual information remains pivotal in the contemporary digital environment. Therefore, make use of the techniques detailed, select the one that aligns with your requirements, and enhance your productivity and communication by becoming proficient in the art of screenshot capture on the Windows platform.
Share your thoughts in the comments
Please Login to comment...