How to Manage Fonts in Linux?
Last Updated :
16 Feb, 2024
Quick Solution!
Here is a quick solution for you. Follow these steps to Manage Fonts on Linux:
- Download the Font Files from the internet.
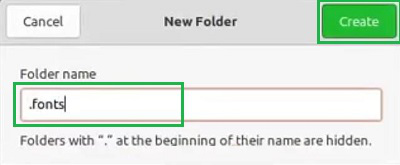
- Create a folder as .fonts.
- Paste the Font File there to change the device font.
- Using Font Manager (Automatic):
- Open Linux Terminal.
- Execute the command add-apt-repository ppa:font-manager.
- Install the Font Manager using the command apt install font manager.
- Use the Font Manager to choose fonts on the device.
While working on a Desktop & Laptop, the appearance of the device plays an important role in how much time an individual can spend there. Along with the Desktop Environment, the Device Font is another major player in this context. For the Linux Operating System & its different distributions, this goes in the same way.
So, you have to efficiently Manage Fonts on Linux. However, there is not so much space provided to Work on Fonts on Linux. Linux comes up with a default font which is set at the device. We can easily Install Fonts on Linux. However, to Manage Linux Fonts there are no direct instructions present.
This article will highlight some methods to Manage Fonts on Linux without having any kind of issues & errors.
How to Manage Fonts on Linux?
To Work on Linux Fonts, the following guidelines should be thoroughly used. We will start with the Manual Method which is quite hard to apply.
Method 1: Manage Fonts on Linux by Adding Fonts (Manually)
Step 1: Create the folder .fonts on the File Manager. Click on Create to make folder.
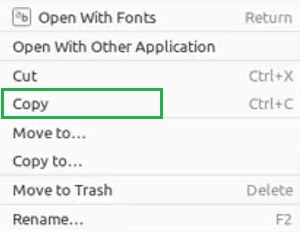
Step 2: Download any Fonts from the internet & Copy the file. Later, paste it into the same folder to change the font.
Congratulation! You have successfully changed the Linux Fonts by adding them manually.
Method 2: Manage Fonts on Linux by Font Manager (Automatically)
Step 1: Open the Linux Terminal & execute the following command to make the Repository ready.
Command: add-apt-repository ppa:font-manager

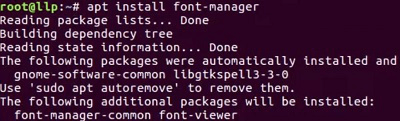
Step 2: Now, install Font Manager using the following Linux Commands. It will take some time to complete the process.
Command: apt install font manager
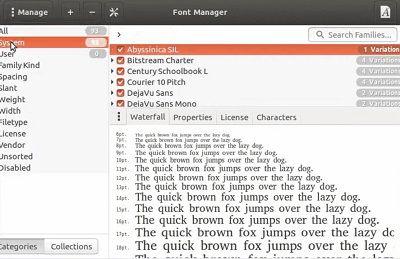
Step 3: If you search for the application Font Manager, it will be now present on the device. Open the app & choose different fonts from there.
As we can see, these are two important methods to Manage Fonts on Linux OS. The Manual method is quite tedious & boring as we have to manually Add & Remove Fonts on Linux there. If you use the Font Manager Method, you can simply Change Fonts on Linux with a few clicks.
Also Read
Frequently Asked Questions to Manage Fonts on Linux
How to manage fonts on Linux?
To Manage fonts on Linux, the following guidelines should be properly used.
- Open Linux Terminal.
- Execute the command add-apt-repository ppa:font-manager.
- Install the Font Manager using the command apt install font manager.
- Now, you can manage fonts easily from the Font Manager.
How can I download fonts on Linux?
To download fonts on Linux, there are many online websites are present. You can search for them on the internet & download the file on the device. However, to use them, you have to manually configure the font file on the device using the font folder creation process.
What is the default font of Linux?
Linux comes up with the default font which is known as the monospace. You can change the entire font by effectively using the Font Manager.
Share your thoughts in the comments
Please Login to comment...