How to Install Fonts in Linux?
Last Updated :
23 Feb, 2024
Quick Solution!
Here is a quick solution for you. Follow these steps to Install Fonts on Linux:
- Using Google Downloaded File:
- Browse to Google Fonts & download the Font File.
- Extract the Font Files on Linux.
- Execute the file with Fonts Application.
- Click on Install to get it.
- Execute the command to install certain fonts on the system. Command: sudo apt install fonts-<Name>
Fonts on Desktops or Laptops play a crucial role in shaping the experience of any user about a specific device or operating system. Keep in mind that, the Operating System oftentimes comes up with a wide range of choices for Installing Fonts on Desktop. However, in the case of Linux, the process to Install Fonts on Linux is a bit tricky.
The Fonts on Linux comes up with the default one which is known as the Monospace Font. And unfortunately, there are no more Linux Font Options present to make a change on the Linux Desktop Environment. To Get New Linux Font activated on the system, you have to Install Linux Fonts using different methods & tricks.
This article is intended to focus on the Installation Process of Linux Font on any Linux Distribution without having any kind of issues.
How to Install Fonts on Linux?
To Get Various Fonts on Linux, the following two methods should be performed. We will first discuss the method by which you can Install Fonts Manually on Linux.
Method 1: Install Fonts on Linux using Google Downloaded File
Step 1: Browse to the Google Fonts & download any Font File.

Step 2: Go to the option Extract Here to option the downloaded file.

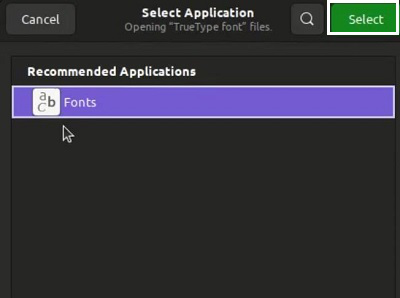
Step 3: Now, execute the downloaded file with the Fonts Application. Go for the Select Option.
Step 4: Click on the Install Button. When the Font is installed, you will get the Installed Message.

Congratulation! You have successfully installed the Fonts & Configure Linux Font on the device using Manual Approach.
Method 2: Install Fonts on Linux using Terminal
Open Terminal & execute the following Linux Command. It will Download & Install Fonts on Linux without moving for any other steps.
sudo apt install fonts-<Name>

So as we can see, these are the simple methods you can execute to Have A New Font Executable on Linux. Once you perform the above steps, the Default Font of Linux will be changed. The New Font on Linux Desktop will be activated. You can use the one-step Linux Terminal method to execute the complex task.
Also Read
Frequently Asked Questions to Install Fonts on Linux
How to install Fonts on Linux?
To install Fonts on Linux, the following steps should used one by one without any hurry.
- Download Fonts from Google Fonts.
- Extract the downloaded file.
- Run the files using the Font Application.
- Click on Install to use it.
Can I use Terminal to install fonts on Linux?
Yes, you can use the Linux Terminal for installing fonts. You have to use the command sudo apt install fonts-<Name>. The font will be installed on the device as well as activated on the system. You don’t need to execute any other command to complete the process.
How can I Manage Fonts on Linux?
To Manage Fonts on Linux, you will not find any preinstalled application on the system. However, there are some third-party tools available on Linux that can be a good option. The Linux Font Manager is one of them. You can use them to Manage Linux Fonts.
Share your thoughts in the comments
Please Login to comment...