How to Install MySQL on Windows?
Last Updated :
20 Mar, 2024
MySQL for Windows is a user-friendly database system that helps manage and organize data efficiently. With a simple installation process, it provides a reliable platform for storing and retrieving information. Its compatibility makes it a Preferred option for businesses and developers looking for a strong Windows database solution.
Downloading MySQL on your Windows is super easy, even if you’re new to databases. So let’s learn how to install MySql on your Windows PC. But before that
Note: Uninstall any previous MySQL versions to avoid potential conflicts during the new installation.
Hardware and Software Requirements to Install MySQL
Before installing MySQL to your PC, ensure your system has a capable processor (like Intel Core), a minimum of 4 GB RAM (or 6 GB), a compatible graphics card, and a display with at least 1024×768 resolution.
How to Install MySQL on Windows?
Now, Let’ ‘s break down MySQL software downloading steps for better understanding.
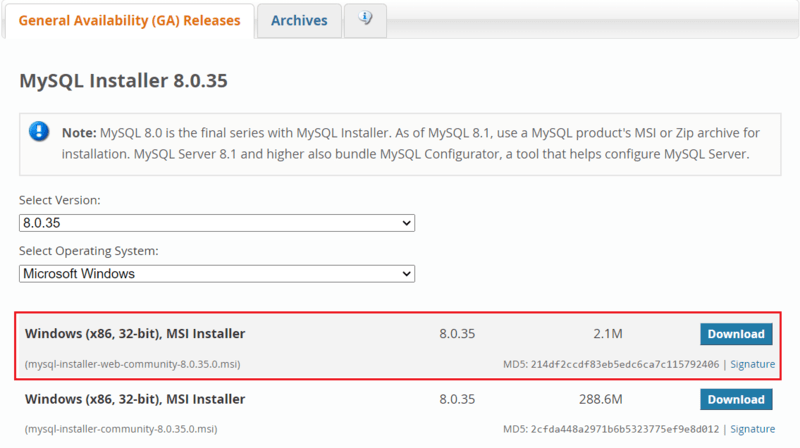
Step 1: Visit the Official MySQL Website
Open your preferred web browser and navigate to the official MySQL website. Now, Simple click on first download button.
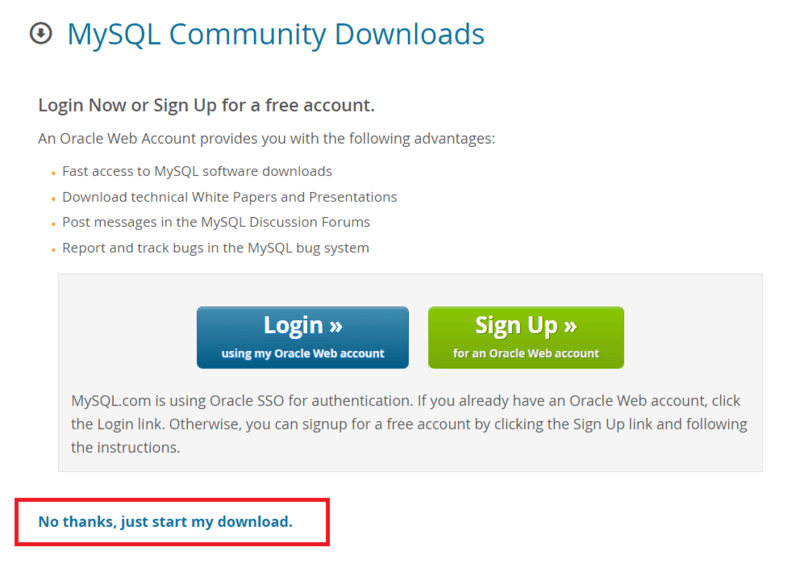
Step 2: Go to the Downloads Section
On the MySQL homepage, Click on the ” No thanks, just start my download” link to proceed MySql downloading.
Step 3: Run the Installer
After MySQL downloading MySQL.exe file , go to your Downloads folder, find the file, and double-click to run the installer.

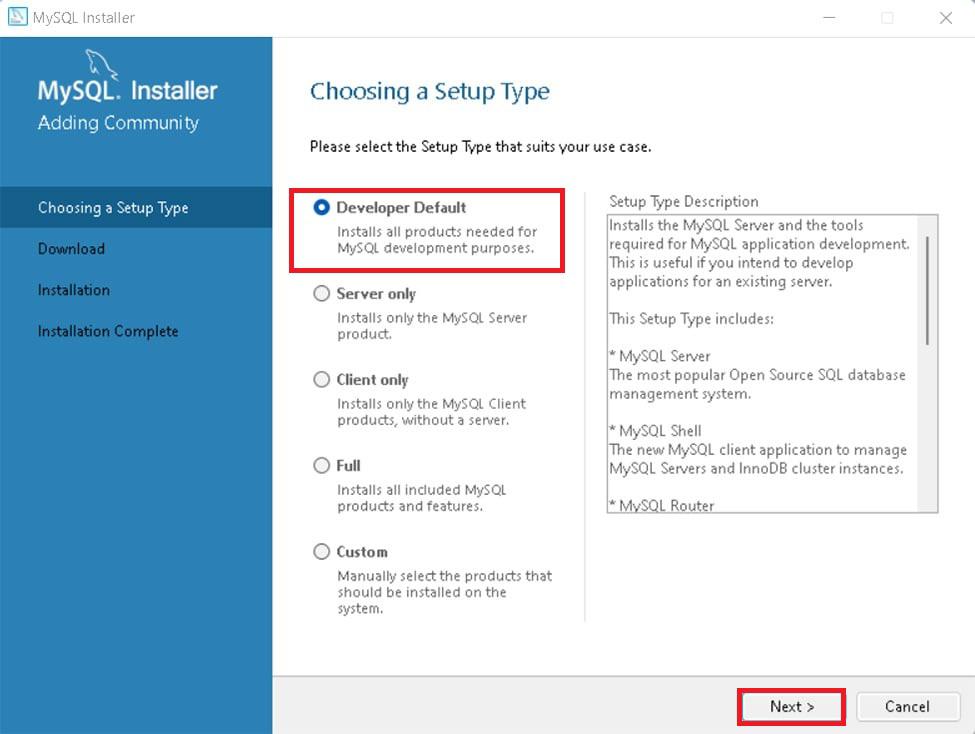
Step 4: Choose Setup Type
The installer will instruct you to choose the setup type. For most users, the “Developer Default” is suitable. Click “Next” to proceed.
Step 5: Check Requirements
You might be prompted to install necessary MySQL software, typically Visual Code. The installer can auto-resolve some issues, but not in this case.

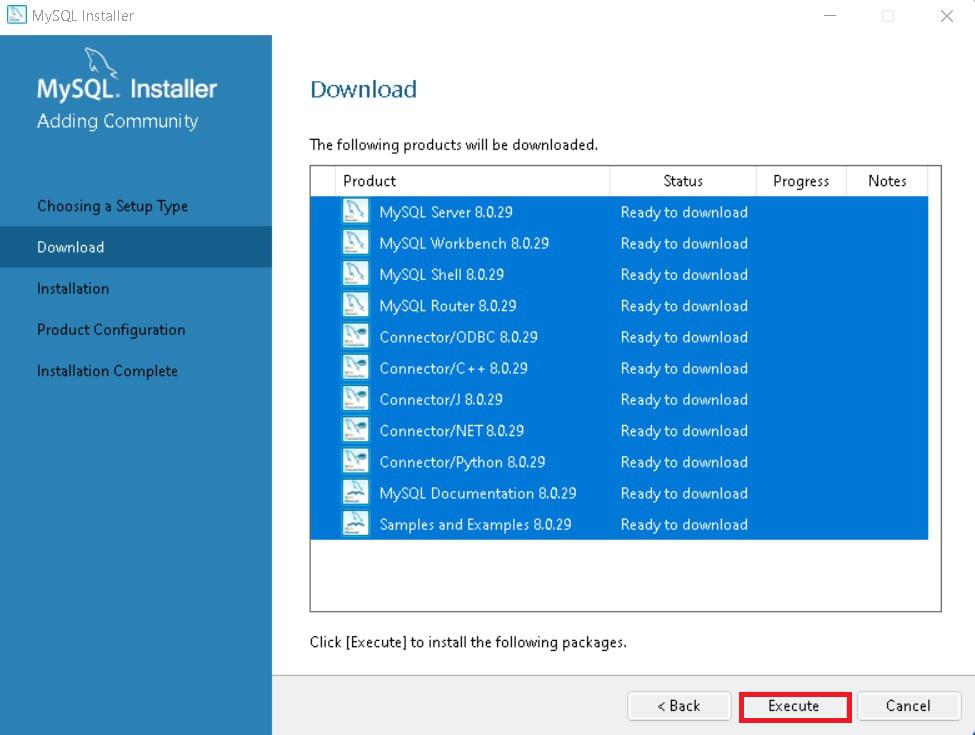
Step 6: MySQL Downloading
Now that you’re in the download section, click “Execute” to start downloading the components you selected. Wait a few minutes until all items show tick marks, indicating completion, before moving forward.
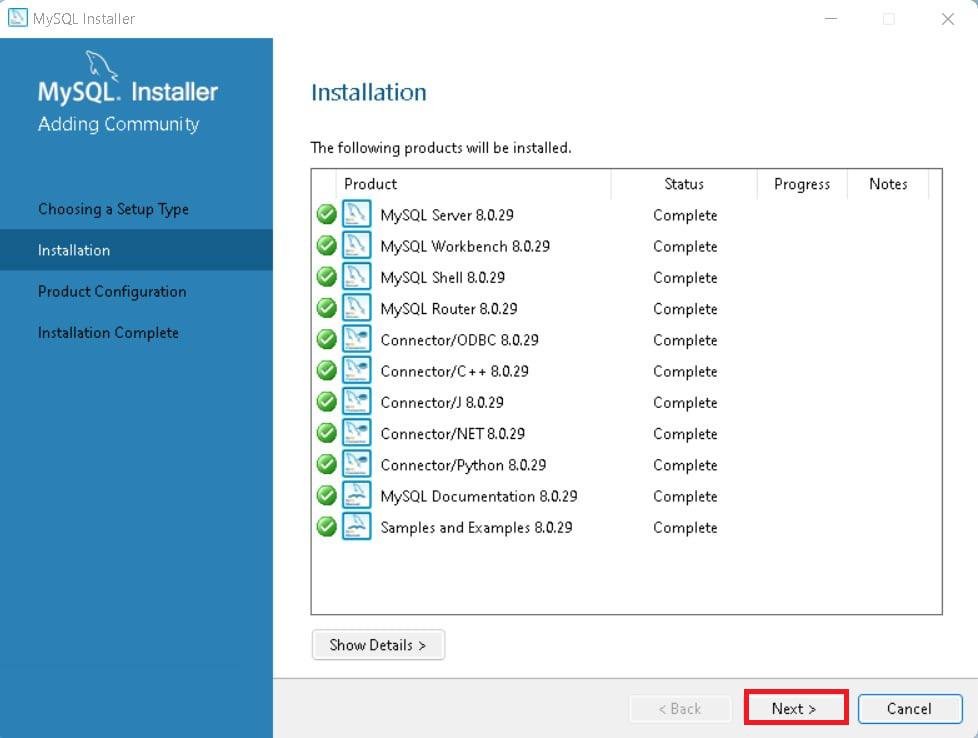
Step 7: MySqL Installation
Now the downloaded components will be installed. Click “Execute” to start the installation process. MySQL will be installed on your Windows system. Then click Next to proceed
Step 8: Navigate to Few Configuration Pages
Proceed to “Product Configuration” > “Type and Networking” > “Authentication Method” Pages by clicking the “Next” button.
Step 9: Create MySQL Accounts
Create a password for the MySQL root user. Ensure it’s strong and memorable. Click “Next” to proceed.

Step 10: Connect To Server
Enter the root password, click Check. If it says “Connection succeed,” you’ve successfully connected to the server.
.png)
Step 11: Complete Installation
Once the installation is complete, click “Finish.” Congratulations! MySQL is now installed on your Windows system.

Step 12: Verify Installation
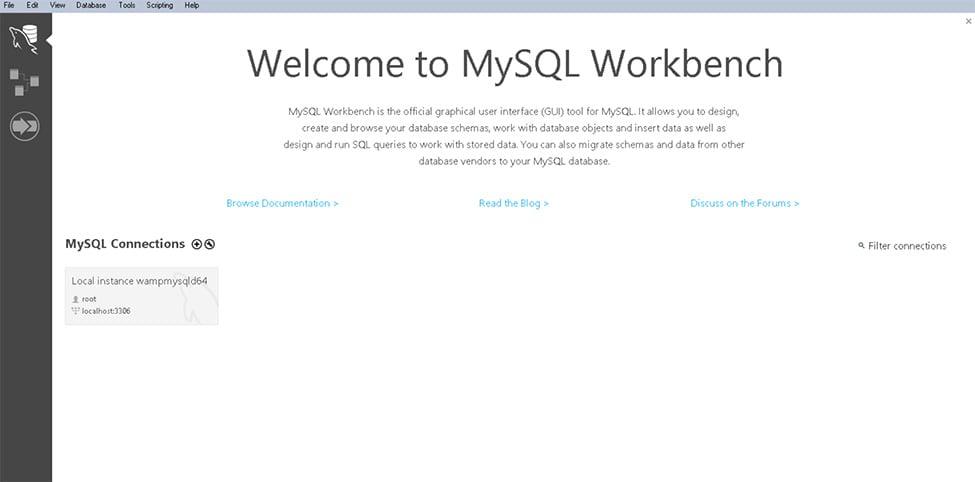
To ensure a successful installation of MySQL, open the MySQL Command Line Client or MySQL Workbench, both available in your Start Menu. Log in using the root user credentials you set during installation.
MySQL Workbench Is Ready To Use
MySQL is an open-source relational database management system that is based on SQL queries. MySQL is used for data operations like querying, filtering, sorting, grouping, modifying, and joining the tables present in the database.
Read more: MySQL and its working
Conclusion
That’s it! You’ve successfully downloaded and installed MySQL on your Windows system.You are now ready to start using MySQL. MySQL is the best relational database that will keep all your data secure. Many Compaes use MySQL because of its solid data security and is supported by multiple applications. So Install MySQL in Linux now and learn SQL in 30 Days – From Basic to Advanced Level!
Also Read
Share your thoughts in the comments
Please Login to comment...