In Ubuntu, client-server communication involves using Telnet, a network protocol that allows you to connect to remote servers and devices over a TCP/IP network. Telnet on Ubuntu 22.04 LTS enables you to establish text-based communication with servers for various purposes such as remote administration, troubleshooting, and testing network services. In this article, we will explore the installation and usage of Telenet on Ubuntu 22.04.
What is Telnet?
Telnet is a network protocol used for remote terminal access and communication over a TCP/IP network. It allows a user to log in to a remote computer or device and execute commands as if they were directly connected to that system. Telnet operates on port 23 by default and provides a text-based interface, making it suitable for tasks such as remote administration, debugging, and accessing network services. However, it’s important to note that Telnet sends data, including login credentials, in plain text, which can pose security risks, leading to its decreased usage in favor of more secure protocols like SSH (Secure Shell).
Installation of Telnet on Ubuntu 22.04
In this section, we will see the process to install Telnet on Ubuntu 22.04. Execute the below-stated commands to install Telnet without encountering any errors.
Step 1: First open the terminal in your Ubuntu machine.
Step 2: Run the below command to check Telnet’s availability in the Ubuntu repository. It shows version 0.17.
apt show telnetd

Check Telnet’s Availability
Step 3: Now install the Telnet using apt manager. Execute the below command in the terminal.
sudo apt install telnetd -y

Installing telnet
Step 4: Once the installation is completed, check the status of the Telnet, it should be active.
sudo systemctl status inetd

Telnet’s Status
Note: As Telnet uses default port 23, so if your computer will block this port then you will not be able to establish the connection between your computer and the remote server. So for that we need to configure the firewall.
Step 5: Now check if the firewall is active or not by using the below command to check its status (in our case it’s inactive).
sudo ufw status

Firewall Status
Step 6: If your firewall is not active then enter the below command to enable the firewall otherwise skip this step.
sudo ufw enable

Enabling firewall
Step 7: Now allow port 23 as all communication will be done through that port, by using the below command.
sudo ufw allow 23
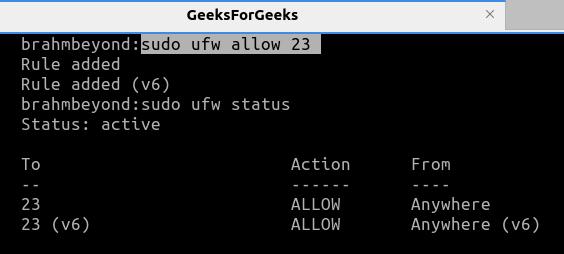
Allow port 23 in the firewall
Step 8: Now we have to connect to the other computer by using its IP address by using the below command.
telnet 192.168.1.10
If you don’t have any other computer to test then you can test by filling in your own computer’s loopback address by using 127.0.0.1 or localhost.
telnet 127.0.0.1
or
telnet localhost

Connecting Using Telnet
Now we are connected to the remote server and you can access it fully, we can use it for whatever reasons you want to install telnet.
Step 9: To exit Telnet, type Ctrl+], then type quit, and press Enter.
Usage of Telnet
Telnet serves numerous purposes, exemplified through practical scenarios. Let’s explore its usage through an example.
Example 1: Verifying Accessibility of an HTTP Server
Step 1: We can check the availability of any HTTP server by using the below command.
telnet www.google.com 80
This uses default port 80 to connect to Google’s Web Server:

Connect to Web Server
Step 2: Now send an HTTP request by typing the below code in the terminal.
GET / HTTP/1.1
Host: www.google.com
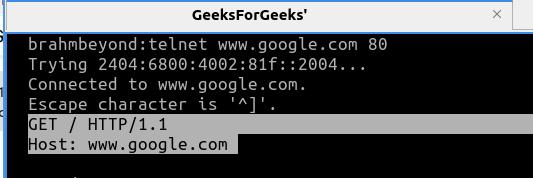
Send HTTP request
Step 3: We will get the response back from the Server if the connection is successful and it will include the Date, Cache-Control, Accept-Ranges, Response code, etc, and possibly the content also of the webpage.
Here we got the Status Code of 200 and the content of the homepage of www.google.com.
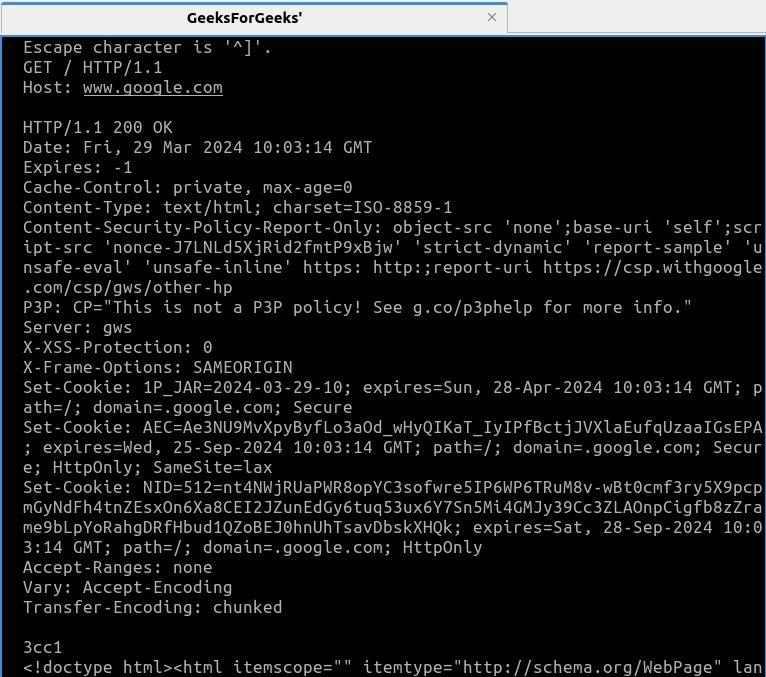
Response from Google’s Server
Example 2: Telnet to Test Open Ports
We can test for the open ports on a remote server using telnet. We’ll check for port 80 on a remote server
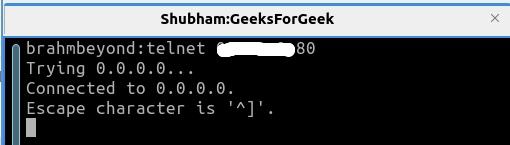
Step 1: To test the open port you have to use the IP address or hostname with the port that you want to test.
Syntax:
telnet <remote_host> <port_number>
Command:
telnet 192.168.1.100 80
Output:
Port 80 is open
And if the Port is not open then you will get a connection refused response.

Port 74 is not open
Example 3: Telnet to test a Mail Server
Step 1: Use the below syntax to use telnet to connect to the mail server.
Syntax:
telnet <mail_server_address> <port_number>
Command:
telnet localhost 25
Output:

Connecting to the mail server
Step 2: Now that the connection is successful, send the ehlo command. This command begins the SMTP session and introduces the client (you) to the server as example.com and gives back a list of supported features lists in response
Syntax:
ehlo example.com
Command:
ehlo testing.mail
Output:
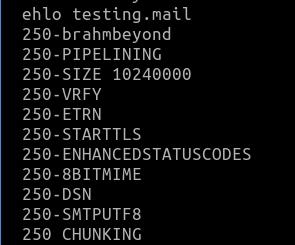
ehlo command
Step 3: Now you can interact with the mail server by sending an email, checking the email queue, checking server status, troubleshoot issues, etc.
Step 4: When work is done you can exit it using the quit command.
quit

Quit mail server
FAQs on Install and Use Telnet on Ubuntu 22.04 LTS
Is Telnet secure?
No, Telnet is not secure at all. It sends data in plain text instead of encrypted one making it vulnerable to cyber attacks and data being stolen.
How to exit in Telnet?
First press Ctrl+], then type quit or type exit.
How to start telnet?
You need to type Telnet followed by IP Address of the remote machine. Like
Telnet 192.168.1.10
How to check the status of Telnet?
To check the status of Telnet type in CLI:
sudo systemctl status inetd
What are alternatives to Telnet?
Some alternatives of telnet are SSH, Netcat, PuTTY, SecureCRT etc.
Conclusion
In conclusion, telnet is used to connect to a remote computer server to access it. But the disadvantage is that the communication channel is not encrypted so anyone who can access the communication channel can see all the passwords, usernames, and other important information. But still, Telnet is used in older computers. Whereas it’s still being used for Network Troubleshooting, education purposes, etc. But it’s better to look and learn its other secure alternatives like SSH.
Share your thoughts in the comments
Please Login to comment...