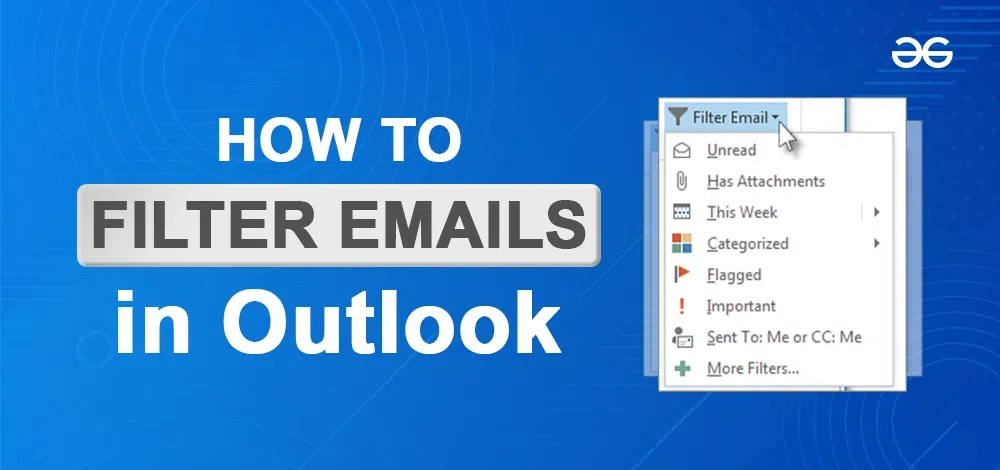
How To Filter Emails In Hotmail – Set up rules to Organize Inbox
Last Updated :
27 Jul, 2023
How To Filter Emails In Hotmail Using Rules- Quick Steps
- Select a Sender message from Emails.
- Right Click on that email and go to Rules Option > select Create Rules.
- Select a Folder here or create a New Folder to move filtered messages.
- Click Ok.
Managing a busy inbox can be a challenge, but fear not, as Outlook formerly known as Hotmail offers a range of powerful filtering options to help you stay organized and focused. Whether you want to automatically sort emails from specific senders into designated folders or set up rules for specific email conditions, this tutorial will walk you through the process step by step. By the end, you’ll be able to master your email flow and ensure that important messages don’t get lost amidst the clutter. Let’s dive in and discover how to make the most of Outlook’s email filtering capabilities!
Note: This Article can be informative for Outlook Microsoft 365 Outlook 2021 Outlook 2019 Outlook 2016 Outlook 2013 Outlook 2010 Users.
How to Filter Emails in Outlook using Built-in Filters
Learning how to filter emails on Hotmail is now a piece of cake. Users also find default email filters provided for easier segregation of incoming emails. You can find these filters and sort emails in your Hotmail Inbox by following this process.
Step 1. Open Outlook.com
Log In or Open your Outlook on Desktop or Web App.
Log in to Outlook.com
Step 2: Click on Filter Email Icon
Please proceed to the top right-hand side of the home panel where you’ll find the Filter icon, and then proceed to click on it.
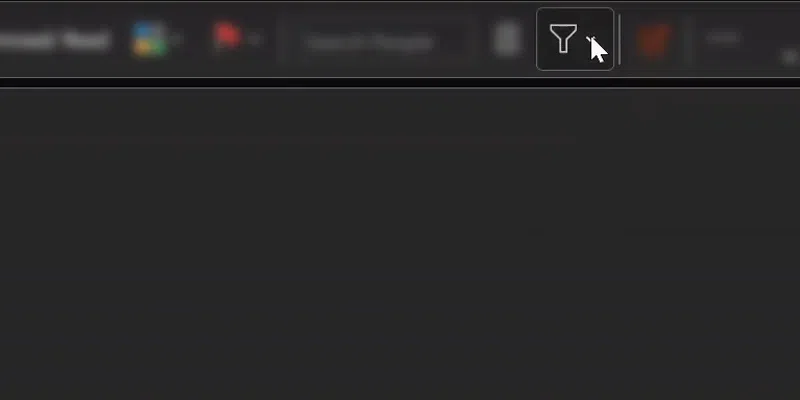
Click on Home > Navigate to Filter Email Icon > Select Icon
Step 3: Choose One Filter Option
Once you click on the filter icon, a dropdown menu will be displayed, presenting the default inbuilt filter list. From there, choose the specific filter you desire to view all emails related to it, and then proceed with viewing all the message according to the selected filter.
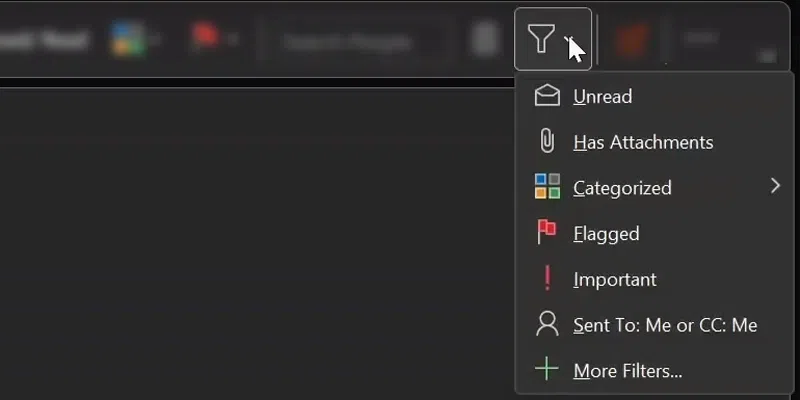
Click on Filter Icon > Choose A Filter
How To Filter Emails In Outlook Using Rules
Outlook, formerly known as Hotmail, offers various features, including rules that allow you to filter your emails and automatically redirect them to specific folders. Now, let’s explore how you can utilize rules to filter all your incoming emails to a particular folder.
How to Filter Emails in Outlook by Sender
Step 1. Create A Folder
Go to the top of the menu and click on “Folder Menu,” then choose “New Folder” and “type a name” of the folder. Once the folder is created, it will be visible on the left-hand side among the email folder options.
Note: Feel free to name it according to your needs and in a way that you can easily remember it.
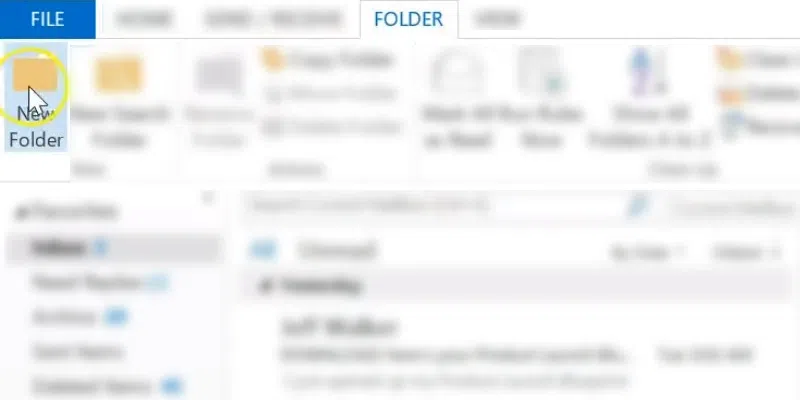
Navigate to the Top Menu > Folder > Select New Folder
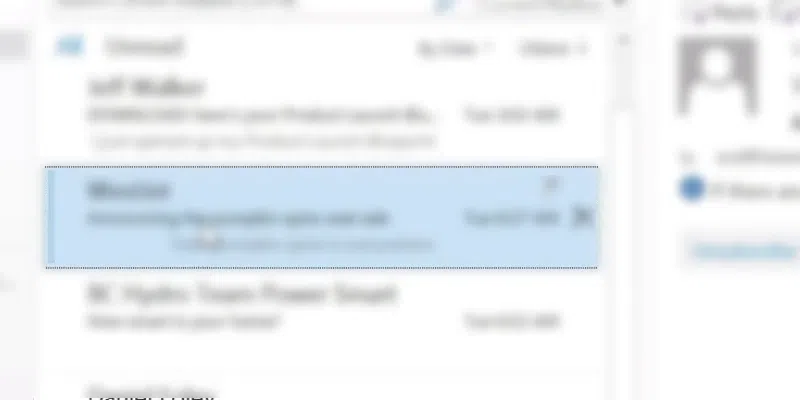
Step 2. Select a Sender from Emails
Now, choose a sender from your emails for whom you want to set up automatic email forwarding to the folder you’ve just created.
Step 3: Select Rules
After you have decided on the sender’s name, simply right-click on the email send by that particular sender and choose “Rules” from the options. Then, select “Always Move Messages from: Sender Name.”
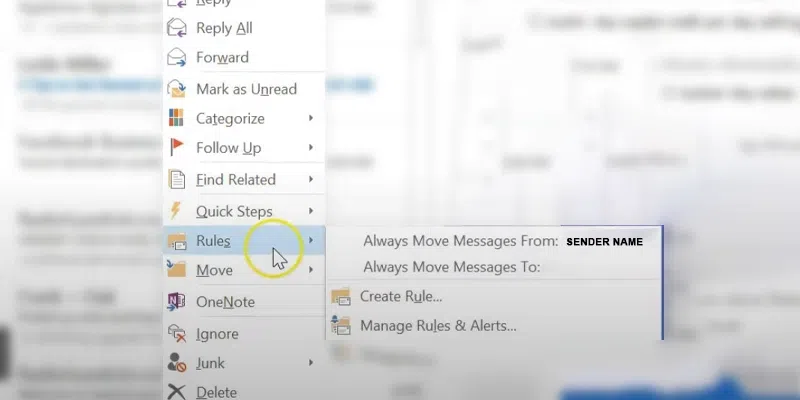
Select the Sender Email > Right Click on Email > Select Rules > Select Always move message from : Sender Name
Step 4: Select the Created Folder
After selecting the above rule, a window will pop up, asking where you want to move the emails. Now, choose the newly created folder and press Ok.
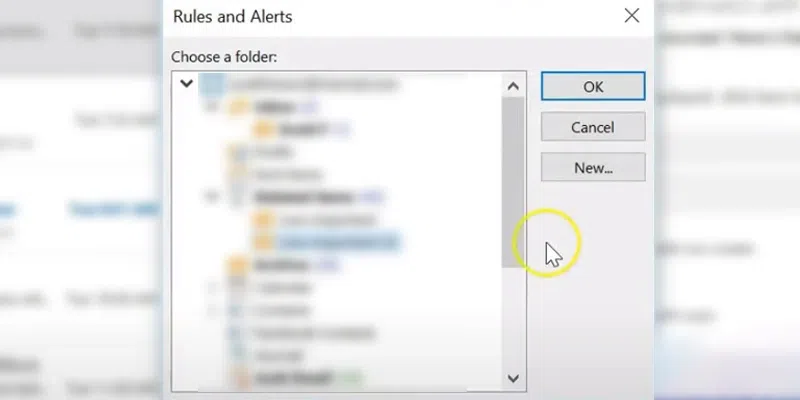
Select the Newly Created Folder > Press Ok
How to Create Rules in Outlook for Specific Emails
Step 1: Select a Sender
Select a sender from your emails for whom you wish to create a rule.
Choose a Sender from your emails
Step 2: Create Rule
Once you’ve chosen a sender, simply right-click on the email, and from the appeared options, select “Rules,” then choose “Create Rule.”
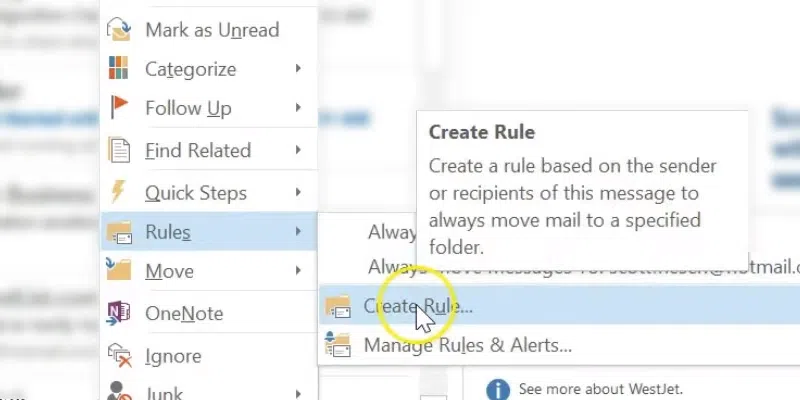
Choose a Sender > Right Click on Sender Email > Rules > Select Create Rule
Step 3: Choose Conditions and Enable Options
When you click on “Create Rule,” a new pop-up will appear, prompting you to set the conditions. Please follow the steps below to configure the conditions:
“When I get e-mail with all of the selected conditions”
Enable Subject Contains and Type the Keyword that you want to filter from your emails. The keyword should be generic in the email subject.
“Do the following”
Enable Move the item to folder > Select Folder where you want to move the emails.
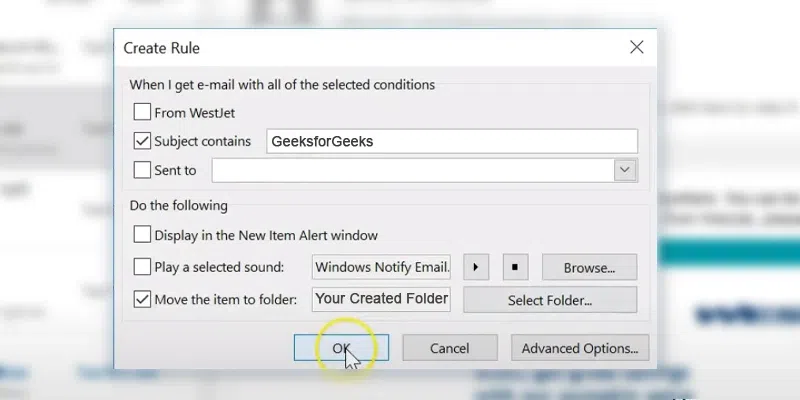
Create Rule > Enable Subject Contains > Type Keyword > Enable Move the item to Folder > Select Folder > Select Ok
Step 4: Select Ok and Run the Rule
Now when you set all the conditions and press ok, a pop up will appear which will ask your permission to run the rule. Enable the Run the Rule option and Press Ok.

Select Ok > Enable Run the Rule > Click Ok
How to Change Junk Email Settings in Outlook
Spam emails can be quite annoying, but Hotmail’s spam filter send most of them to the Junk Email folder. However, if you find that Outlook is either not catching enough spam or marking too many regular messages as spam, you have the option to adjust the email protection level. By doing this, you can specify which messages Outlook should block or allow, giving you more control over your email filtering.
Step 1: Navigate to Junk Email folder
Step 2: Select an Email
Step 3: Right Click top View all Options
Step 4: Select Report > Select Not Junk
Note: You’re then asked to confirm that you want to move the message to your Inbox. You also have the option to specify that all future emails from that address will not be marked as junk.
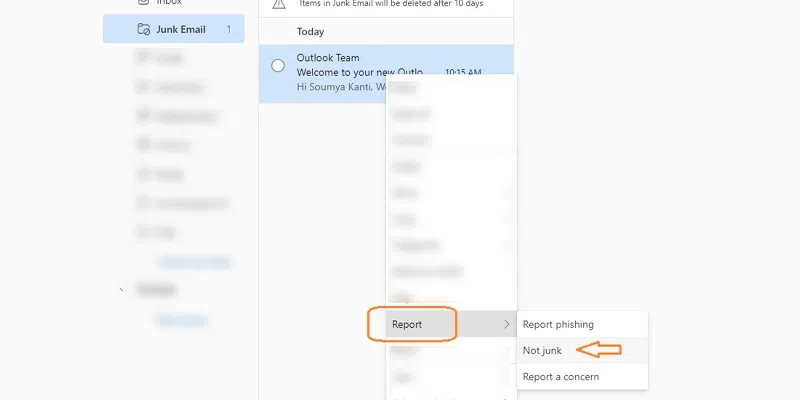
Select Junk Email > Right Click on Selected Email > Report > Not Junk
Conclusion
Managing an overflowing inbox can be overwhelming, but with Hotmail’s powerful filtering features, users can stay organized and prioritize important messages effectively. The above article covers step-by-step instructions on creating rules to automatically filter emails from specific senders into designated folders, ensuring a clutter-free inbox. By following the outlined steps, users can efficiently manage their inbox and ensure that important communications are promptly attended to while keeping spam at bay.
FAQs
How do I make emails go to a specific Folder in Outlook?
To easily create a rule for moving all emails from a particular sender or a group of senders to a specific folder, follow these steps: Right-click on a message in your message list that you wish to create a rule for, then select “Create rule.” Next, choose the folder where you want all messages from that sender or set of senders to be automatically moved, and finally, click on “OK.”
How do I sort and filter emails in Outlook?
In Outlook, you can sort by the name of the sender or the recipient, the date of the email message, its size, and other options. Select Filter at the top of your inbox. Under Sort by, choose any option you prefer to sort your email.
Share your thoughts in the comments
Please Login to comment...