How to Extract and Import file in Django
Last Updated :
18 Mar, 2024
In Django, extracting and importing files is a common requirement for various applications. Whether it’s handling user-uploaded files, importing data from external sources, or processing files within your application, Django provides robust tools and libraries to facilitate these tasks. This article explores techniques and best practices for extracting and importing files in Django, helping developers efficiently manage and utilize file-based data within their projects.
Extracting and Importing Files in Django
To install Django follow these steps.
Starting the Project Folder
To start the project use this command
django-admin startproject rest_tut
cd rest_tut
To start the app use this command
python manage.py startapp home
File Structure
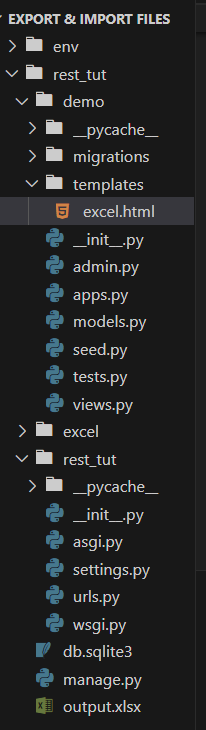
File Structure
Register the app name in settings.py file. follow the Below commands
INSTALLED_APPS = [
    "django.contrib.admin",
    "django.contrib.auth",
    "django.contrib.contenttypes",
    "django.contrib.sessions",
    "django.contrib.messages",
    "django.contrib.staticfiles",
    "home", //App name
]
Creating necessary files
models.py: Here we are creating the models .The main function of models is to make connection with the database so that information can be stored in the database.
Python
from django.db import models
class GFG(models.Model):
    name = models.CharField(max_length=100)
    contact = models.CharField(max_length=100)
    address = models.CharField(max_length=500)

class File(models.Model):
    file = models.FileField(upload_to="excel")
views.py: Below is the explaination of the functions
- export_data_to_excel(request): This view is responsible for exporting data from the database to an Excel file.It retrieves all Employee objects from the database using Employee.objects.all().It creates an empty list called data.Finally, it returns a JSON response with a status code indicating a successful export (status 200).
- import_data_to_db(request): This view handles the import of data from an uploaded Excel file into the database.It initializes data_to_display as None, which will be used to display imported data on the web page.Finally, it renders the ‘excel.html’ template, passing the data_to_display variable in the context so that the imported data can be displayed on the webpage.
Python
from django.shortcuts import render
from .models import *
import pandas as pd
from django.http import JsonResponse
from django.conf import settings


def export_data_to_excel(request):
    # Retrieve all Employee objects from the database
    objs = GFG.objects.all()
    data = []
    for obj in objs:
        data.append({
            "name": obj.name,
            "contact": obj.contact,
            "address": obj.address
        })
    pd.DataFrame(data).to_excel('output.xlsx')
    return JsonResponse({
        'status': 200
    })


def import_data_to_db(request):
    data_to_display = None
    if request.method == 'POST':
        file = request.FILES['files']
        obj = File.objects.create(
            file=file
        )

        path = file.file
        df = pd.read_excel(path)
        data_to_display = df.to_html()

    return render(request, 'excel.html', {'data_to_display': data_to_display})
Creating GUI
excel.html:This HTML file is used to upload file from the user to the database.
HTML
<!DOCTYPE html>
<html lang="en">
<head>
    <meta charset="UTF-8">
    <meta name="viewport" content="width=device-width, initial-scale=1.0">
    <title>Excel</title>
    <style>
        h1 {
            color: green;
            font-size: 25px;
            font-weight: bold;
        }
    </style>
</head>
<body>
    <h1>GeeksforGeeks</h1>

    <form action="" method="post" enctype="multipart/form-data">
        {% csrf_token %}
        <h4>Select & Upload File</h4>
        <input type="file" required name="files">
        <button type="submit">Submit</button>
    </form>

    {% if data_to_display %}
    <div>
        <h2>Uploaded Data</h2>
        {{ data_to_display | safe }}
    </div>
    {% endif %}
</body>
</html>
admin.py: Here we are registering the models.
Python3
from django.contrib import admin
from home.models import *
admin.site.register(GFG)
urls.py :Here we are defining all the path of the project.
Python3
from django.contrib import admin
from django.urls import path
from home.views import *

urlpatterns = [
    path('export_data_to_excel/', export_data_to_excel),
    path('import_data_to_db/', import_data_to_db),
    path("admin/", admin.site.urls),
]
Deployement of the Project
Run these commands to apply the migrations:
python3 manage.py makemigrations
python3 manage.py migrate
Run the server with the help of following command:
python3 manage.py runserver
Output
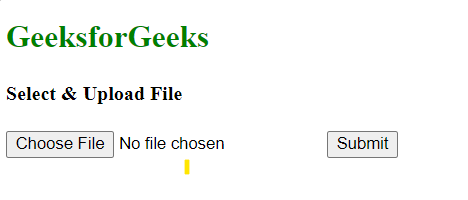
Chose File
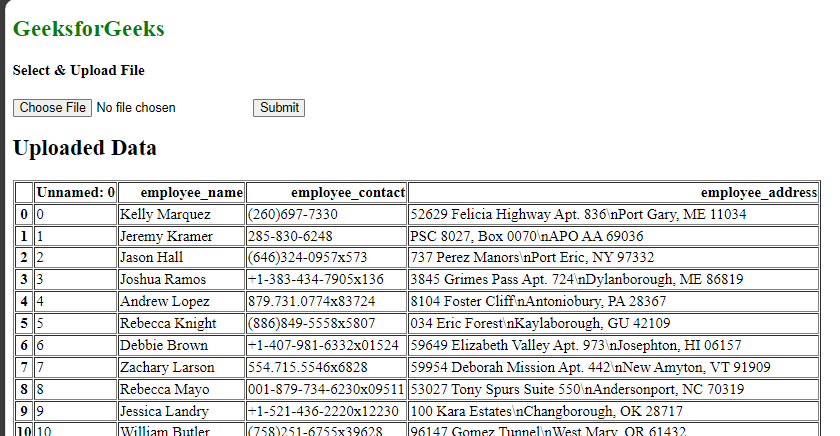
Upload the data and click on Submit button
Conclusion:
In Django, the process of extracting and importing files plays a crucial role in developing data-driven web applications. It allows users to upload files, such as Excel spreadsheets or CSV files, which are then processed to extract valuable information. This data can be stored in a structured manner within a database, facilitating easy retrieval and analysis. Django’s security measures ensure the safe handling of files and user data during the upload and import process, making it a fundamental feature for building robust and user-friendly web applications with seamless data integration you can downalod the output.xlxs file by click here download
Share your thoughts in the comments
Please Login to comment...