How to Edit Live Photos on iPhone: Step by Step Guide
Last Updated :
16 Apr, 2024
iPhone launched the live photo feature in 2015. The purpose of live photos is to ensure that you never miss a moment while taking a picture. The iPhone Live photo feature records what happens 1.5 seconds before and after you take a photo, including the audio. You can tap and play the picture and pick a key photo you like.
Many people get confused about whether they can edit live photos on iPhones. Well, the good news is that the iPhone allows you to edit live pictures as well. In this, blog, we will learn how in just a couple of steps you can edit and make the most out of live photos on an iPhone.
How to Edit Live Photos on iPhone: Step by Step Guide
How to Edit Live Photos on iPhone: Step-by-Step Guide
Here is how you can edit or change the key live photo-
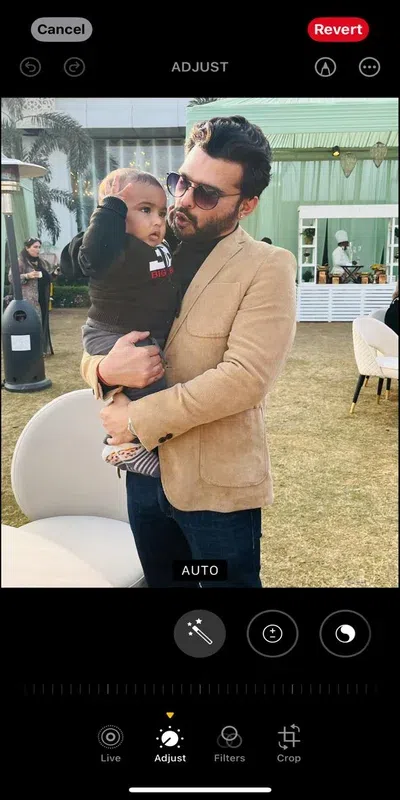
Step 1– Open any Live Photo in the Photos app

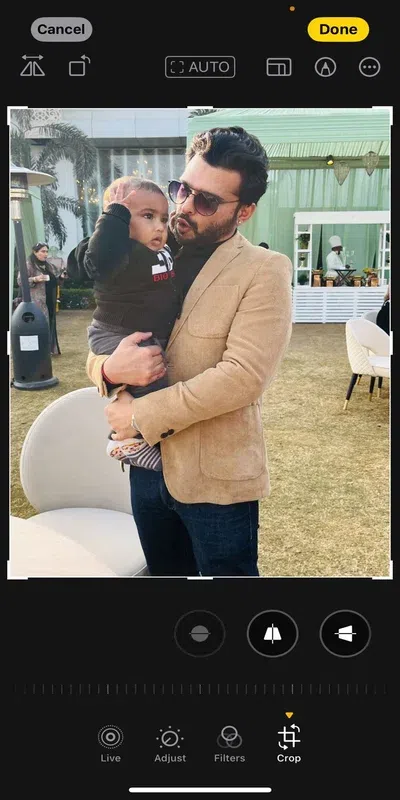
Step 2– Click on the Edit button on the top right corner of the screen

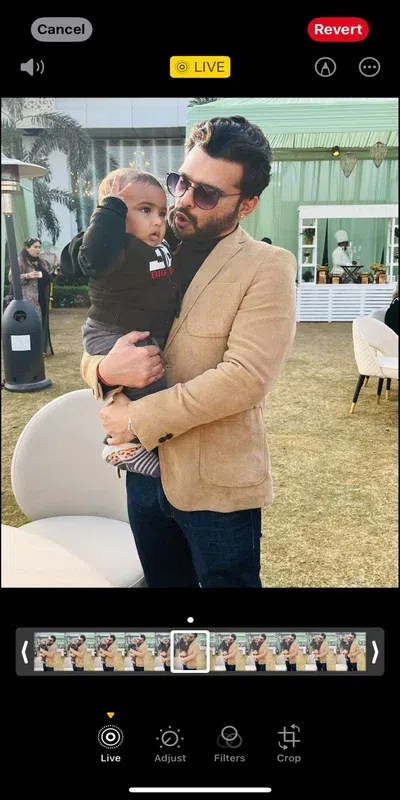
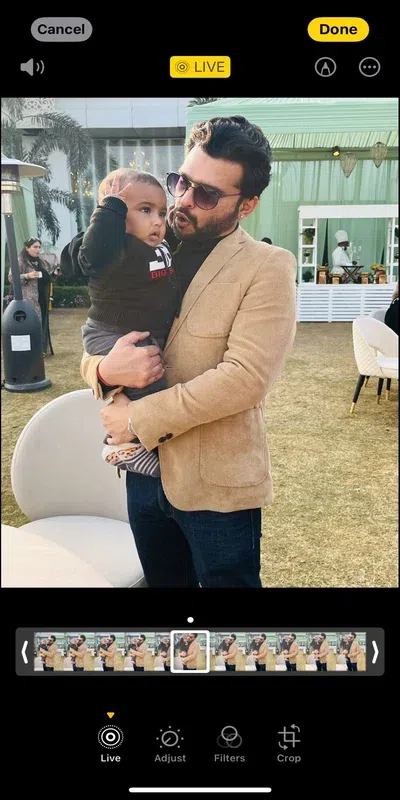
Step 3– You will see a ‘Live’ button on the left bottom of the screen
Step 4– It will provide you with numerous photos on the slide; you can select the best Live Photo
You will get numerous options to edit the live photo-
i) On the top left corner of the photo, you will see the ‘Live’ option; click on it, and it will give you numerous effects that you can add to a live photo-
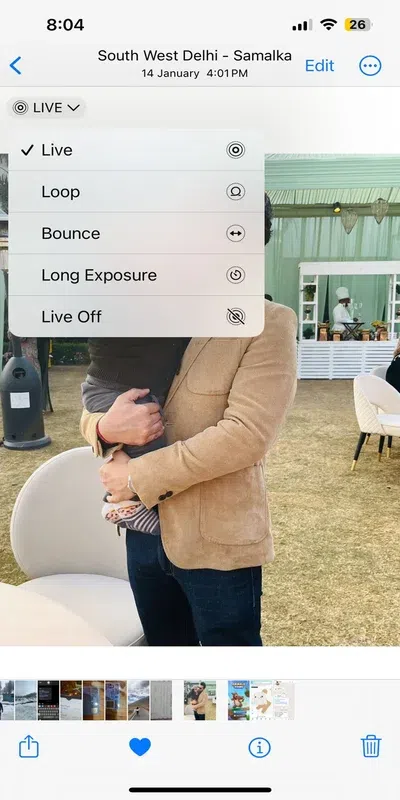
- Live- Choosing this feature will apply the Live video playback feature
- Loop- This feature repeats the action in a continuous looping video
- Bounce- You can opt for this one if you want the picture to rewind the action backwards and forward
- Long Exposure- This effect burrs the motion and simulates a DSLR-like long exposure effect
- Live Off- To turn off the live feature, click on the ‘Live Off’ option.
Step 5– Now, at the bottom of the screen, you will see ‘Filters’ options; tap on it
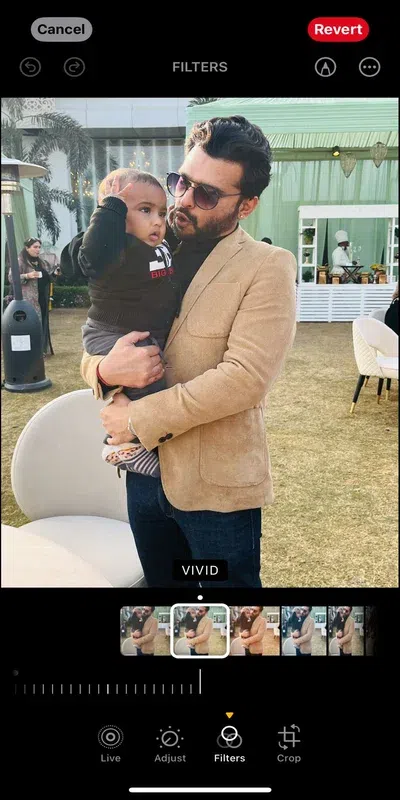
Step 6– It will give you numerous filter options; you can apply any filter of your choice to edit the picture. Filter options include-
- Original
- Vivid
- Vivid Warm
- Vivid Cool
- Dramatic
- Dramatic Warm
- Dramatic Cool
- Mono
- Silvertone
- Noir
Step 7– There is another option, i.e. ‘Crop’, which allows you to adjust the photo size and rotate it to your liking. You will get three options to crop the picture: Straighten, Vertical, and Horizontal. You can also rotate or flip the photo using the icons at the top left.
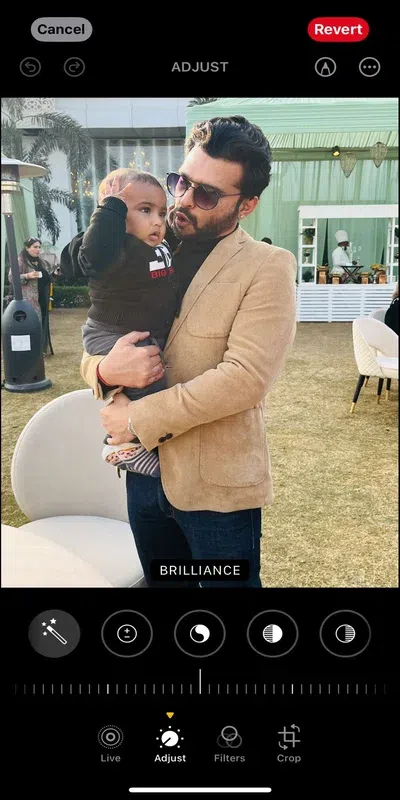
Step 8– You will also see the second option on the left bottom of the screen, ‘Adjust’. It provides you with numerous options to edit live photos on iPhone–
- Exposure- To control the brightness of your image
- Brilliance- It is excellent for bringing out details and making your photo look richer and more vibrant
- Highlights- It adjusts the brightness of only the bright areas in your photo
- Shadows- By using this feature, all shadowy parts in your photo will appear brighter than they were in the original photo
- Contrast- This feature brings depth into your photograph and illuminates the details
- Brightness- Using the feature will increase the brightness of all shadows and highlights in your image
- Black Point- Sets the point at which the darkest parts of the image become entirely black without any detail
- Saturation- You can use this feature to simply enhance or even mute the colors
- Vibrancy- This feature makes muted colors vibrant without doing any changes in skin tones
- Warmth- Using this feature makes a great impact on the overall mood of your image
- Tint- This feature is recommended to use if you want to add a green or magenta tint to the photo
- Sharpness- It emphasizes the edges by lessening the effects of smoothing or blurring
- Definition- It adjusts the contrast of the image to improve the clarity of detail
- Noise Reduction- It removes the visual distortion which can make your picture look specked or grainy
- Vignette—This feature darkens or fades the edges to draw attention to the subject of the image.
You can adjust all these features by dragging the slider.
Step 9– You can also remove the sound in the live video by tapping on the ‘Sound’ (speaker) icon in the top left corner to mute the audio. As soon as you turn it off, the sound icon will turn grey to indicate that the sound is switched off.
Step 10 – If you wish to convert your Live Photo into a still image, tap the yellow Live icon at the centre of the screen. Once you click on it, the option will be greyed out, and your live photo will become a still photo. You can make it a Live Photo at any time by clicking on the Live icon again.

Step 11– After editing your live photo, click on ‘Done’ option at the top right corner of the screen to save the changes.

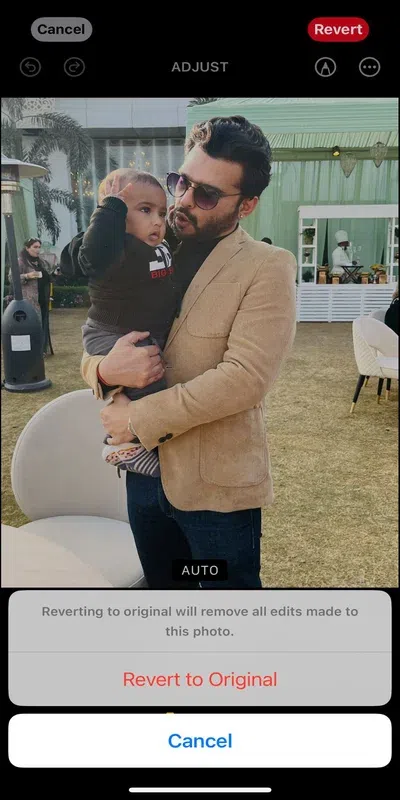
Step 12– If you do not like the editing you did and wish to remove the ones you have done, you can change the photo back to the original Live Photo whenever you want. For this, just go to the ‘Photos’ app, open the Live Photo you wish to revert, and click the ‘Edit’ option. Then select the ‘Revert’ option and tap ‘Revert to Original.’
Conclusion
A live photo offers many more options than a still photo. Now, you are also well versed in how to edit live photos on iPhone. Using these easy steps, you will be able to add filters, crop your image, and adjust different elements of the photo. iPhone offers so many photo editing options that you do not need to use any third-party app. So, take Live Photos to create a seamless effect that captures a few seconds of motion before and after clicking the picture.
FAQs
Which iPhone can take live photos?
The live photos feature started with the launch of the iPhone 6s, and after that, it was available on every model.
How do you take a Live Photo on an iPhone?
iPhone, by default, takes live photos. However, it is possible to turn off the live photos feature if you do not require it.
How can I find Live Photo in the Photos app?
In the photos app, switch to the “Albums’ view, scroll down and you will see the option of “Live Photos.”
Share your thoughts in the comments
Please Login to comment...