The world of electronic communication is one in which business transactions and personal communications frequently intersect. Email is the most common form of digital communication, with services like Gmail leading the way. Gmail users can personalize their experience by adding unique touches such as custom avatars, background images, or even a signature. You may not think it’s necessary, but adding a Gmail signature can help you stand out from the crowd and make recipients more likely to respond to your emails.
Here’s how to add a Gmail signature and quickly access it whenever you send an email. Following are the methods of adding a signature in Gmail:
How to Add A Signature in Gmail?
Step 1:
Open a new tab and log into your Gmail account to create a signature.
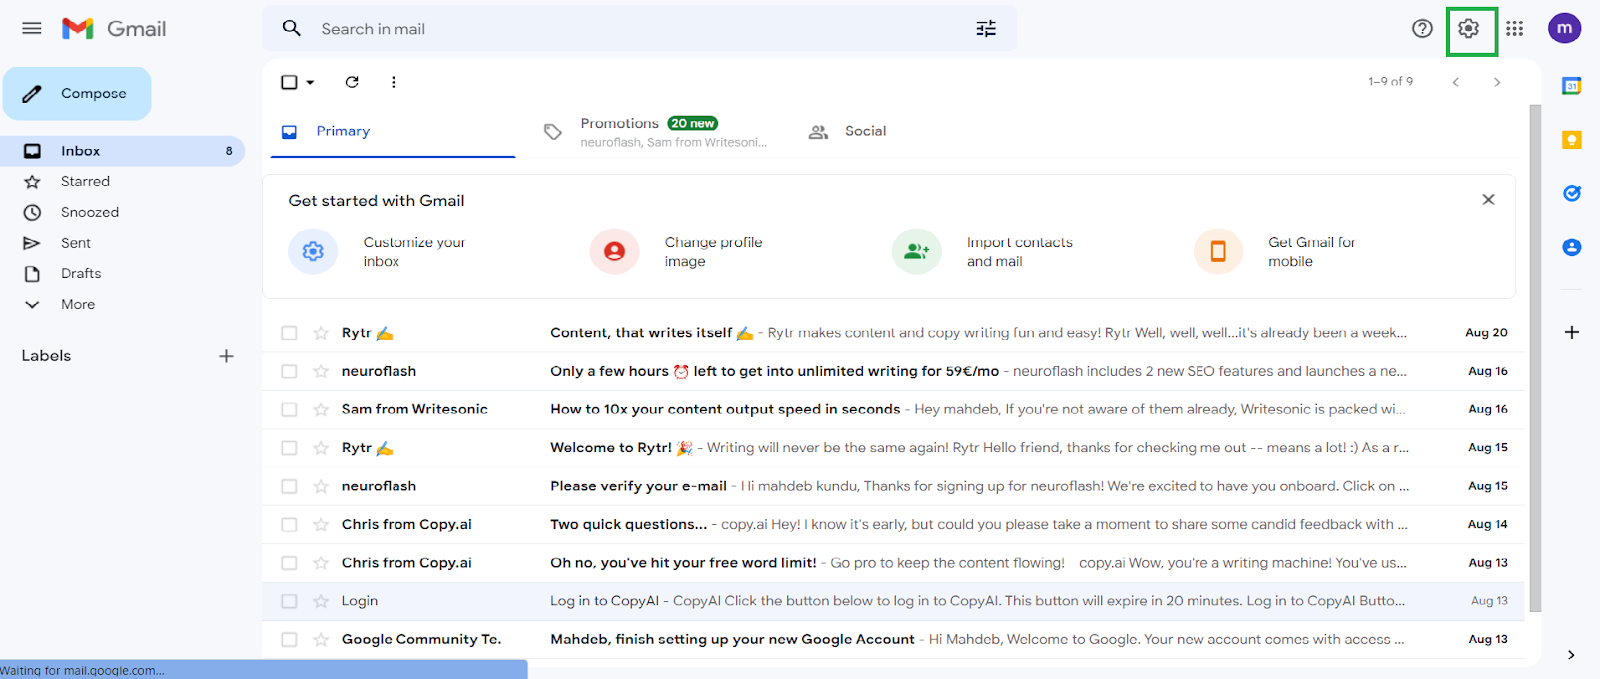
Step 2:
Click on the top right corner ‘Gear’ (Settings) icon of the Gmail account.
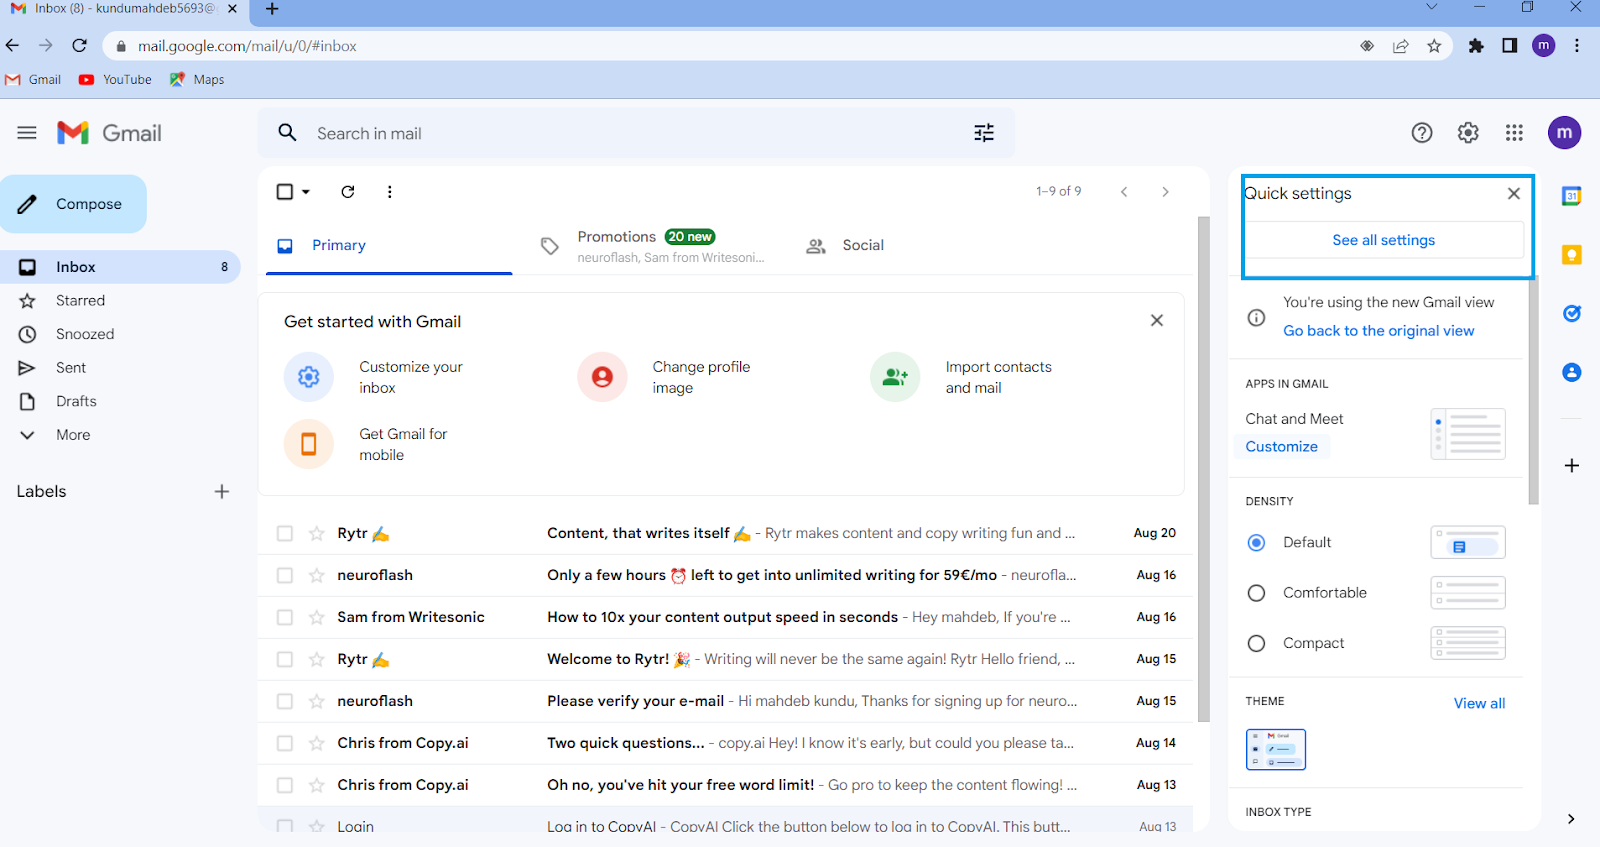
Step 3:
Click on the ‘See all Settings’ option. Generally, it’s the menu item in the ‘Quick Settings’ category.
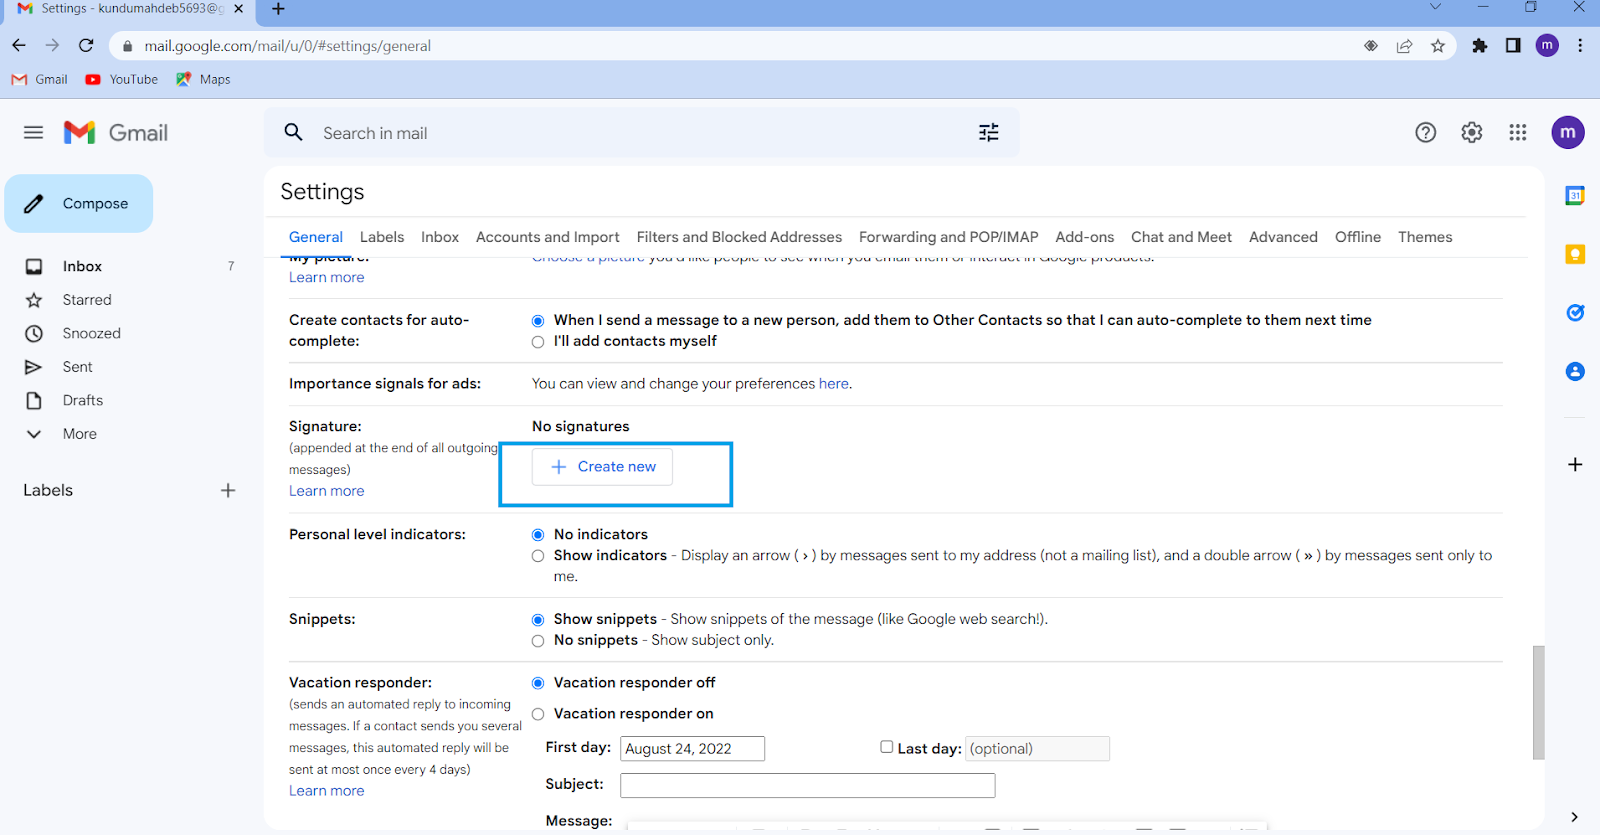
Step 4:
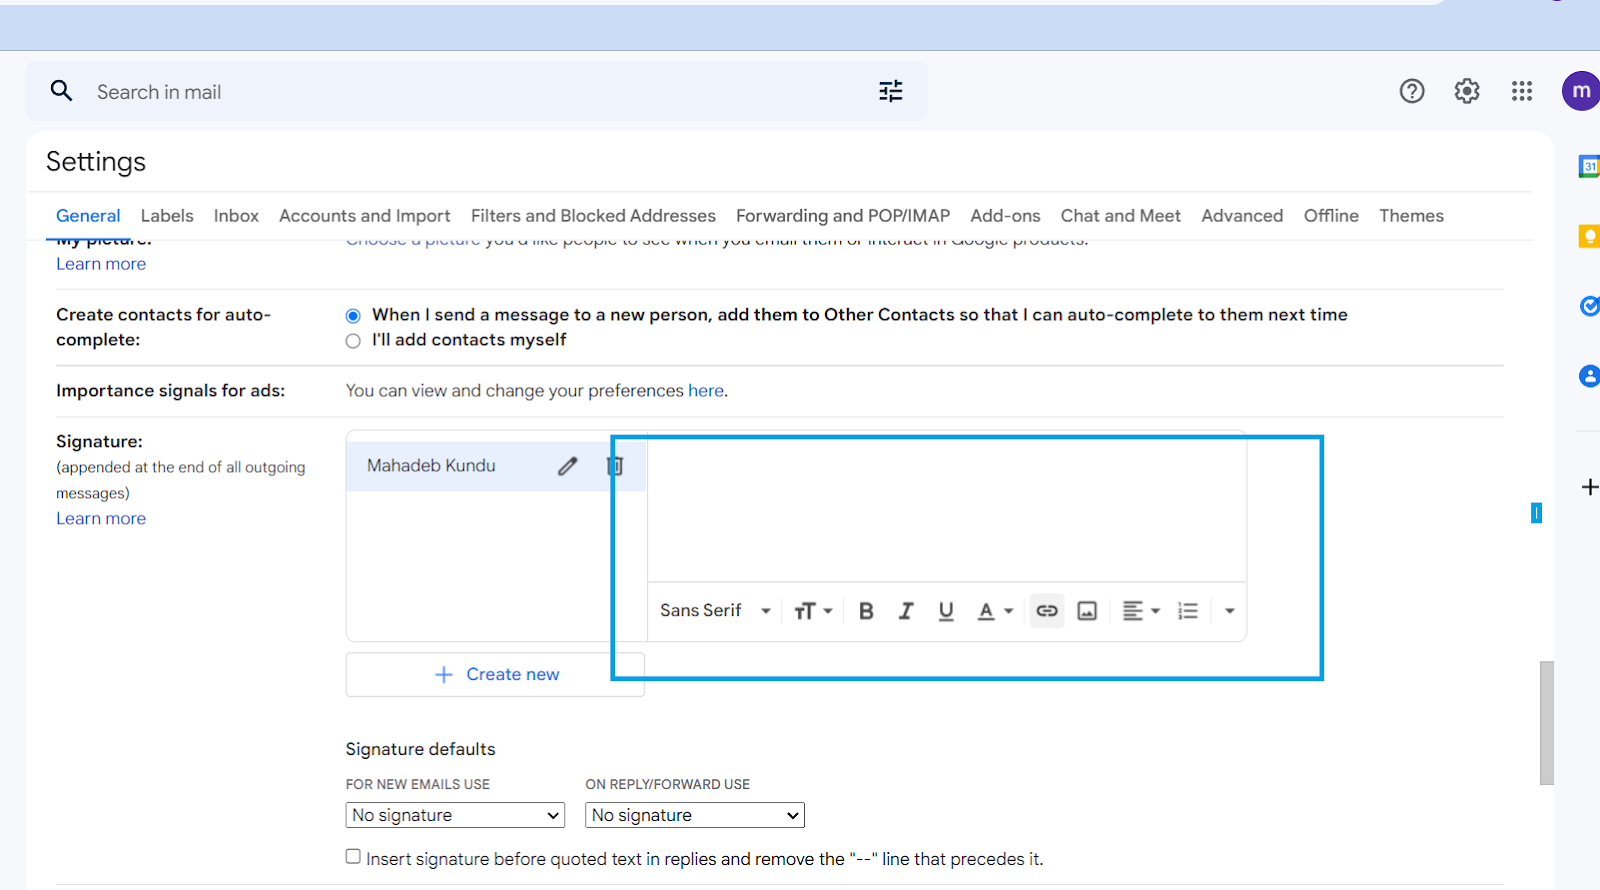
Scroll down in General Tab, and you will find the Signature option; you will see there ‘No Signature’ popup. Click on the ‘Create New’ button.
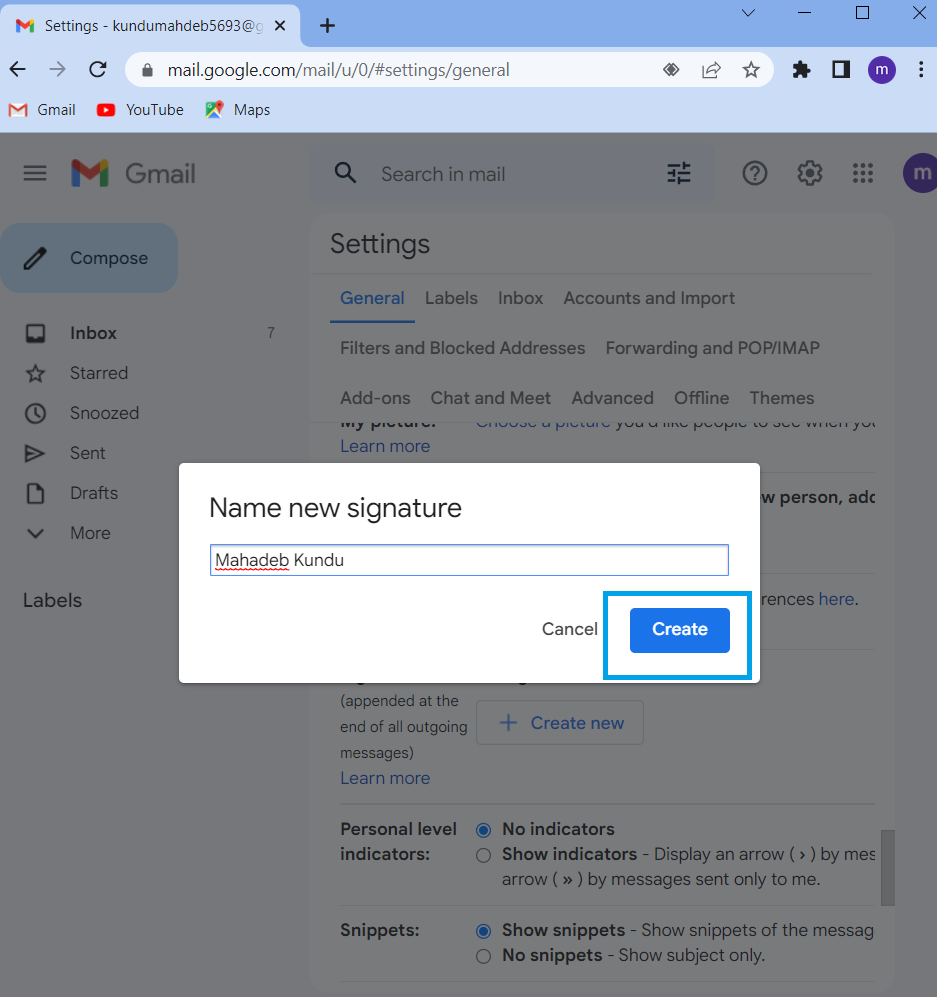
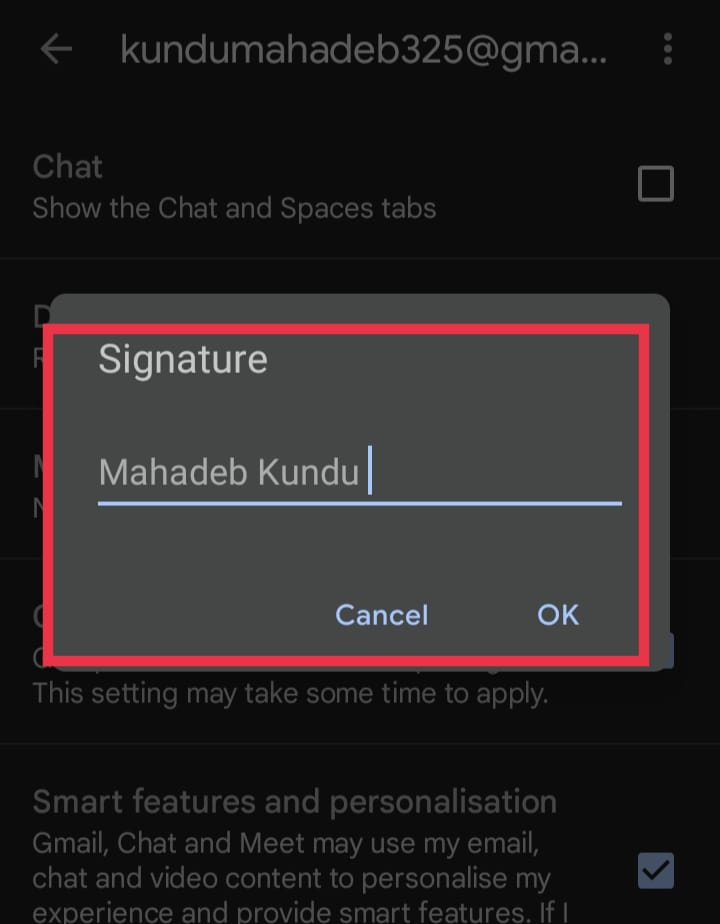
Step 5:
Add your signature to the box. To help you understand when to use it, this should be specific about what it is intended for, for example, ‘Mahadeb Kundu‘ or ‘For New Messages.
When you’re prepared to move forward, click ‘Create’.
Step 6:
Customization-
The signature area allows you to enter whatever text you desire, and you may format that information as you like using the text formatting tools. Your name, employer, title, and contact details are often included in your Gmail signature.
Utilizing text editing tools at the bottom of the dialogue box, you can modify the font style, color, size, and more.
Step 7:
You can add your website link to your Gmail signature. When you click the Link button, a new window will appear. Paste your website link on the link position, and press ‘OK’. You can also add your different social media handles links.

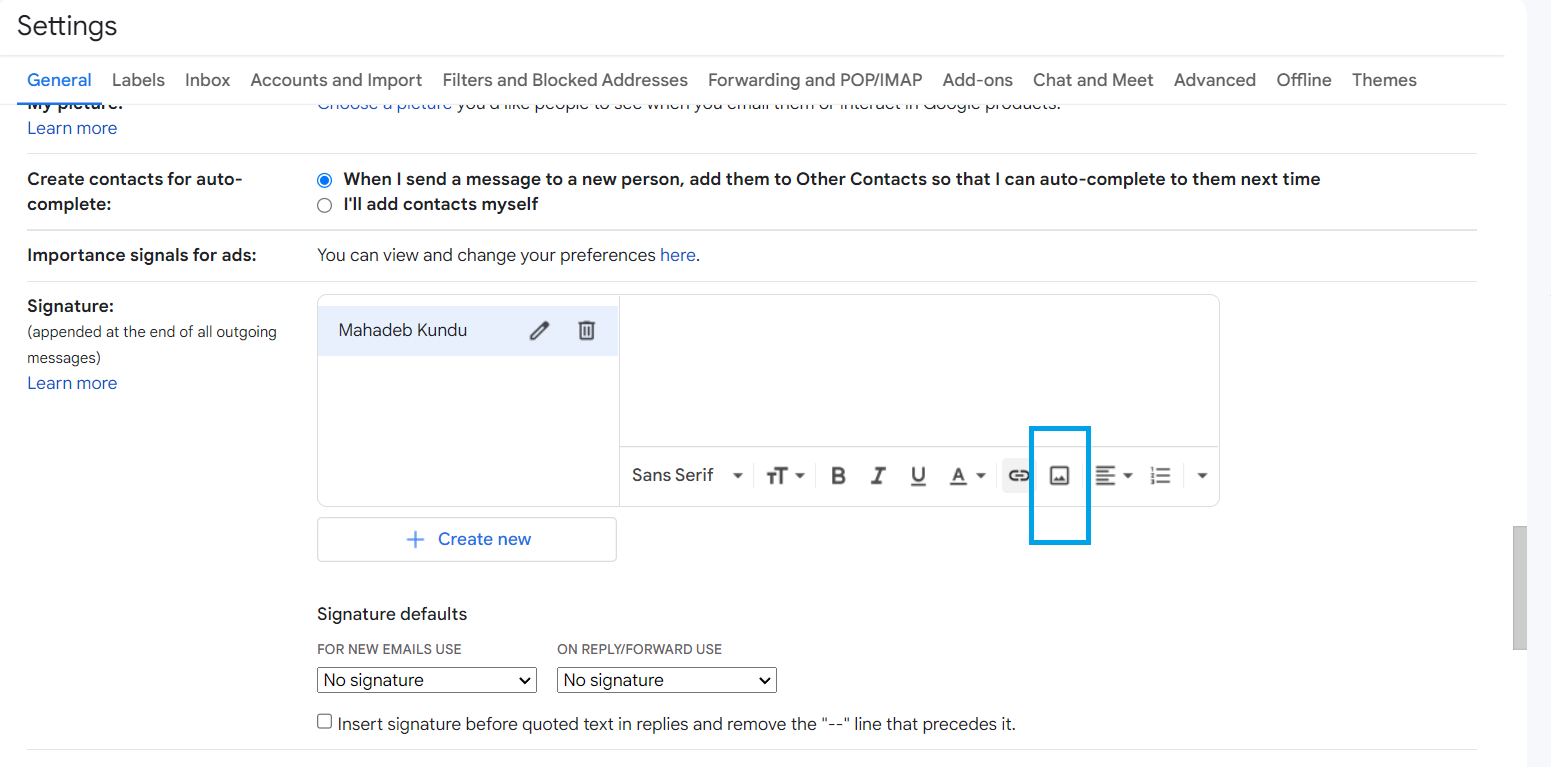
Step 8
Scroll to the bottom of the Signature option. Next to the hypertext button, select the picture icon. You have the choice to upload a picture from your computer, paste a URL from the internet, or even import a photograph from your Cloud Storage into Gmail.
Step 9:
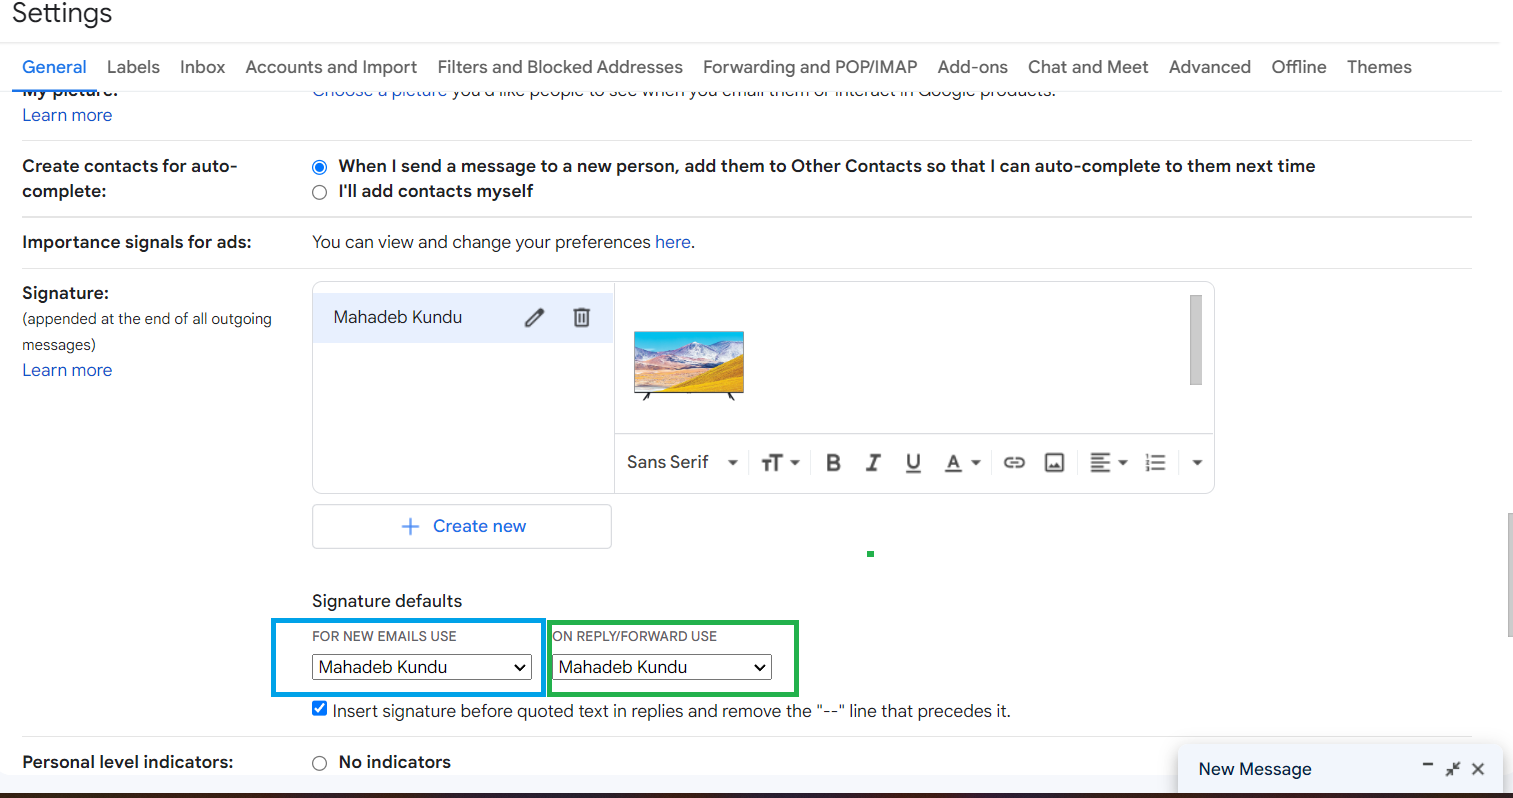
Assign Signature in Default Setting-
Choose the sign to use under ‘For New Emails Use’ and ‘On Reply/Forward Use’. It’s helpful to have your signature identifiers so anyone can recognize you.
Step 10:
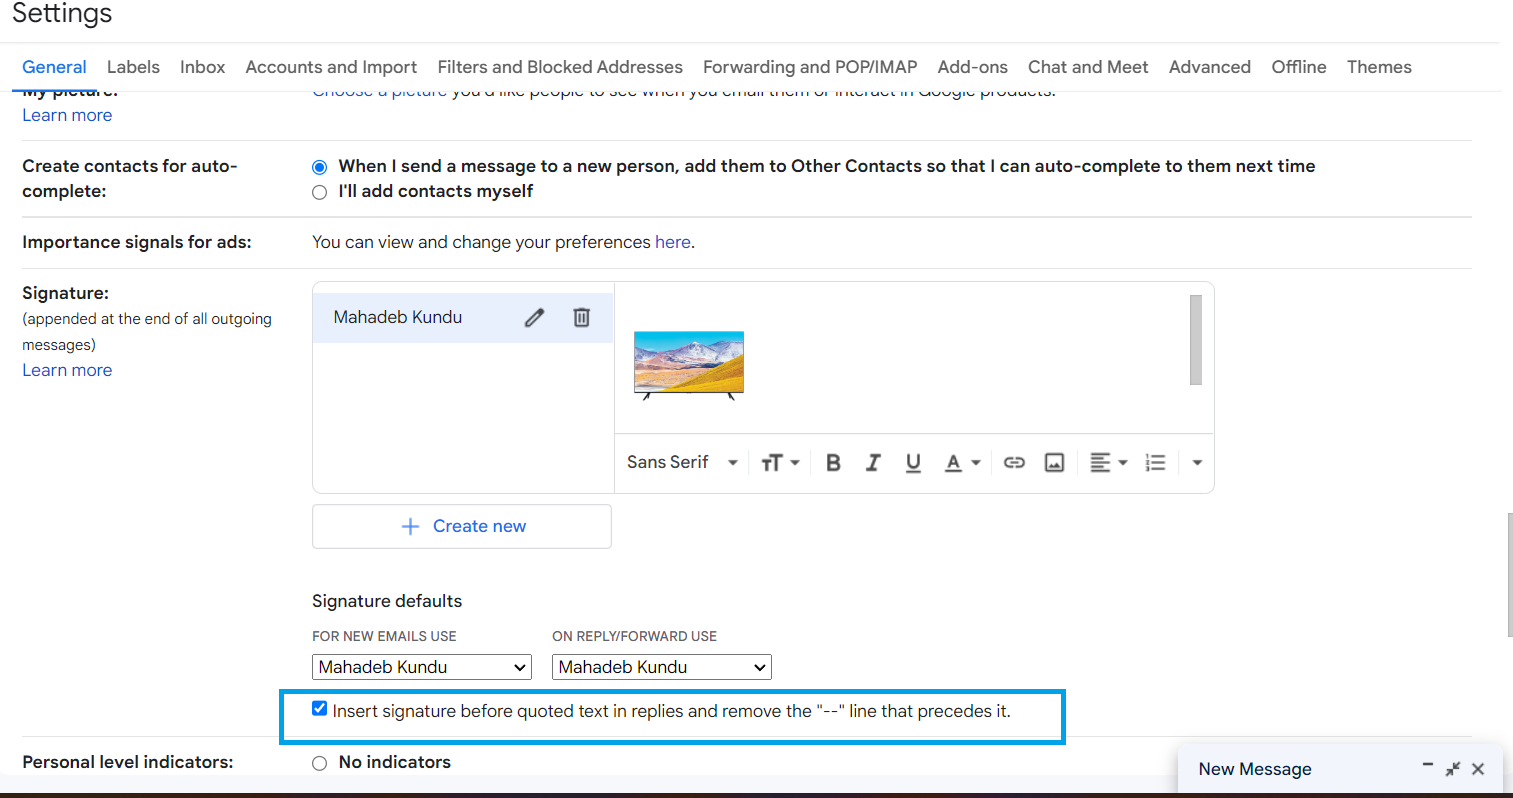
Position-
Tick the checkbox next to ‘Insert signature before quoted text in replies’ and remove the ‘–‘ that precedes it’. The sign will appear at the bottom of the text, below any quotations, if you keep it unmarked.
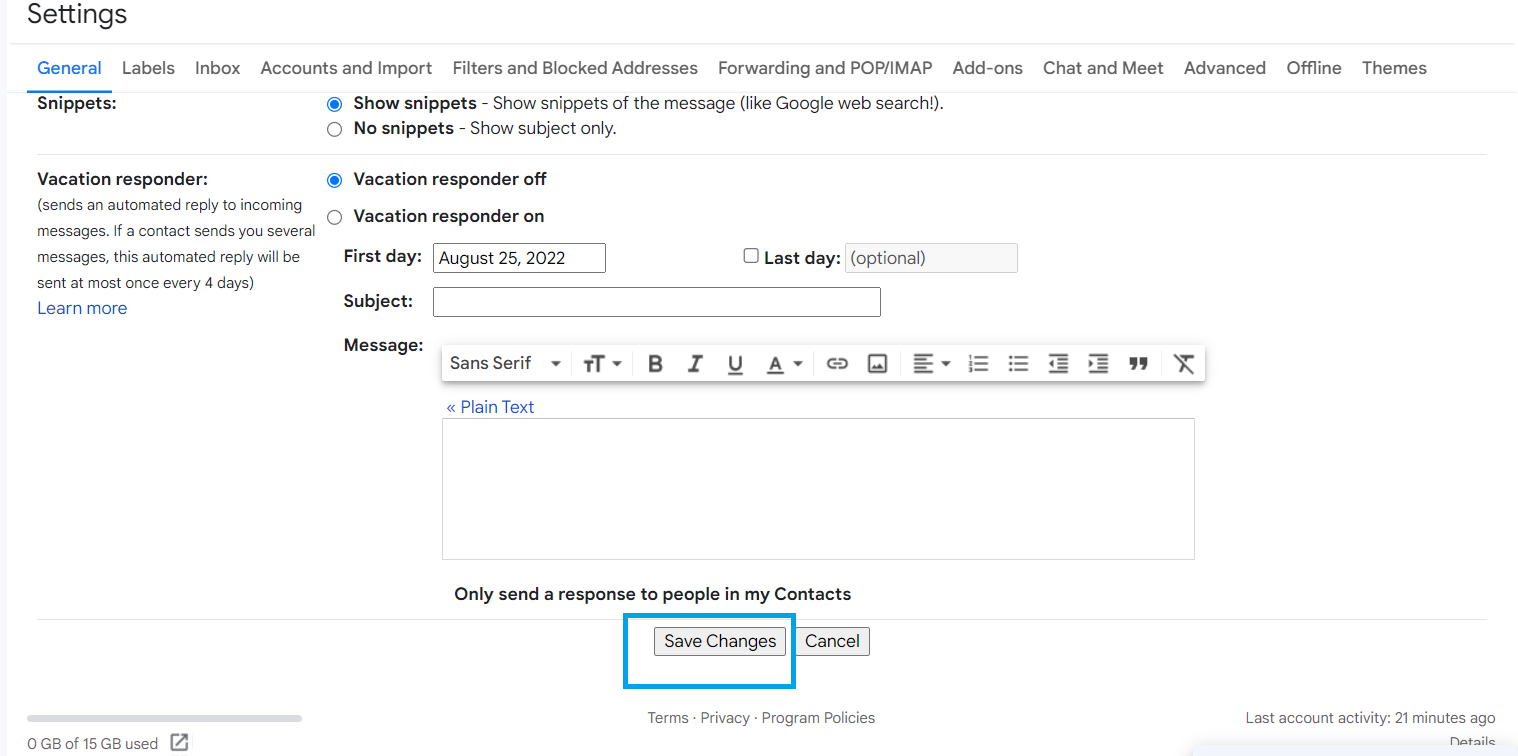
After completing this, scroll down to the button and click on the ‘Save Changes button.
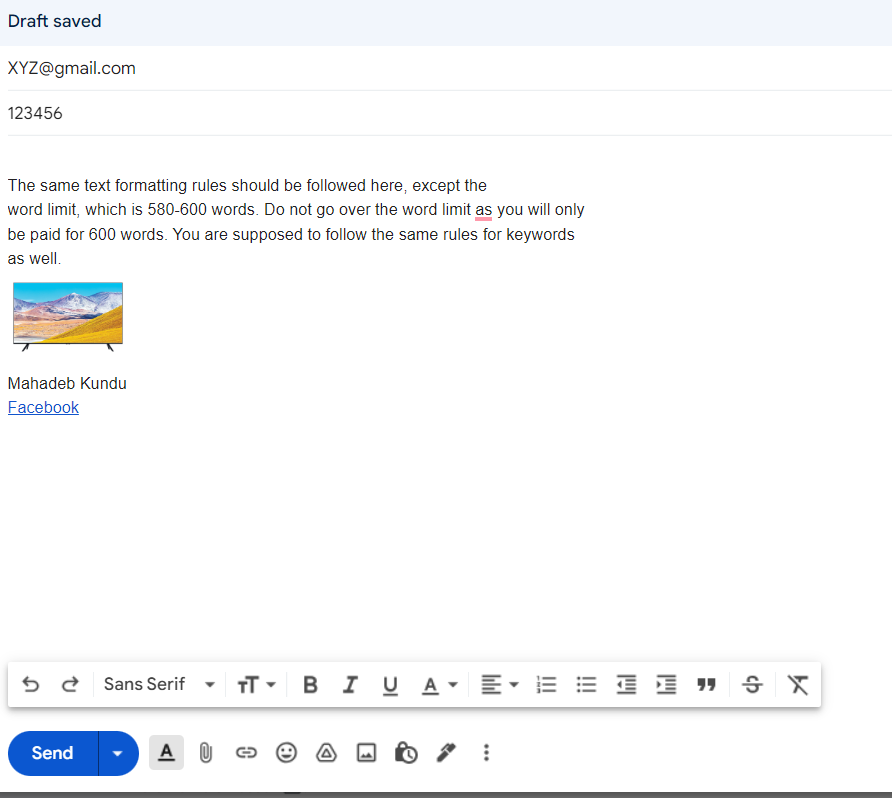
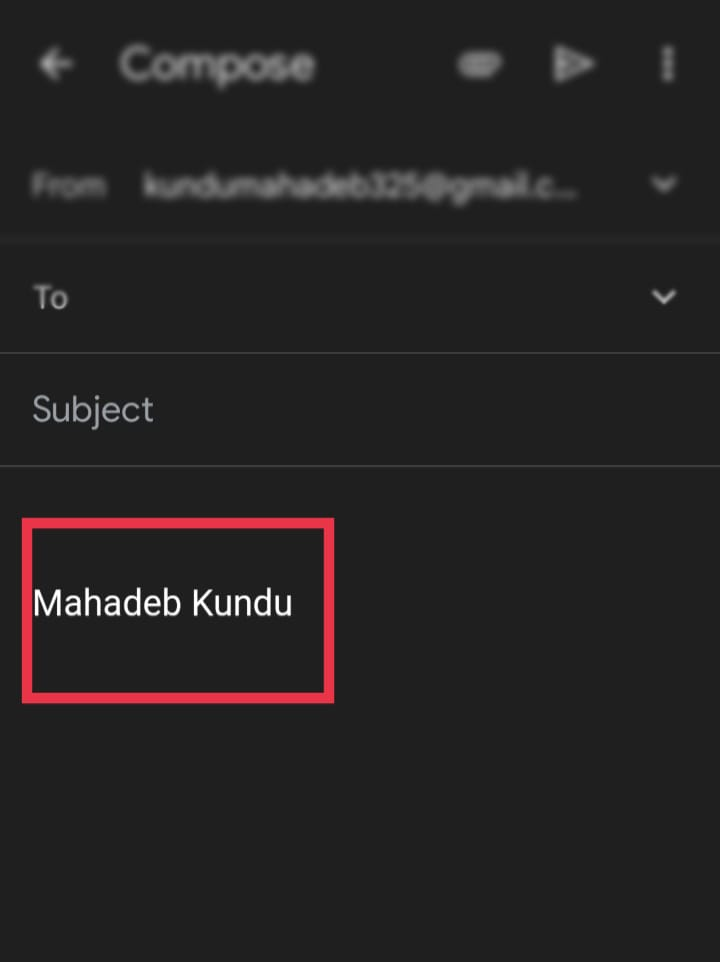
Lastly, when you send an email or reply, your Gmail signature will look like this:
How to Add a Signature in the Gmail Android App?
Nowadays, most of us read our personal and business emails on our mobile devices and reply to them immediately. Let’s look at how to add a signature on Gmail installed on an Android device.
Step 1:
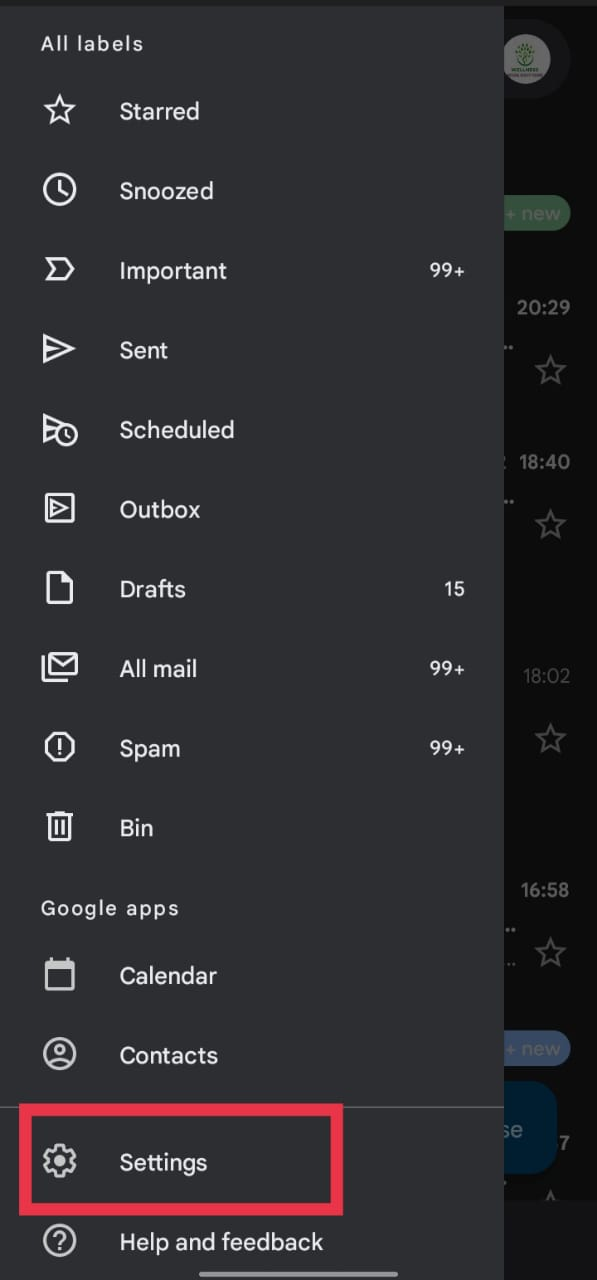
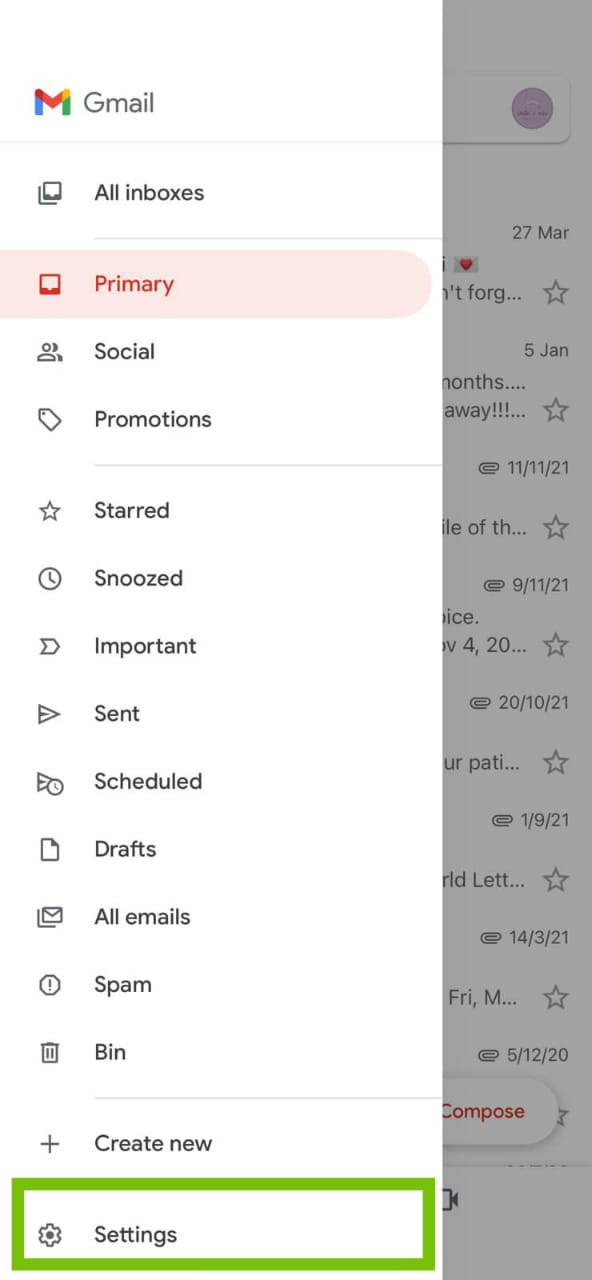
Tap on the Gmail icon of your android phone and click on the three horizontal lines.

Step 2:
Scroll below and click on the ‘Settings’ option
Step 3:
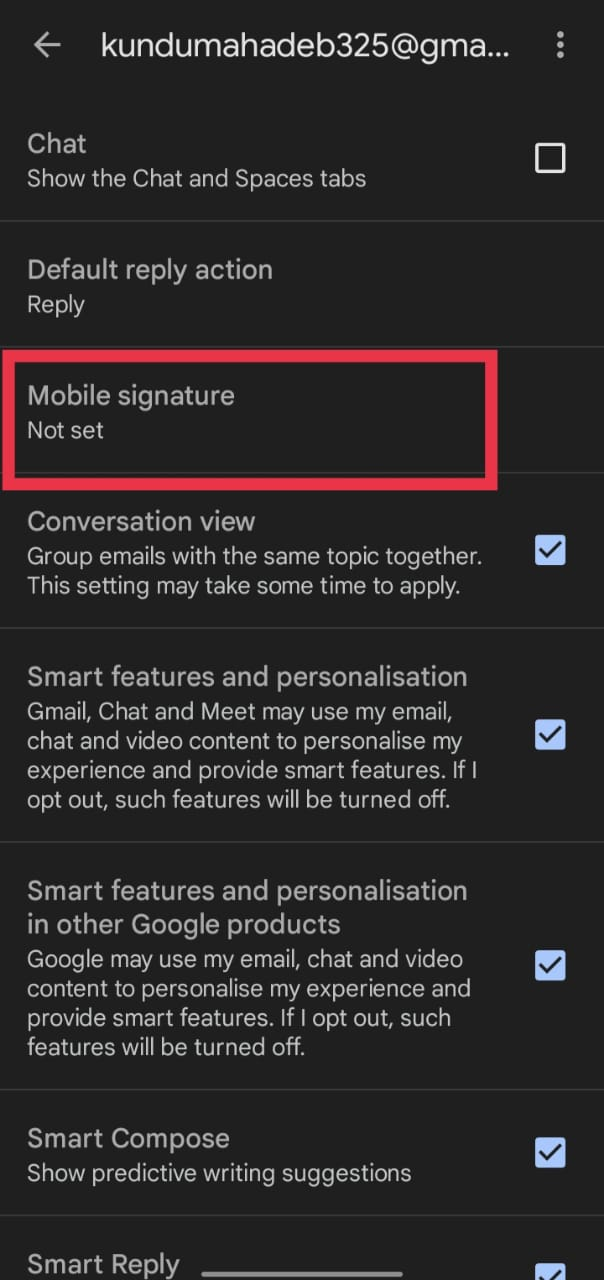
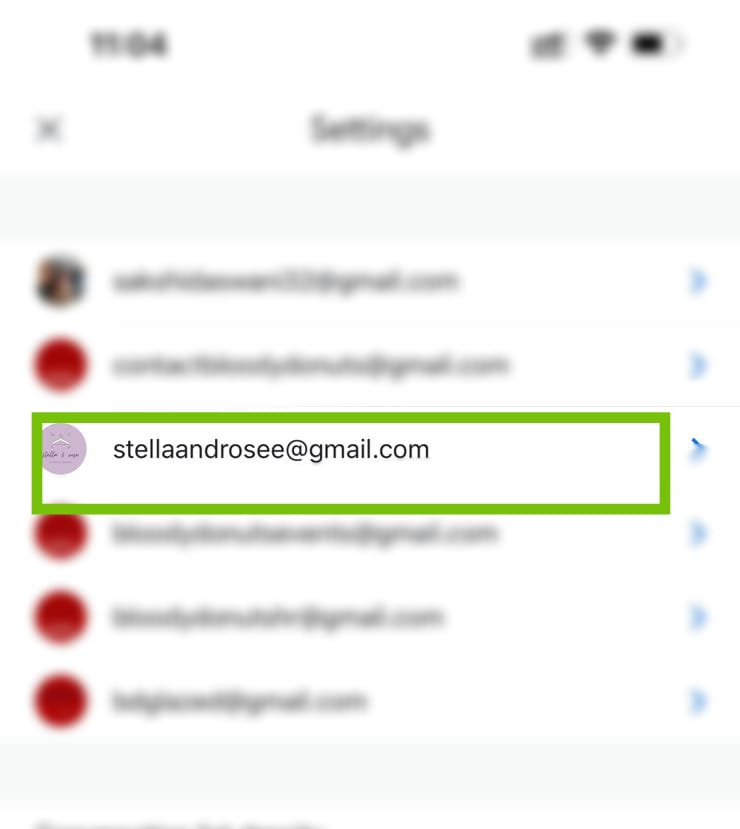
Choose the Gmail account where you want to add a Signature.

Step 4:
Find the ‘Mobile Signature’ text and click on that option.
Step 5:
Upon clicking the button, a blank box will open. You can easily type in anything you want in that box. Press ‘OK’. You can only make and utilize basic text signatures on mobile devices; there aren’t any text formatting choices like there are on a PC.
Lastly, when you send an email or reply on your android phone, your Gmail signature will look like this:
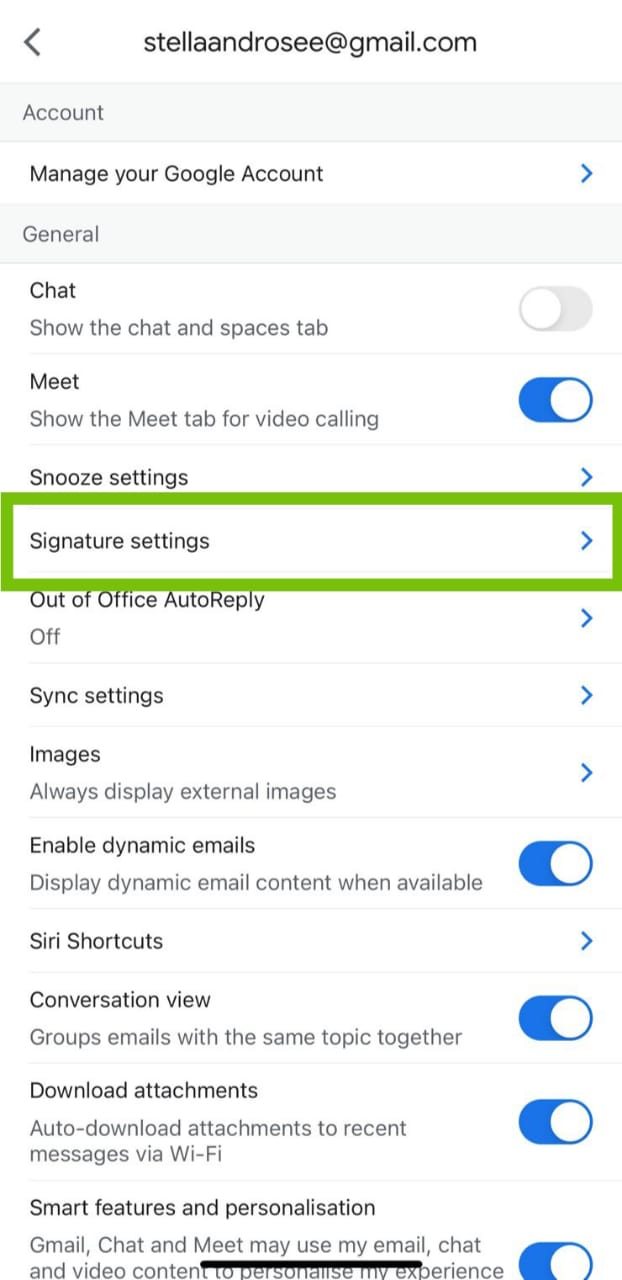
How to Add Gmail Signature on iOS Devices?
Let’s explore how to do it on iOS devices like iPhones and iPads.
Step 1:
Open the Gmail app on your iOS device.
Step 2:
Click on the three lines icon in the left corner and drag it down to the ‘Settings’ option.
Step 3:
Select the Google account to which you wish to add the signature.
Step 4:
Scroll and find the ‘Signature Settings’ option. Click it for the next step.
Step 5:
A new window opens, and toggle the ‘Mobile Signature’ slide to blue.
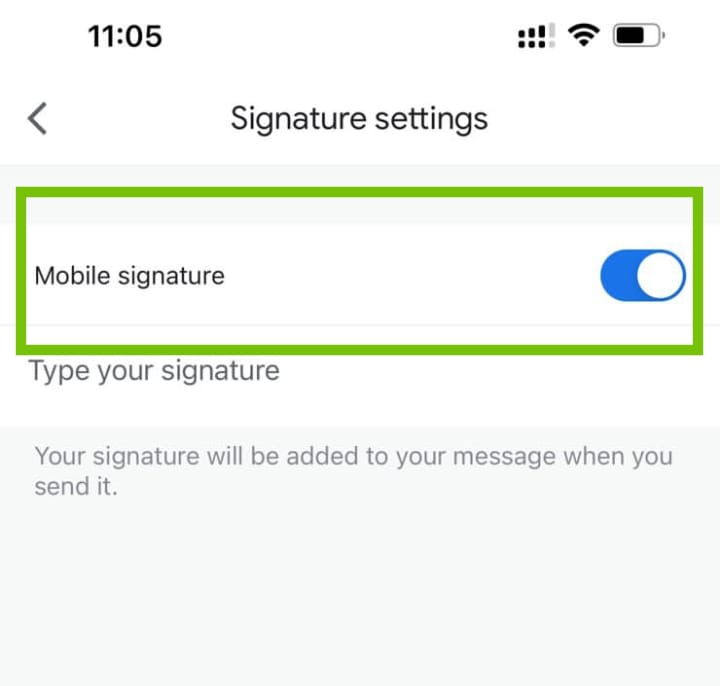
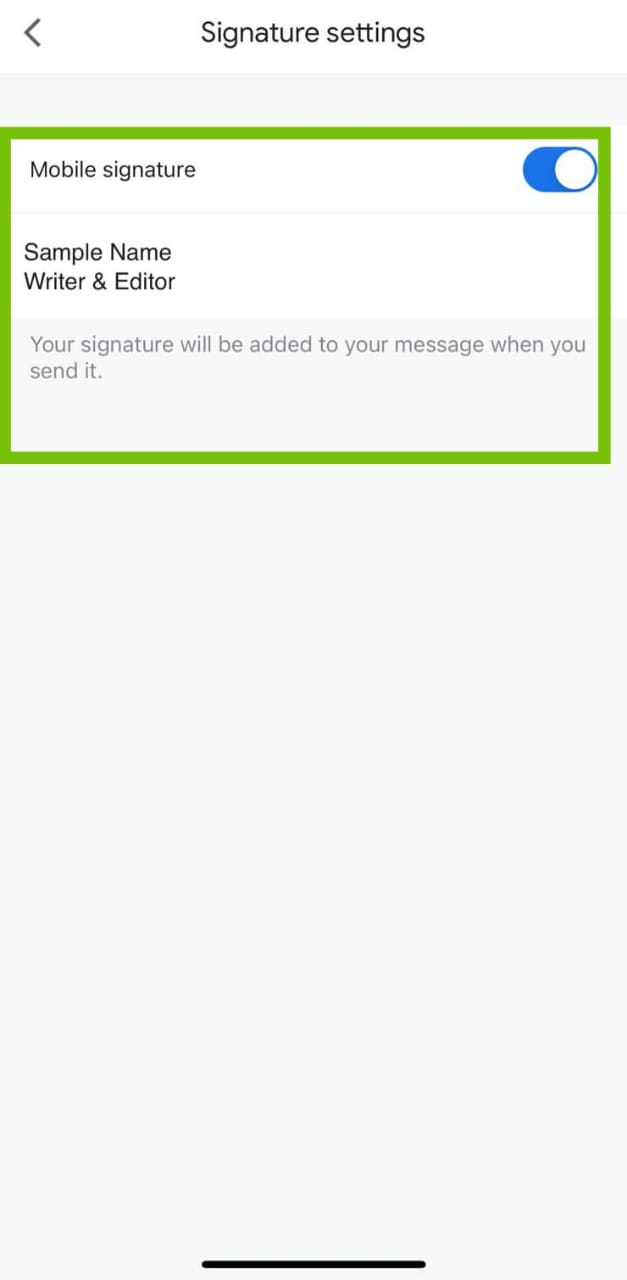
Step 6:
You can add a new signature by tapping the area below. Note that you will not be able to format text using the text formatting features accessible on a PC.
Summary:
Getting accustomed to using your Gmail account is very simple today. When you have a routine that involves signing into Gmail repeatedly, an account signature can make the experience much more enjoyable. Using the various techniques listed above, you may create a Gmail signature via a web interface or an Android, iOS, or Windows device. You must only ensure that each step is followed carefully and with precision.
Share your thoughts in the comments
Please Login to comment...