How To Create Storage Bucket In Gcp Using Terraform ?
Last Updated :
21 Mar, 2024
In Cloud Computing, it is very crucial to provide efficient storage solutions. Google Cloud Platform (GCP) offers an exemplary service through it’s Storage Bucket. Storage Buckets are versatile containers for securely storing data objects, while providing scalability, durability, and global accessibility. However, manually configuring these type of services can be tedious and prone to error. Here comes Terraform in the picture. Terraform is an infrastructure as code tool that manages resource with it’s declarative configuration approach. Using Terraform users can define the desired state of infrastructure, including Storage Buckets, in a concise and reproducible manner. In this article, we will be learning about creating storage bucket using Terraform.
What Is Cloud Storage Bucket In GCP?
A Cloud Storage Bucket in Google Cloud Platform is a globally unique named storage container used for storing data objects. Objects can be anything such as images, videos, documents, and other type of files. It provides high durability and high scalability. Cloud Storage Buckets can be accessed securely from anywhere on the internet. Each Cloud Storage Bucket belongs to a particular Google Cloud Project and can be configured with various settings such as access control, versioning, etc.
Some Key features of Google Cloud’s Cloud Storage Bucket are,
- Durability
- Scalability
- Security
- Multi-region support
- Object Versioning
- Lifecycle Management
- Integration with other GCP services
What Is Terraform ?
Terraform is an Open-sourced, infrastructure as Code (IaC) tool developed by HashiCorp. Terraform enables users to define and provision infrastructure resources such as virtual machines, networks, storage, and more using declarative configuration files. With Terraform, infrastructure can be managed as code which enables versioning, collaboration, and automation of provisioning tasks across various cloud providers and on-premise infrastructure.
Some important features of Terraform includes as follows:
- Declarative Configuration
- Infrastructure as Code (IaC)
- Multi-Cloud Support
- State Management
- Modularity
Create Storage Bucket In GCP Using Terraform: A Step-By-Step Guide
Step 1: Setup Terraform
- To use Terraform, you need to make sure that Terraform is installed in your computer system. To check if Terraform is installed or not, run the following command in Command Prompt.
terraform --version
Output
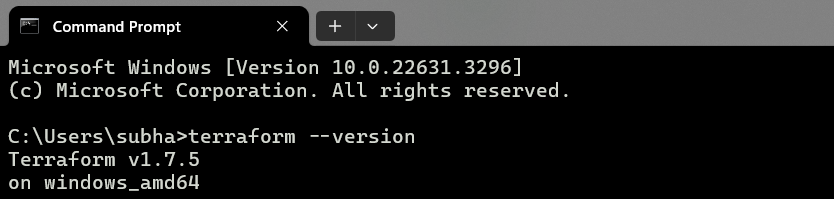
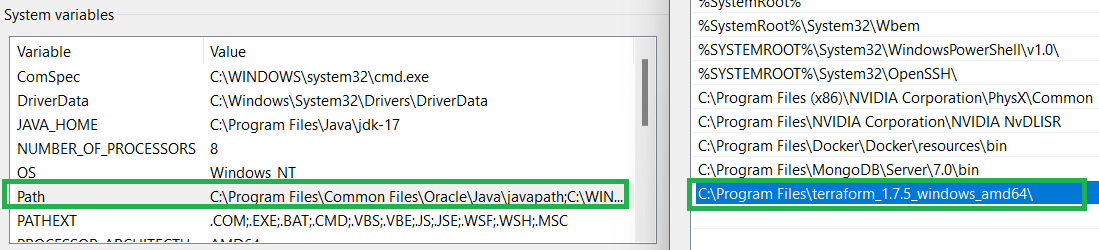
- As Terraform is installed in my system, you can see it is showing it’s version. If you don’t see this output then do the followings,
- Download the Terraform installation file.
- Unzip the downloaded file.
- Copy the path from the directory.
- In environment variable settings, make a entry using this under Path.
Step 2: Install Google Cloud SDK
Cloud SDK stands for Google Cloud Software Development kit. It is a set of tools and libraries that enables developers to interact with Google Cloud Platform (GCP) services using command line. Using Cloud SDK we can manage GCP resources, deploy applications, and perform other tasks directly from Terminal. To use terraform with Google Cloud Platform we need this Google Cloud SDK to be installed in our computer system.
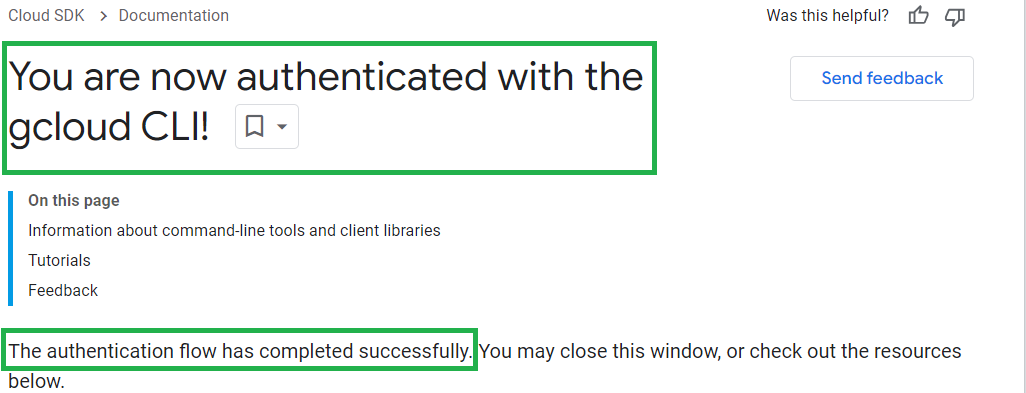
- Download the Cloud SDK setup file and execute the .exe file to install the software. Once you finish installing, Windows terminal will be open automatically and perform the network diagnosis and ask your permission to log in. Enter Y.
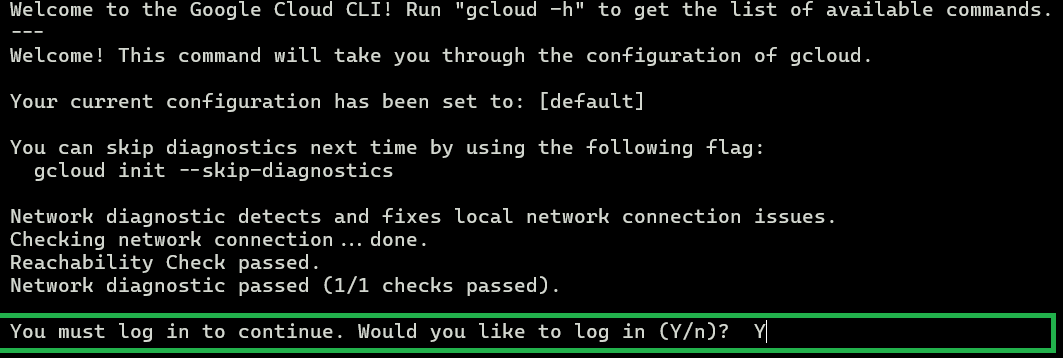
- This will open the web browser where you have to choose the Google Account which has a valid subscription and allow the permission asked. And you will be connected to the Google Cloud CLI.
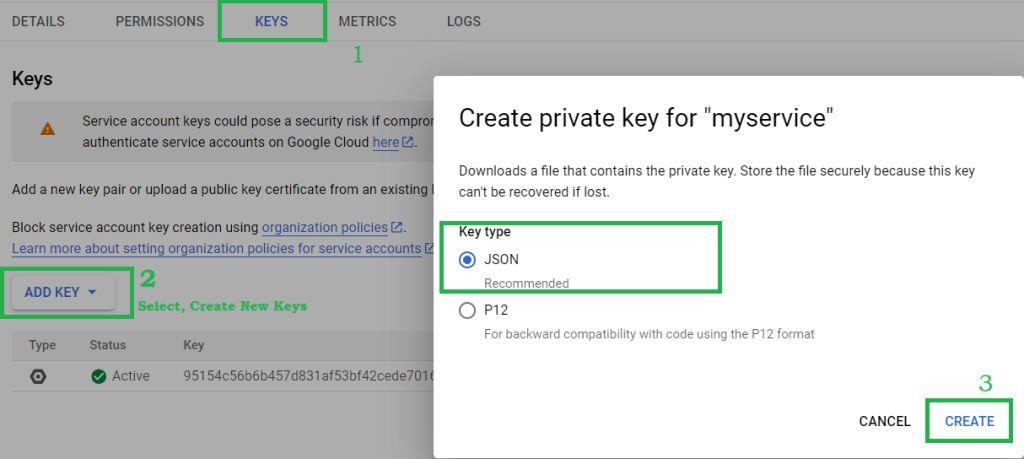
Step 3: Generate JSON Key
- To get connected with the Google Cloud Platform we will need a service account key which will help us authenticate the user wit the cloud provider.
- In Google Cloud Console, search for service account.
- In service account’s page click on create service account and give name and service account Id for the service account, and click on Create.

- Click on the Account’s name and go to the Keys section and select Create new keys. Select Key type as JSON and click on Create. This will download the JSON key in your computer.
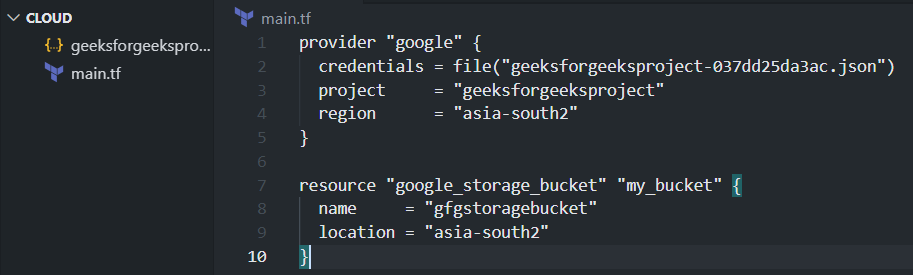
Step 4: Write Terraform Configuration
- Open any IDE of you choice and create a new directory
- Copy the JSON key file in the directory.
- In the working directory create a new file and name is “main.tf” and use the following configuration format in the main.tf.
provider "google" {
  credentials = file("<PATH_TO_YOUR_GCP_SERVICE_ACCOUNT_KEY_JSON>")
  project     = "<YOUR_GCP_PROJECT_ID>"
  region      = "<YOUR_GCP_REGION>"
}

resource "google_storage_bucket" "my_bucket" {
  name     = "my-unique-bucket-name"
  location = "<BUCKET_LOCATION>"
}
Provider Block:
- The credential attribute specifies the JSON file containing the service account key for authenticating using GCP.
- Project specifies the GCP project ID where the resources will be created.
- Region specifies the Google Cloud region where resources will be utilized.

Resource Block:
- Name specifies the unique name for the Storage bucket to be created.
- Location specifies the location where bucket’s data will be stored.
Step 5: Execute Terraform Configurations
- Open terminal in the directory you have the JSON key and main.tf. Now to initialize Terraform and download the necessary plugins, run the following command
terraform init
Output:

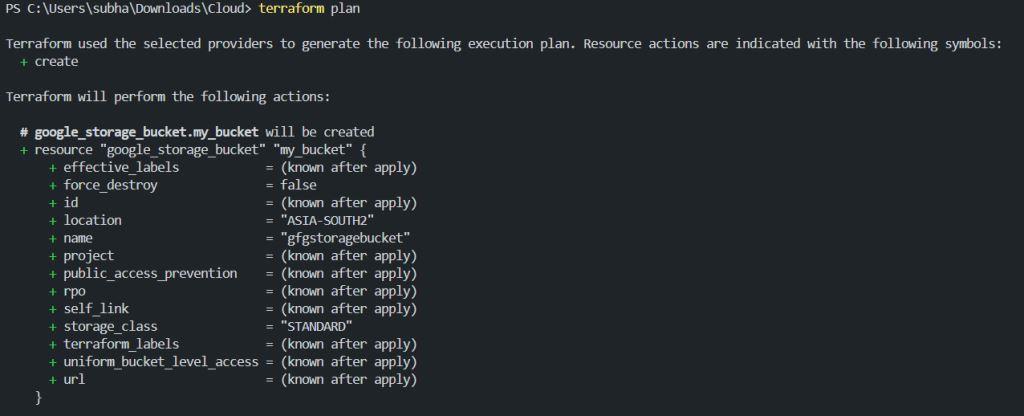
- Now run, the following command to preview the changes Terraform will make.
terraform plan
output:
- After successful review of the plan, go ahead and execute the following line of command
terraform apply
- This will show you the plan again for review and ask for your confirmation. Enter yes to continue and the Storage Bucket will be created.
Output:
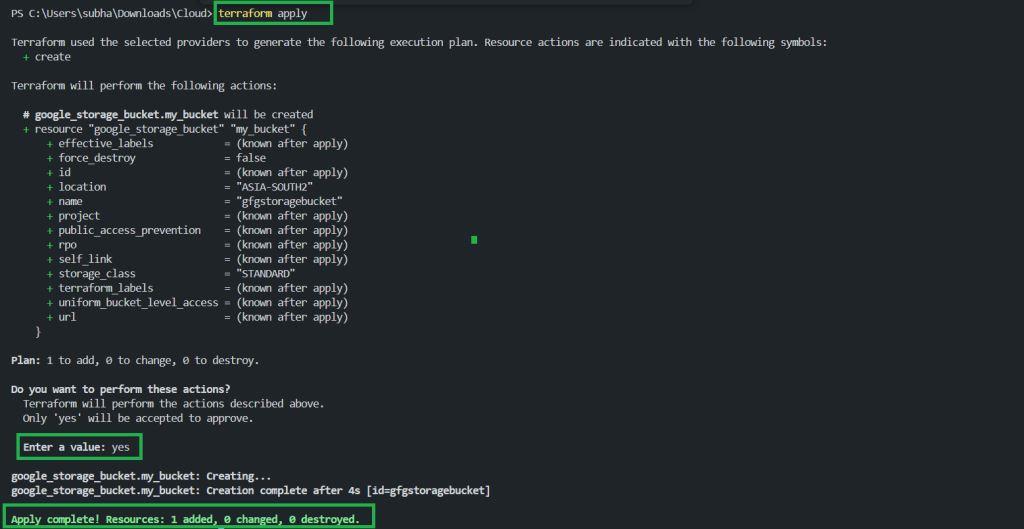
- As you can observe from the above picture, we the Storage bucket is created successfully.
Step 6: Verify Storage Bucket Creation
Now to verify the creation of the Storage Bucket,
- Open GCP Cloud Console in your web browser.
- Select Cloud Storage and then click on buckets.
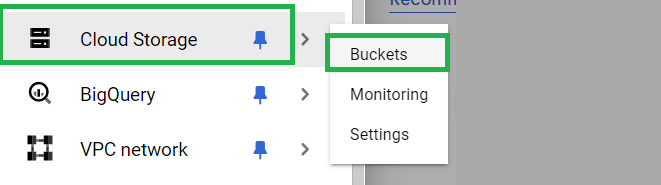
- In the Buckets page, you should be able to see the Cloud storage bucket we have created.

- As you can observe, the bucket with same unique name is present in Cloud console with the configurations we have made earlier. Hence, we have successfully created a Storage Bucket in Google Cloud Platform using Terraform.
Conclusion
Using Terraform to provision storage buckets in Google Cloud Platform provides a convenient and efficient way to manage infrastructure resources. We have use Terraform to easily create, update, and delete storage buckets while maintaining version control and consistency. You can further upload data in the bucket or integrate the storage bucket with you application and use the cloud storage services.
Create Storage Bucket In GCP Using Terraform – FAQ’s
Can I Create Storage Bucket Using Terraform In GCP ?
Yes, you can perform any resource provisioning services in GCP including Storage Bucket using Terraform. You need to have Google SDK installed in your system, and you should have service account keys for your GCP project.
How Can I Enable Versioning For My Storage Bucket Using Terraform?
You can enable versioning for a storage bucket by adding the ‘versioning’ block to your Terraform configuration and setting the enabled attribute to true.
Can I Create Multiple Storge Buckets In One Configuration File In Terraform?
Yes, You can create multiple storage buckets using one configuration file in Terraform. Each resource block in terraform should have a unique name and configuration.
What Is The Maximum Object Size To Be Uploaded In Storage Bucket?
You can upload any object to GCP bucket which is less than 5TB in size.
What Will Happen If Error Occurs During Execution Of Terraform Apply ?
If error occurs during execution, Terraform will halt the process and display error messages. The execution will not make any changes to resources until errors are resolved.
Share your thoughts in the comments
Please Login to comment...