Hibernate – One-to-Many Mapping
Last Updated :
12 Mar, 2024
Hibernate is used to increase the data manipulation efficiency between the spring application and the database, insertion will be done is already defined with the help of hibernating.
- JPA (Java persistence API) is like an interface and hibernate is the implementation of the methods of the interface.
In this article, we will discuss One-to-Many Mapping in the Hibernate. Let’s understand the One-to-many mapping with the help of a real-life example. Bike manufacturers can manufacture multiple models of the bike, but the same bike model cannot be manufactured by multiple manufacturers.
Syntax:
This mapped variable of the other tables is responsible for mapping between two tables.
@oneToMany(mappedby=”nameofmappedvariable”)
For this example, we will map the id field of manufactures to the manufacture_id of the model entity.

1. Configuration of Hibernate One-to-Many Mapping
1.1 Go to this spring initializr and fill in the details mentioned.
- Project: Maven
- Language: Java
- Spring Boot: 2.5.7
- Packaging: JAR
- Java: 11
- Dependencies:
- Spring Web
- Spring Data JPA
- MySql Driver
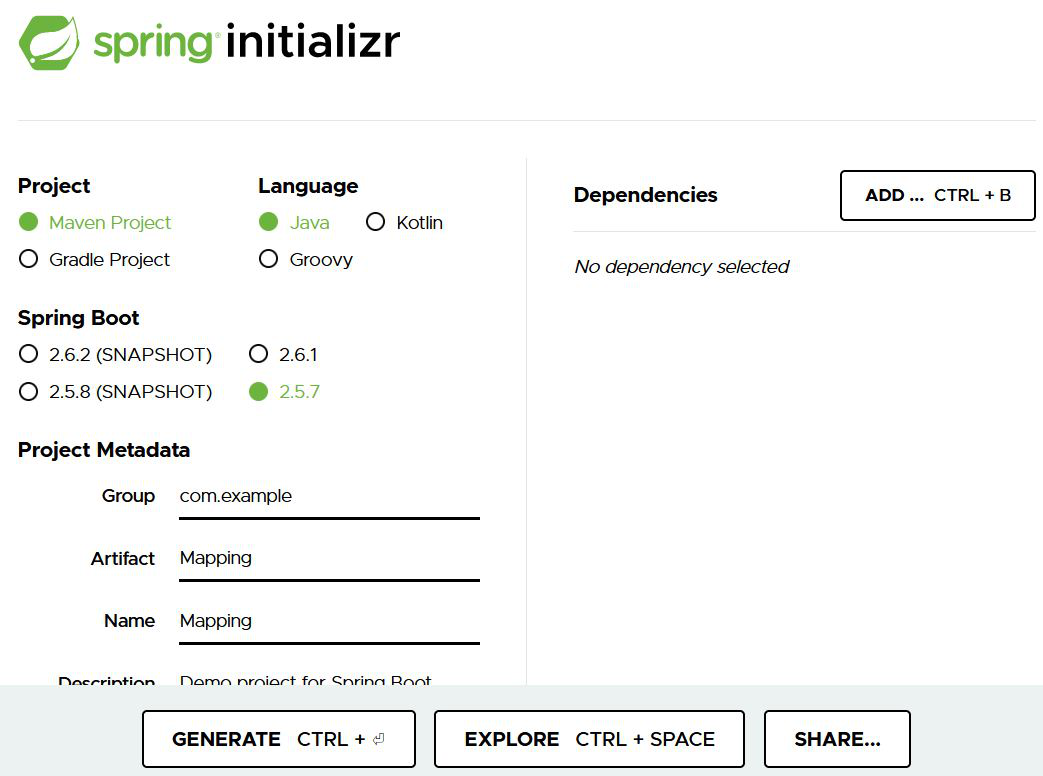
Click on Generate which will download the starter project.
1.2 Extract the zip file
Now open a suitable IDE and then go to File > New > Project from existing sources > Spring-boot-app and select pom.xml. Click on import changes on prompt and wait for the project to sync as pictorially depicted below as follows:

1.3: Adding the necessary properties in the application.properties file
Database configuration required for connection of Mysql database to the Spring Boot Application.
spring.datasource.username=root
spring.datasource.password=Aayush
spring.datasource.url=jdbc:mysql://localhost:3306/mapping
spring.jpa.hibernate.ddl-auto=update
1.4 Folder directory creation
Go to src > main > java > com > example > Mapping and create two files in the models folder i.e Manufactures.java and Model.java

2. Implementing the Application
Over here, we will implement the
- Entity – Manufacures, Model
- Repository – ManufacuresRepo, ModelRepo
- Application class
2.1 Manufactures.java
This contains the entity Manufactures, which contains the required associated fields.
- id – int type
- manufactures_name – string type
- models – mapped with one-to-many mapping
- constructors, getters, setters, etc.
Javapackage com.example.Mapping.Models;
import javax.persistence.*;
import java.util.List;
@Entity
public class Manufactures {
// Unique identifier for the manufacturer
@Id
@GeneratedValue(strategy = GenerationType.IDENTITY)
private int id;
// Name of the manufacturer
private String manufactures_name;
// A manufacturer can have many models
@OneToMany(mappedBy = "manufacturer")
private List<Model> models;
// Constructor with both id and name
public Manufactures(int id, String manufactures_name) {
this.id = id;
this.manufactures_name = manufactures_name;
}
// Default constructor
public Manufactures() {
}
// Getters and setters for id and name
public int getId() {
return id;
}
public void setId(int id) {
this.id = id;
}
public String getManufactures_name() {
return manufactures_name;
}
public void setManufactures_name(String manufactures_name) {
this.manufactures_name = manufactures_name;
}
// Getter for models
public List<Model> getModels() {
return models;
}
// Setter for models
public void setModels(List<Model> models) {
this.models = models;
}
}
2.2 Models (Mapped by table)
This contains the entity Model with various fields and methods-
- id – int type
- name – String type
- ob – object mapped with manufacture_id as Many-to-one
- Constructors, getters, setter, etc.
Javapackage com.example.Mapping.Models;
import javax.persistence.Entity;
import javax.persistence.Id;
import javax.persistence.JoinColumn;
import javax.persistence.ManyToOne;
@Entity
public class Model {
// Unique identifier for the model
@Id
private int model_id;
// Name of the model
private String name;
// A model belongs to one manufacturer
// Foreign key referencing the manufacturer table
@ManyToOne
@JoinColumn(name = "manufacture_id")
private Manufactures manufacturer;
// Constructor with all fields
public Model(int model_id, String name, Manufactures manufacturer) {
this.model_id = model_id;
this.name = name;
this.manufacturer = manufacturer;
}
// Default constructor
public Model() {
}
// Getters and setters
public int getModel_id() {
return model_id;
}
public void setModel_id(int model_id) {
this.model_id = model_id;
}
public String getName() {
return name;
}
public void setName(String name) {
this.name = name;
}
public Manufactures getManufacturer() {
return manufacturer;
}
public void setManufacturer(Manufactures manufacturer) {
this.manufacturer = manufacturer;
}
}
3. Adding the JPA repository
3.1 ManufactureRepo
This Interface contains the forms the bridge of entity Manufactures to the Database
Javapackage com.example.Mapping.Repositories;
import com.example.Mapping.Models.Manufactures;
import org.springframework.data.jpa.repository.JpaRepository;
/**
* Spring Data JPA repository for the Manufacture entity.
* This interface extends JpaRepository and provides basic
* CRUD operations for Manufactures entities.
*/
public interface ManufacturesRepo extends JpaRepository<Manufactures, Integer> {
}
3.2 ModelRepo
This Interface contains the forms the bridge of entity Model to the Database
Javapackage com.example.Mapping.Repositories;
import com.example.Mapping.Models.Model;
import org.springframework.data.jpa.repository.JpaRepository;
/**
* Spring Data JPA repository for the Model entity.
* This interface extends JpaRepository and provides basic
* CRUD operations for Model entities.
*/
public interface ModelRepo extends JpaRepository<Model, Integer> {
}
3.3 MappingApplication
Driver class for Spring Boot application to test the One-to-One Mapping of hibernate.
- This Spring Boot application initializes and saves data using JPA repositories.
- It creates a Manufacturer(“Honda”) entity and two associated Model (“AYZ” and “ZET”) entities with a one-to-many relationship.
- The data is then stored in corresponding repositories during the application’s run.
Javapackage com.example.Mapping;
import com.example.Mapping.Models.Manufactures;
import com.example.Mapping.Models.Model;
import com.example.Mapping.Repositories.ManufacturesRepo;
import com.example.Mapping.Repositories.ModelRepo;
import org.springframework.beans.factory.annotation.Autowired;
import org.springframework.boot.CommandLineRunner;
import org.springframework.boot.SpringApplication;
import org.springframework.boot.autoconfigure.SpringBootApplication;
/**
* Spring Boot application for mapping relationships between Manufactures and Models.
*/
@SpringBootApplication
public class MappingApplication implements CommandLineRunner {
// Injecting Manufactures and Model repositories using autowiring
@Autowired
private ManufacturesRepo manufacturesRepo;
@Autowired
private ModelRepo modelRepo;
public static void main(String[] args) {
SpringApplication.run(MappingApplication.class, args);
}
@Override
public void run(String... args) throws Exception {
// Creating a new Manufactures object with ID 1 and name "Honda"
Manufactures data = new Manufactures(1, "Honda");
// Saving the Manufactures record
manufacturesRepo.save(data);
// Creating two new Model objects associated with the "Honda" manufacturer
Model model1 = new Model(1, "AYZ", data);
Model model2 = new Model(2, "ZET", data);
// Saving the Model records
modelRepo.save(model1);
modelRepo.save(model2);
}
}
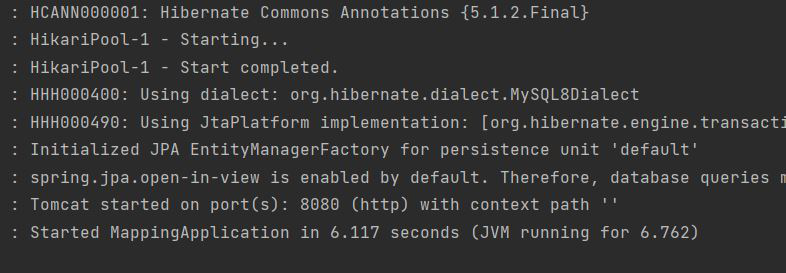
Run the main application:
Console log of project running.
Manufacture Table
Database view of manufactures table:

Model Table
Database view of model table:

The below image depicts the link between the two tables.
Share your thoughts in the comments
Please Login to comment...