Are you facing an I/O Device Error and frustrated? Then you are at the right place, In this article, we will solve the I/O device Error and will discover the various causes of this error and various methods to fix this error.
Before going in-depth into the methods to fix this error let us understand a little bit about this error and what are the causes that lead to this error in our systems.
What is the I/O Device Error?
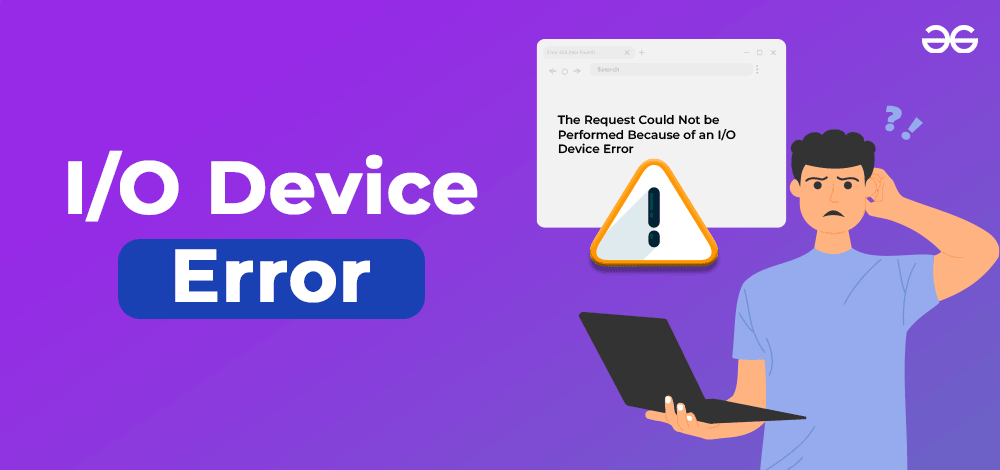
The error message “The Request Could Not be Performed Because of an I/O Device Error” is a common error message that we might encounter when we try to access the data from our USB flash drives, External Hard drives, CDs, or any other external storage devices. This I/O basically (Input/Output ) Error is generally caused when the external drive is corrupted or may not be plugged correctly. Rather than this error message you might also face error messages like “Only part of a ReadProcessMemory or WriteProcessMemory request was completed” or ” I/O Error codes: error 6, error 21″.
What are the Causes of the I/O Device Error?
- Outdated Device Drivers: The device drivers you are using might be outdated which causes this error as the external device is not supported by them.
- Corrupted Data: The data you are trying to access from the external device might be corrupted or tampered with. with
- Virus or Malware: Your system might be affected by a virus or malware that is causing this error.
- Hardware Conflicts: The external ports might be damaged in your system into which you have plugged your external device like USB ports.
- Insufficient Permission: The user may not have permission to access the data from the external drive. Try to access it as an administrator.
- Loose Connection: This is a very silly cause still this can be the cause of this error. You might have not plugged the external drive correctly into your PC. Double-check the connection.
Now that we know a little about the I/O device error and its major causes let’s deep dive into the methods through which we can fix this error.
Method 1: Update the Device Drivers
The most common cause of this I/O device error is outdated or unsupported device drivers. We can get the latest version of the device drivers to fix this error. Follow the below steps to update the device drivers:
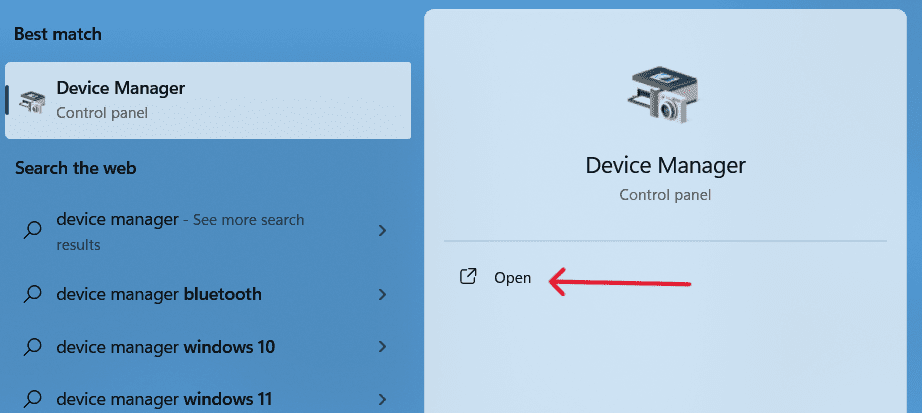
Step 1: Search for the device manager in Start and open it.
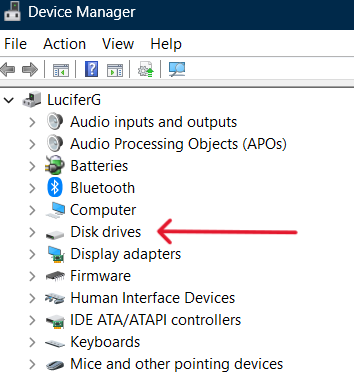
Step 2: Search for Disk drivers and expand it.
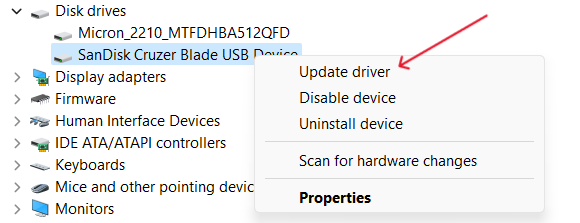
Step 3: Right-click on the External disk driver you are using and click on update driver. In my case, it is a Sandisk Cruzer blade.
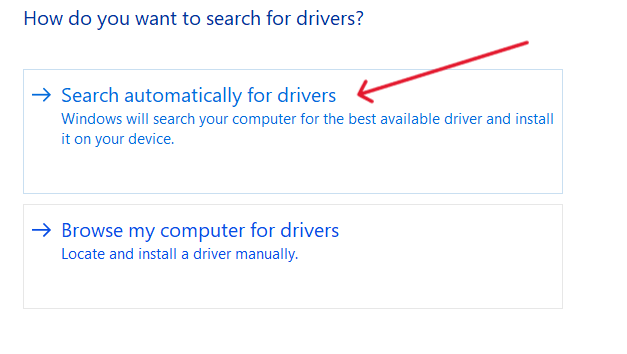
Step 4: Select search automatically for drivers.
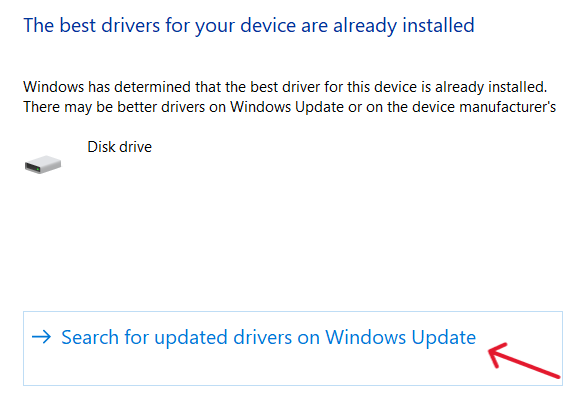
Step 5: Click on Search for updated drivers on Windows update.
Step 6: Click on Check for updates and the drivers will be installed automatically.

Step 7: Once the update is complete restart your computer and your error will be fixed.
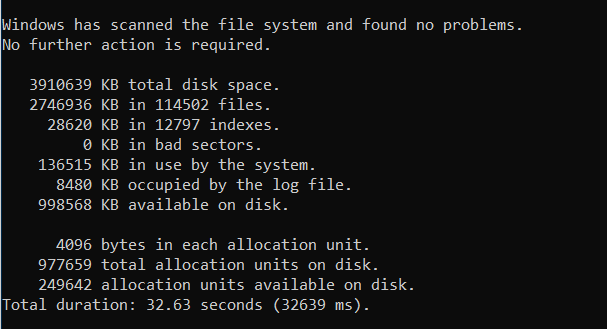
Method 2: Use the Check Disk Utility
If the above method didn’t solve your issue then the issue might be on your external drive’s end. To fix the corrupted external drive we can use the Window’s built-in utility called Check Disk which scans your drive for errors and fix them directly. Follow the below steps to use the check disk utility.
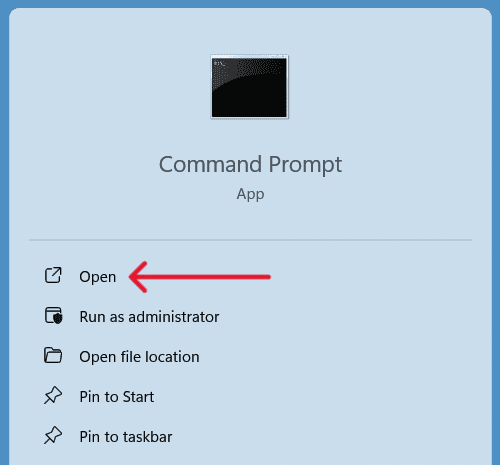
Step 1: Search for cmd at the start and open the command prompt.
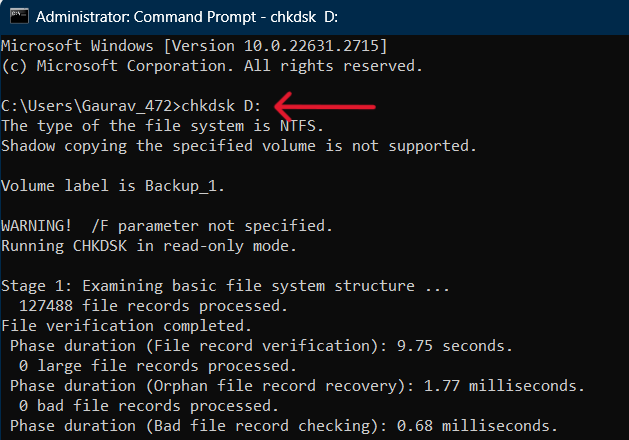
Step 2: Type the following command in the command prompt and press enter.
chkdsk D:
Note: Replace the letter D with your external drive’s letter. In your case it can be E/F or anything else. Do check that before executing the command.
Step 3: Wait for a little bit till the scan is completed and the drive will be fixed if it has any errors.
Be patient during the scan don’t close this window in the middle
Step 4: Restart your computer once the scan is completed.
Method 3: Use the Diskpart Utility.
The diskpart is also a built-in Utility to manage disks, external drives, partitions, and volumes. We can clean our corrupted drive using the diskpart utility to fix the I/O device error. Follow the below steps to use the diskpart utility.
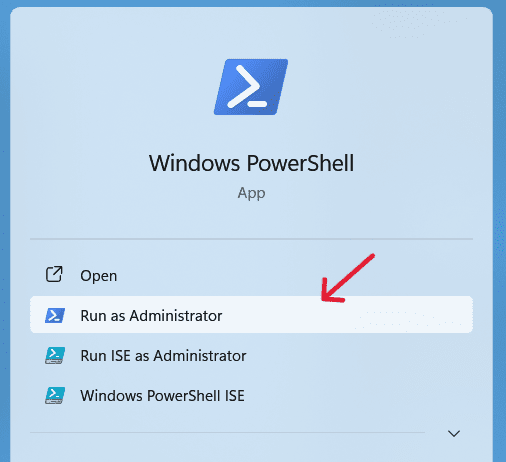
Step 1: Search for Windows Powershell in Start and open it in administrator mode.
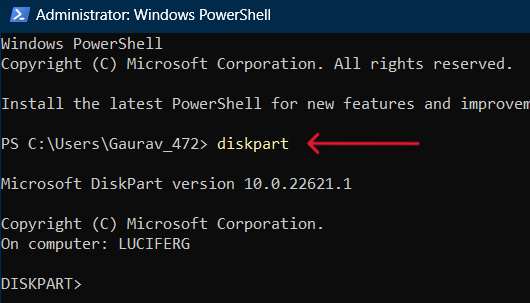
Step 2: Type the following command in the PowerShell and press enter.
diskpart
Step 3: Type this command and again press enter to see the available disks of your system.
list disk
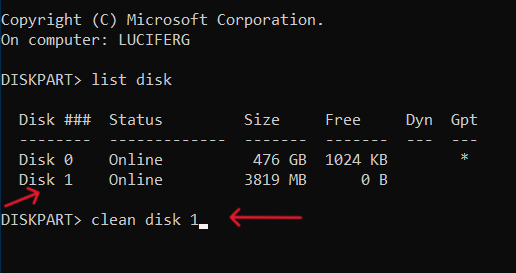
Step 4: You will be able to see all the drives connected to your device. In my case, my corrupted drive is the disk 1. So I will clean it using the following command. Type this command and replace the disk number as per your needs and press enter.
clean disk 1
Step 5: Restart your computer once the command is executed successfully.
Method 4: Change the File system of your External Device
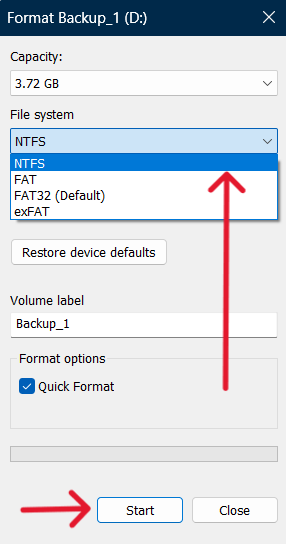
There are many cases when you are trying to access data from an external drive like a USB flash drive whose file system mode is not supported by your system. For example, your system supports FAT-32 format but the external drive is set using the NTFS format. So to fix this error we must ensure that the correct format of the file system has been assigned to your external drive. Follow the below steps to assign the right file system for your external drive.
Step 1: Plug in your external drive.
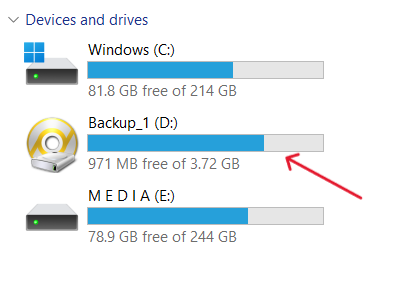
Step 2: Navigate to your external drive by going to this PC.
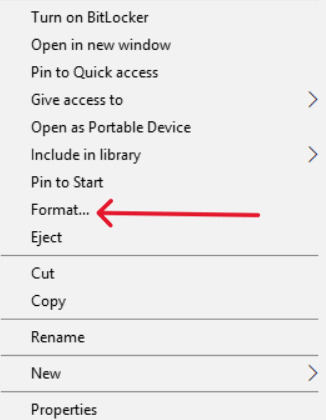
Step 3: Right-click on your external drive and select the format option.
Step 4: Select the appropriate file system mode that your system supports and click on Start.
Step 5: Once the format is complete eject your external drive and then again plug it and use it without any errors.
Note: Make sure to backup your files in the external drive before formatting it.
Method 5: Change the Data Transfer Mode of your IDE Controllers.
In a few cases, windows might use the data transfer mode which is not supported by your external drives. To fix this we can enable the DMA mode of our IDE ATA/ATAPI controllers. To enable the DMA mode follow the below procedure.
Step 1: Search for the device manager in Windows and open it.

Step 2: Expand the IDE ATA/ATAPI controllers.
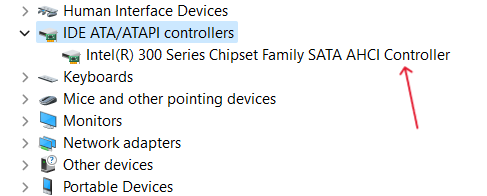
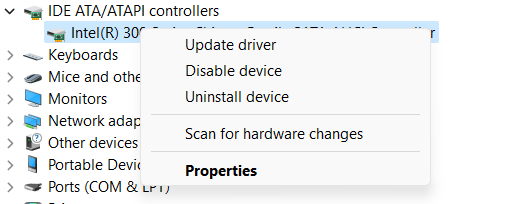
Step 3: Right-click on the available controller and open the properties.
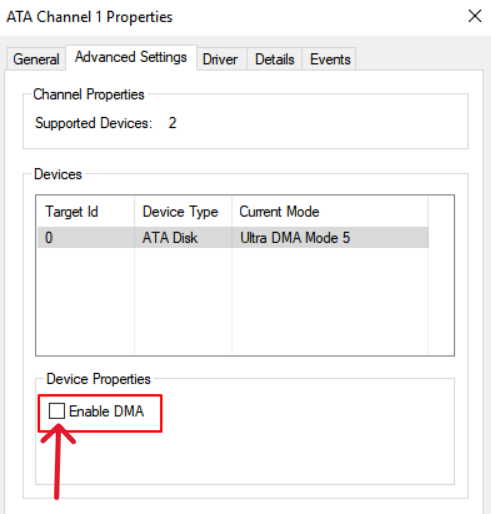
Step 4: Go to advanced settings and enable the DMA mode and click on OK.
Step 5: Restart your PC and now try to use the external drive the error will be resolved.
Performing a clean boot on your Windows will help you to track any 3rd party background process that might be causing troubles on your system which results in the following error. Follow the below steps to perform a clean boot.
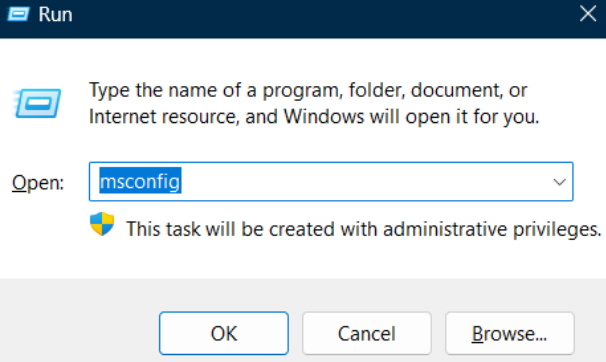
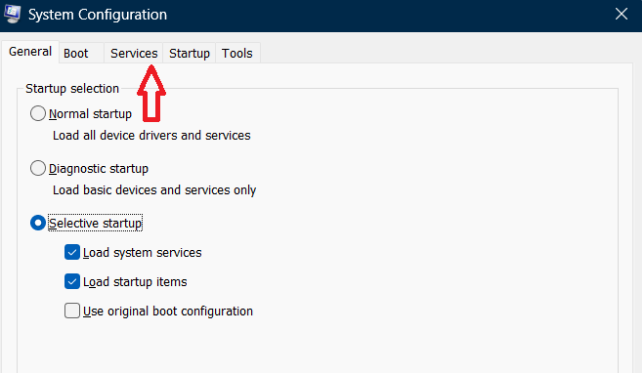
Step 1: Press the Windows key + R to open the run dialogue box. Now, type msconfig and press enter.
Step 2: Enable the use original boot configuration option and navigate to services.
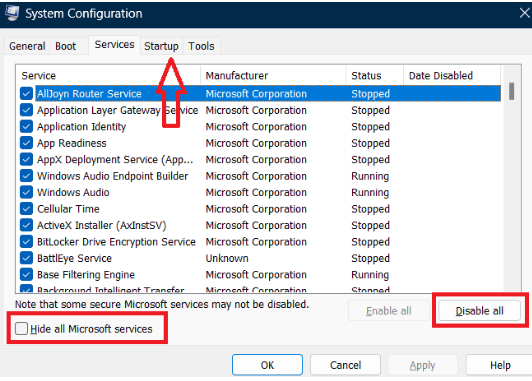
Step 3: Check the Hide all Microsoft services option and click on the Disable All option.
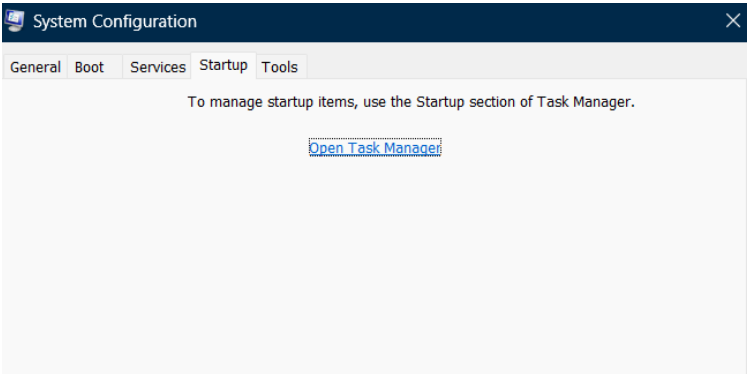
Step 4: Navigate to Startup and click on Open Task Manager.
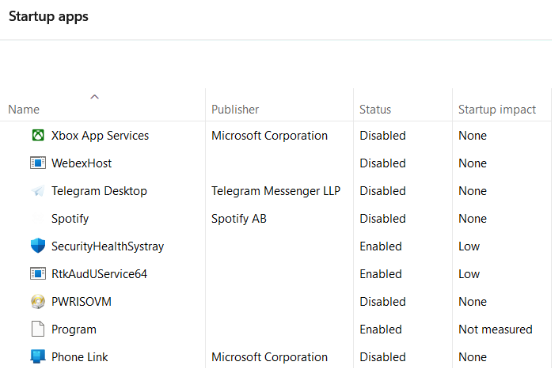
Step 5: Now Right-click on each task and disable it.
Step 6: Restart your PC now and try to plug in the external drive the error will be resolved.
Method 7: Change the External Drive’s Letter.
You must have noticed that a letter like E or F is associated with your external drive. Sometimes a specific letter might be reserved by some permanent storage drive. So to fix this you can change the drive letter which is causing the I/O device error. Follow the below-mentioned steps to change the Drive’s letter.
Step 1: Search for disk management in Windows and open it.
 You will see the following interface after opening this disk management
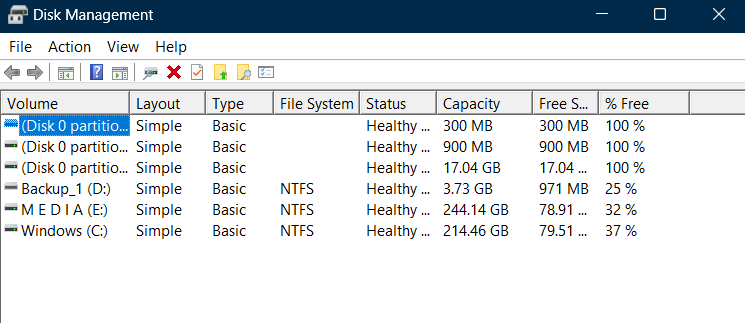
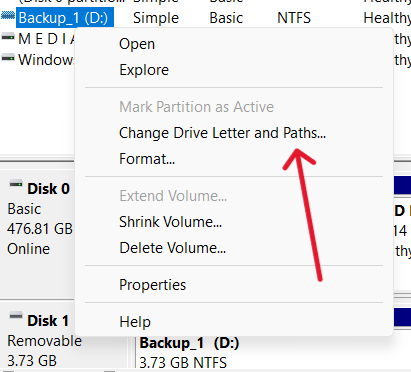
Step 2: Right-click on the external drive and click on Change drive letter and paths.
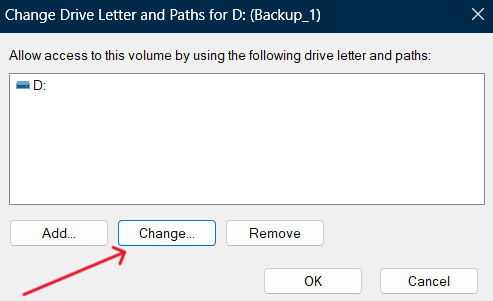
Step 3: Click on Change.
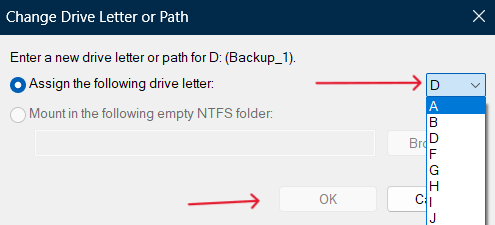
Step 4: Select the drive letter of your choice from the drop-down and click on OK.
Step 5: Eject your external drive and plug it the I/O device error will be resolved now hopefully.
Method 8: Check for Malware or Viruses
In some cases, your external drive might be corrupted or damaged by malware which can be the cause for the I/O device error. To fix this we can use Windows Defender to scan for viruses or malware and get rid of them.
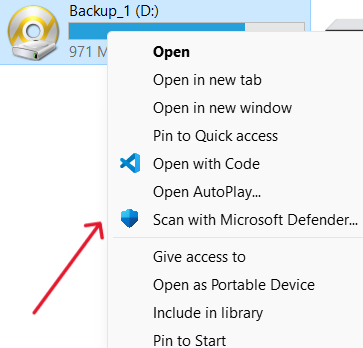
Step 1: Go to This Pc
Step 2: Right-click on the external drive and click on Scan with Microsoft Defender
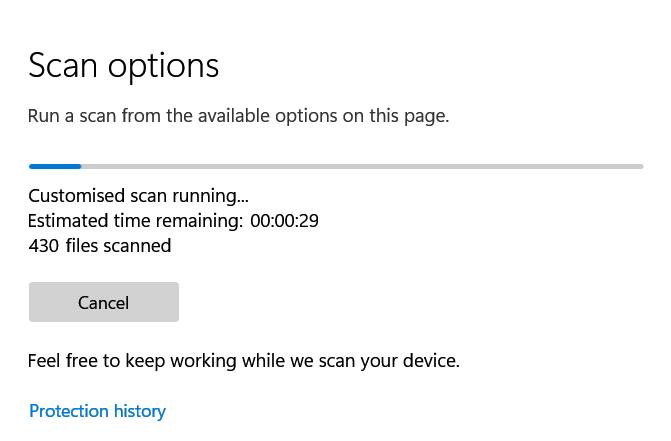
Step 3: Wait till the scan is completed. If any malware is found Microsoft Defender will deal with it.
Step 4: Eject your external drive and restart your PC and again plug in your external drive the error will be fixed.
Method 9: Check Hardware Connections
If the above 3 methods didn’t fix your issue then it seems that the issue is from the hardware end, try these common fixing methods which might help you.
- Check the connection of your external drive whether it is a USB drive or an external hard drive. Make sure it is not loose. Sometimes loose connections also cause this error. Make sure the USB port you are using is working perfectly.
- Unplug and replug the device and check if it works or not
- Restart your computer
- If you are using an external hard drive make sure that the SATA cable is working perfectly.
- Seek expert help to check if your external device is working properly. If not then try to repair it.
- Try to use a different USB port or a different cable for your external hard drives.
Conclusion
As we have seen in this article this error is generally caused due to faults in the external drives. Make sure that the external drive you are using is working perfectly. We hope that the methods we have provided in this article will help you to resolve your issue. If none of the methods resolved your issue then it indicates that the issue is related to the hardware. We would recommend you contact your technician to resolve the hardware-related issues.
Also Read
FAQs on I/O device Error
1. What are the causes of this I/O device error?
The major causes of this error are outdated drivers and corrupted external drives.
2. Can a virus or malware cause this error?
Yes, a virus or malware can cause this error by corrupting an external drive thorugh which you are trying to access data.
3. Is it possible to recover data from a device having an I/O error?
Yes, in some cases it is possible to recover data from such devices using professional data recovery softwares.
4. How can I prevent I/O device error?
Make sure to eject your external devices properly before removing them from your system to prevent this error.
Share your thoughts in the comments
Please Login to comment...