Detect an object with OpenCV-Python
Last Updated :
10 Oct, 2023
OpenCV is the huge open-source library for computer vision, machine learning, and image processing and now it plays a major role in real-time operation which is very important in today’s systems. By using it, one can process images and videos to identify objects, faces, or even the handwriting of a human. This article focuses on detecting objects.
Note: For more information, refer to Introduction to OpenCV.
Object Detection
Object Detection is a computer technology related to computer vision, image processing, and deep learning that deals with detecting instances of objects in images and videos. We will do object detection in this article using something known as haar cascades.
Haar Cascades
Haar Cascade classifiers are an effective way for object detection. This method was proposed by Paul Viola and Michael Jones in their paper Rapid Object Detection using a Boosted Cascade of Simple Features. Haar Cascade is a machine learning-based approach where a lot of positive and negative images are used to train the classifier.
- Positive images – These images contain the images that we want our classifier to identify.
- Negative Images – Images of everything else, which do not contain the object we want to detect.
Steps to download the requirements below
Note: Put the XML file and the PNG image in the same folder as your Python script.
Implementation
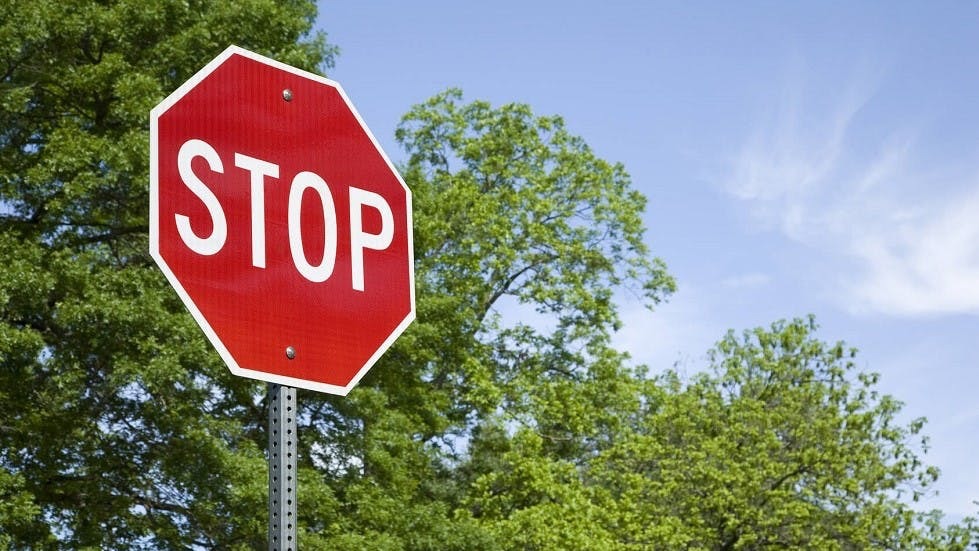
Image used
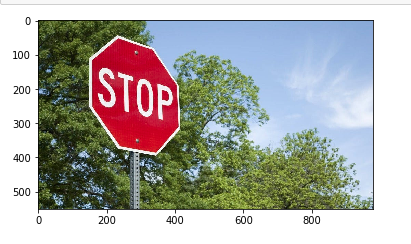
Opening an image
Python
import cv2
from matplotlib import pyplot as plt
img = cv2.imread("image.jpg")
img_gray = cv2.cvtColor(img, cv2.COLOR_BGR2GRAY)
img_rgb = cv2.cvtColor(img, cv2.COLOR_BGR2RGB)
plt.subplot(1, 1, 1)
plt.imshow(img_rgb)
plt.show()
|
Output:
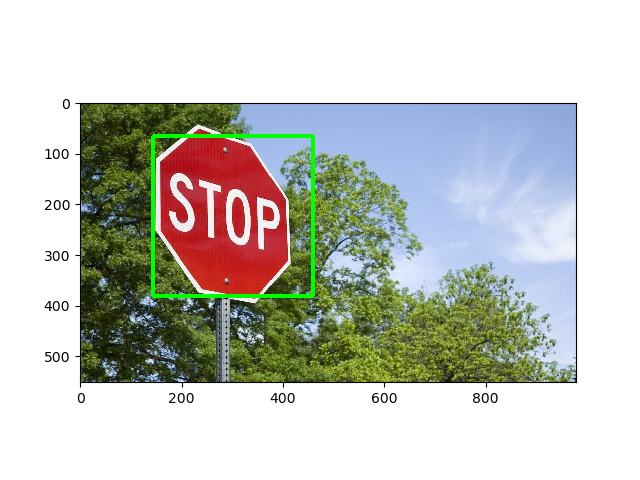
Recognition
We will use the detectMultiScale() function of OpenCV to recognize big signs as well as small ones:
Python
stop_data = cv2.CascadeClassifier('stop_data.xml')
found = stop_data.detectMultiScale(img_gray,
minSize =(20, 20))
amount_found = len(found)
if amount_found != 0:
for (x, y, width, height) in found:
cv2.rectangle(img_rgb, (x, y),
(x + height, y + width),
(0, 255, 0), 5)
|
Here is the full script for lazy devs:
Python
import cv2
from matplotlib import pyplot as plt
img = cv2.imread("image.jpg")
img_gray = cv2.cvtColor(img, cv2.COLOR_BGR2GRAY)
img_rgb = cv2.cvtColor(img, cv2.COLOR_BGR2RGB)
stop_data = cv2.CascadeClassifier('stop_data.xml')
found = stop_data.detectMultiScale(img_gray,
minSize =(20, 20))
amount_found = len(found)
if amount_found != 0:
for (x, y, width, height) in found:
cv2.rectangle(img_rgb, (x, y),
(x + height, y + width),
(0, 255, 0), 5)
plt.subplot(1, 1, 1)
plt.imshow(img_rgb)
plt.show()
|
Output :
Share your thoughts in the comments
Please Login to comment...