What is Vue 3 Reactivity ?
Last Updated :
26 Aug, 2023
Reactivity in Vue refers to the ability of the framework to track changes to data and automatically update the corresponding parts of the user interface. When data changes, Vue efficiently determines which components need to be re-rendered, ensuring that the UI remains in sync with the underlying data.
Vue achieves reactivity through a combination of JavaScript’s getter/setter mechanism, a dependency tracking system, and a virtual DOM. The syntax and approach for enabling reactivity in Vue are straightforward and intuitive. To make a data property reactive, you define it within a Vue instance’s “data” option or use the “reactive” function from the Vue Composition API. Vue automatically converts each property into a reactive getter/setter during the initialization process. Here’s an example of defining reactive data in Vue:
Syntax: Syntax for Vue 2.x:
new Vue({
    data: {
        message: "Hello, Vue!",
        count: 0,
    },
});
Syntax: Syntax for Vue 3.x with Composition API
import { reactive } from 'vue';
const state = reactive({
    message: "Hello, Vue!",
    count: 0,
});
Once a data property is reactive, you can access it in your template or component methods, and Vue will automatically track dependencies. When a reactive property is accessed during the render, Vue knows that it should be included in the dependency graph for that component.
We will understand Vue reactivity with the help of examples.
Approach 1: In this approach, we declare the counter variable using Vue.ref() and initialize it with a value of 0. The incrementCounter method increments the counter value. In the HTML section, we use Vue template syntax {{ counter }} to display the current value of the counter and @click to bind the incrementCounter method to the button’s click event. Finally, we mount the Vue app to the #app element using app.mount(‘#app’). When you open the HTML file in the browser, you’ll see the “Counter” component with the counter value displayed and an “Increment” button. Clicking the button will increment the counter, and the updated value will be shown on the page.
Example: This example illustrates the basic implementation for vue reactivity.
HTML
<template>
<div>
<p>Counter: {{ counter }}</p>
<button @click="incrementCounter">
Increment
</button>
</div>
</template>
<script>
import { ref } from 'vue';
export default {
setup() {
// Declare a reactive variable
const counter = ref(0);
// Define a method to increment the counter
const incrementCounter = () => {
counter.value++;
};
// Return the reactive variables and methods
return {
counter,
incrementCounter,
};
},
};
</script>
<style scoped>
button {
margin-top: 10px;
}
</style>
|
Output:
.gif)
Approach 2: In this approach, we have an input field (<input>) where users can enter a new item, and a button (<button>) to add the item to the list. The list is displayed using an unordered list (<ul>) and each item is rendered using a v-for directive. Inside the data function, we define two properties: newItem and items. The newItem represents the value entered in the input field, and items are an array that stores the list of items. The addItem method is triggered when the button is clicked. It checks if newItem is not empty, creates a new item object with a unique ID and the name from newItem, pushes it to the items array, and then resets newItem to an empty string.
The v-for directive in the template iterates over the items array and renders an <li> element for each item. The :key attribute ensures that each rendered item has a unique identifier. Whenever a new item is added (this.items.push(…)), Vue detects the change and automatically re-renders the component, updating the view to display the updated list of items.
Example: This is another example of view reactivity in Vue.js, where changes in the underlying data (the items array) automatically trigger updates in the rendered view, keeping them in sync. Here, users can add new items to the list by entering a value in an input field and clicking a button.
HTML
<template>
<div>
<input v-model="newItem"
type="text"
placeholder="Enter a new item">
<button @click="addItem">
Add
</button>
<ul>
<li v-for="item in items"
:key="item.id">
{{ item.name }}
</li>
</ul>
</div>
</template>
<script>
export default {
data() {
return {
newItem: '',
items: []
};
},
methods: {
addItem() {
if (this.newItem !== '') {
this.items.push({
id: Date.now(),
name: this.newItem
});
this.newItem = '';
}
}
}
};
</script>
|
Output:
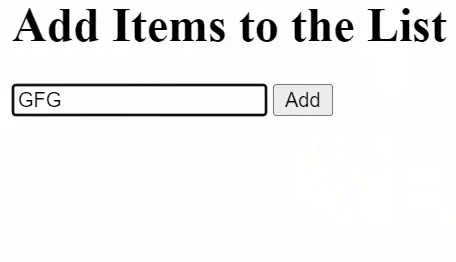
Items are added to the list by entering the value in the input field.
Share your thoughts in the comments
Please Login to comment...