How to Update Intel Drivers On Windows 11?
Last Updated :
26 Dec, 2023
Is your system crashing regularly? If so, you’ll have to check the out-of-date drivers on the system. Drivers are essential as they maintain the performance of your system. Fortunately, Intel updates drivers regularly for a smoother experience. So, even if you are not updating your PC regularly, keeping your intel driver up to date is important.
In this blog, we will go through steps to update Intel drivers on Windows 11, helping you maximize the potential of your Intel-powered hardware.
What are Intel Drivers and Support Assistance?
Intel drivers and support assistance also known as Intel DSA. It keeps your system up-to-date by providing customized support and hassle-free updates for most of the Intel hardware.
Why Do You Need To Update Intel Drivers in Windows 11?
Intel driver is a software component through which Intel hardware parts communicate with your operating system. Updating your Intel drivers is important because it can improve the performance of your computer, fix bugs, and introduce new features that were not present before.
Necessary Precautions to Take Before Updating Intel Drivers
Though updating the Intel drivers is not hard even beginners can do it easily by following the steps given below. But precautions are always significant as things can go wrong sometimes. Use the tips below to successfully update Intel drivers and save you from mishaps.
- Create A Restore Point: It’s always good to have a restore point before updating drivers. This way, you can roll back your previous version if things go wrong.
- Always restart after the update: Always restart your PC after you update the driver. This ensures that effects have taken place.
- Compatibility: If you are using manual updates, ensure that drivers are compatible with Windows 11.
How to Update Intel Drivers On Windows 11?
In the previous section, we saw why updating your drivers is important to keep your computer running smoothly. Now, in this section, we shall see how you can update your drivers. There are various ways to update Intel Drivers on Windows 11. Let’s look at each method one by one.
Method 1: Updating drivers using Device Manager
The first method that we will discuss here is using a device manager. This is our most recommended method as it’s safe. So, let’s see how you can update Intel drivers using device manager.
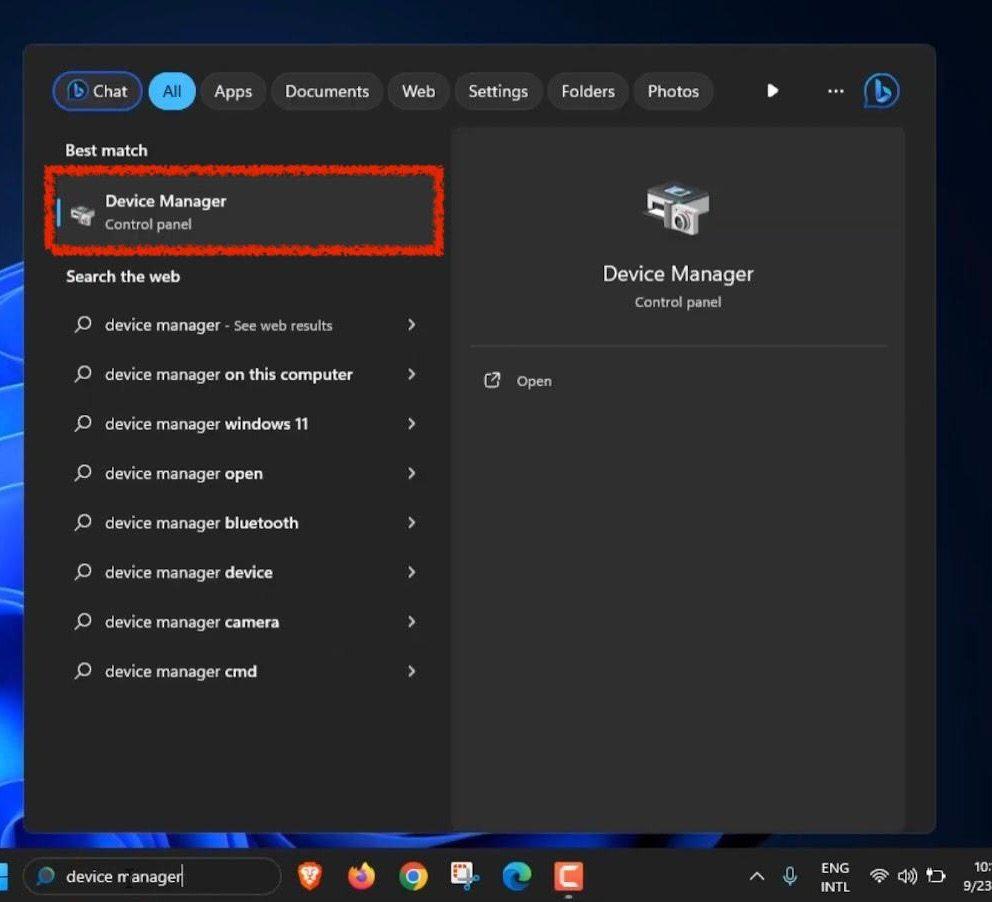
Step 1: First open “Device Manager”. To open the device manager, type device manager in the search box in the taskbar.
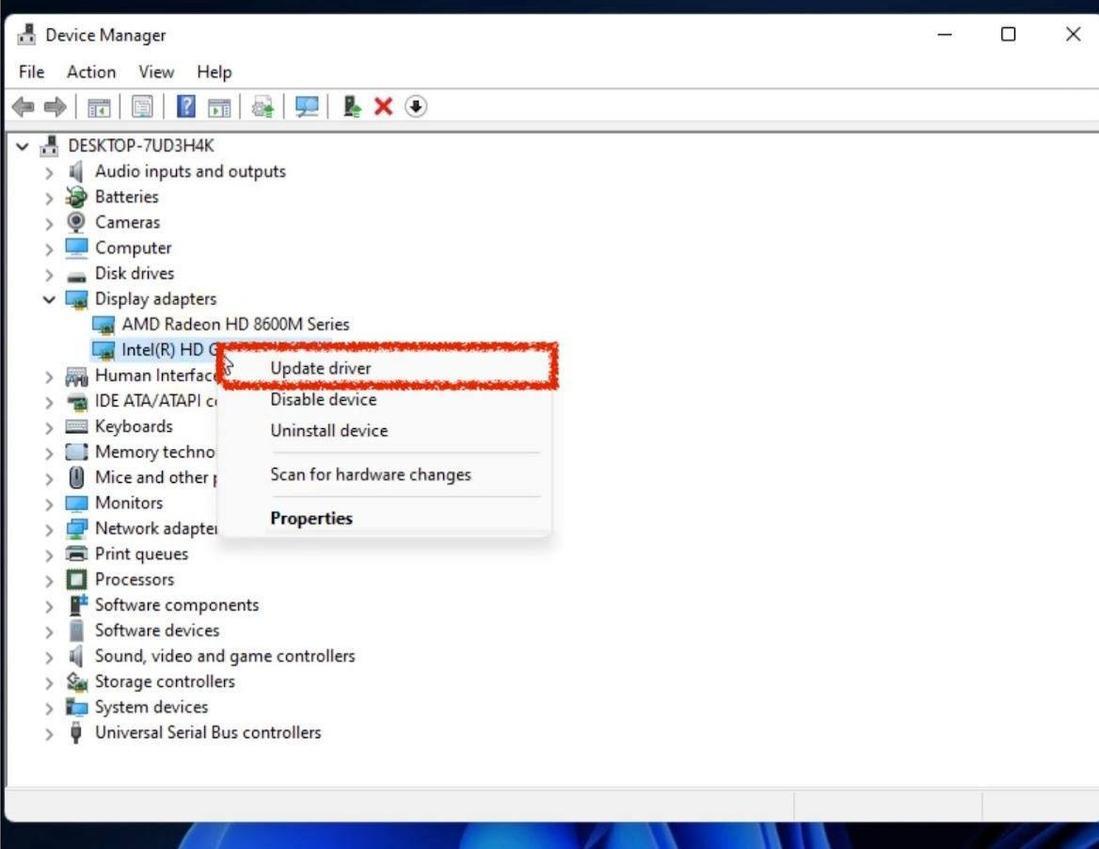
Step 2: Open the device manager, and you will see a different options available, now click on “display adapters” and right-click on the driver you want to update and select Update Driver from the context menu.
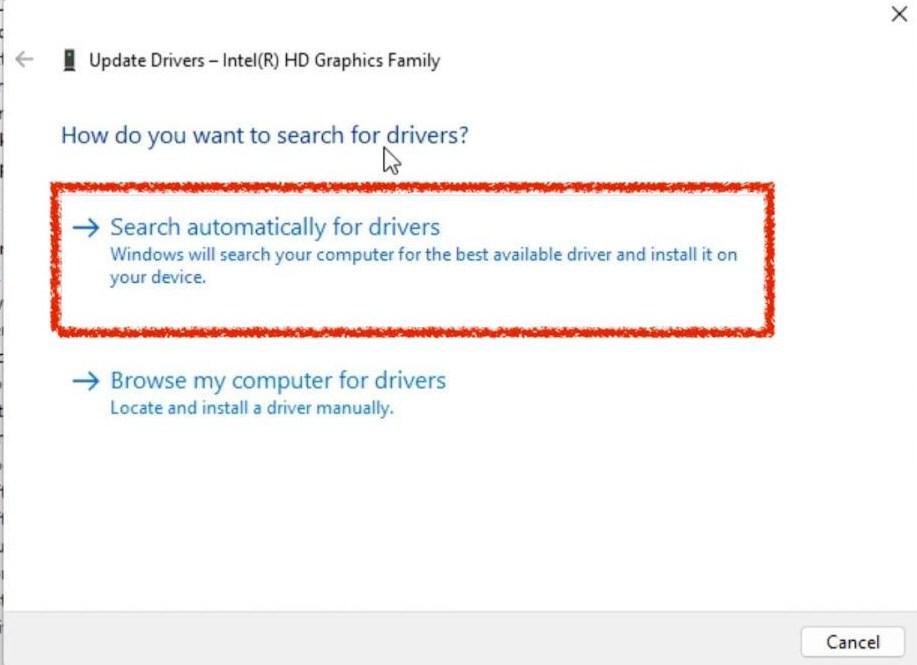
Step 3: Now select Search automatically for drivers. After selecting search automatically for drivers, windows will search for an updated driver for your device and when it finds one, it will automatically download and install it for you.
Step 4: Now, once the driver is installed successfully, it will prompt you to restart your computer.
Method 2: Using Intel drivers and support assistance
The second method that we will talk about is using Intel drivers and support assistance (DSA). Since this method requires restarting your computer, please use this method without anything important running in the background.
If you have tried the device manager method, and it didn’t work for you, then you can use this method too.
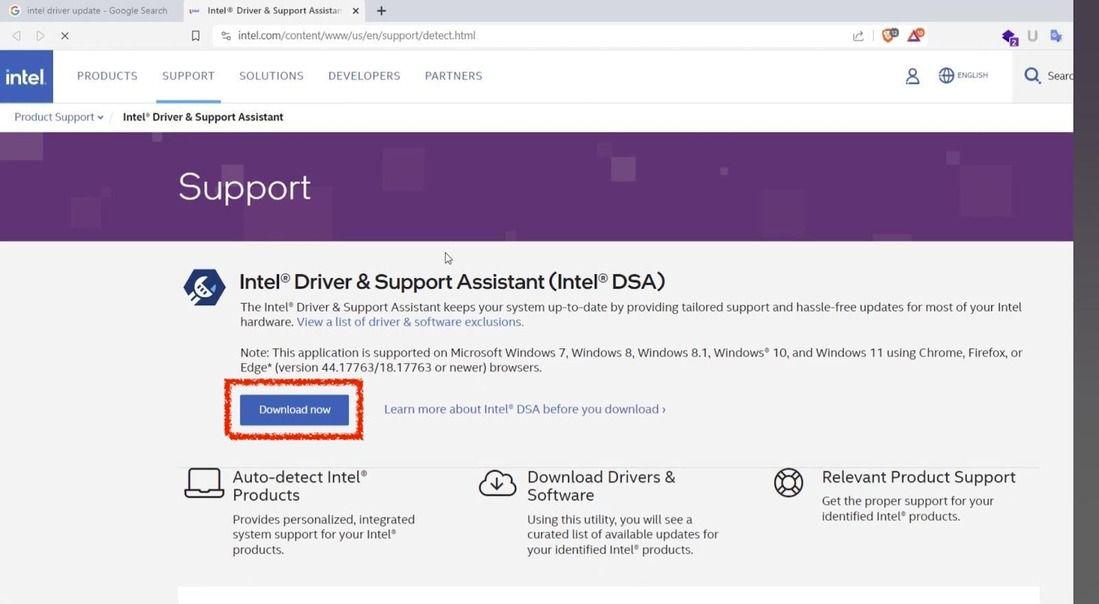
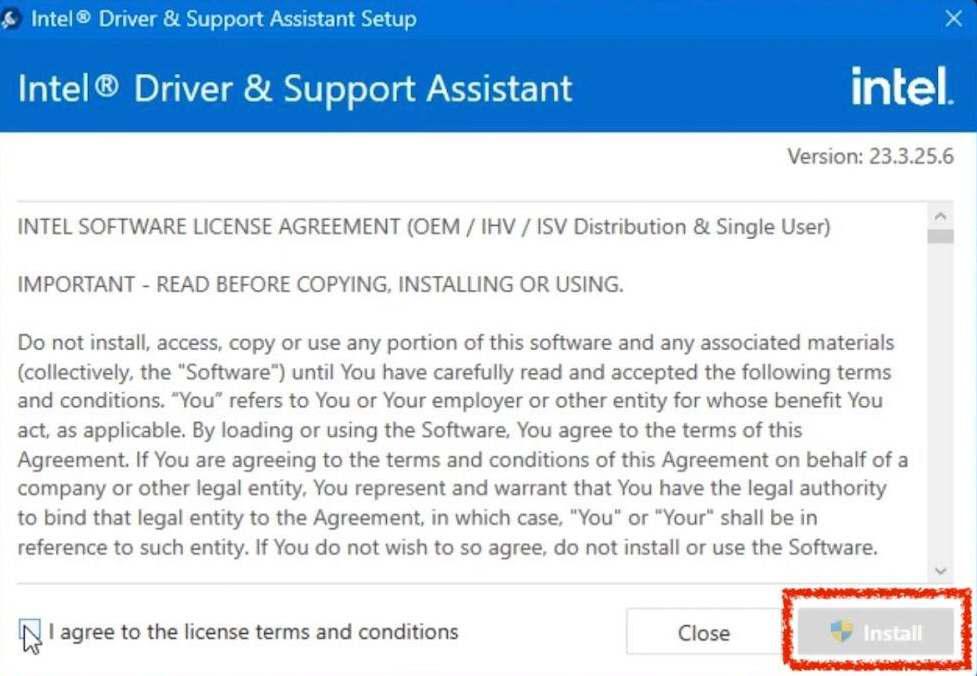
Step 1: Search for Intel drivers updates on the internet and open the Intel driver & support assistant page. There you will find “Intel driver and support assistant. Click on the Download Now button. It will start downloading.
Step 2: Once downloaded, install on your PC. Restart is required to finish your installation.
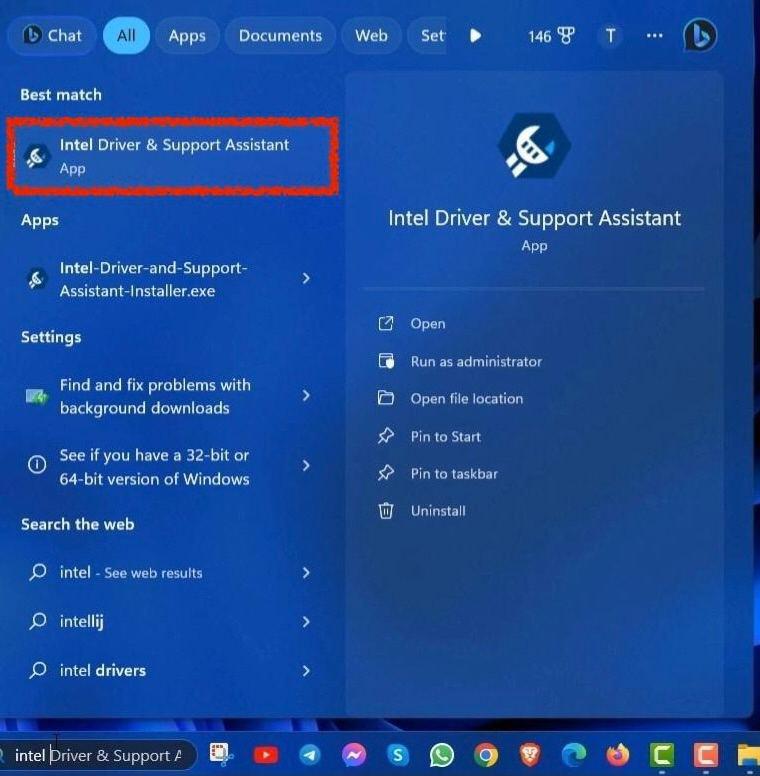
Step 3: After restarting, search for “Intel driver and support assistant” in the search box located at the taskbar. Open it to see if there are software updates available for your system.
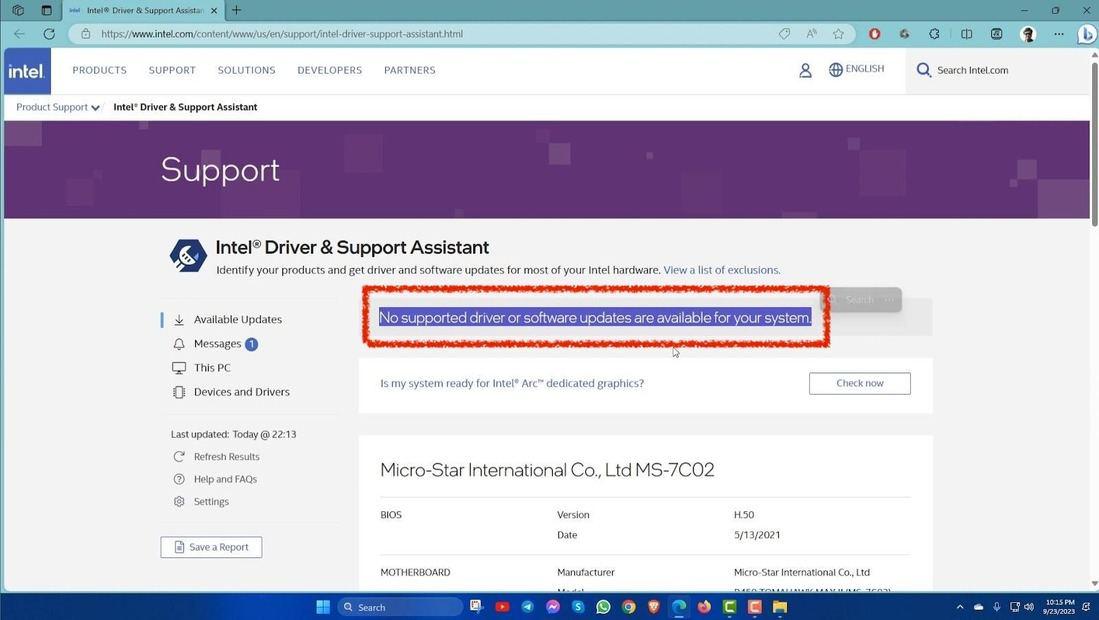
Step 4: If your drivers need an update, it will show in the support assistant. Else, it reads No support driver or software updates are available on your system.
Method 3: Using Windows Settings
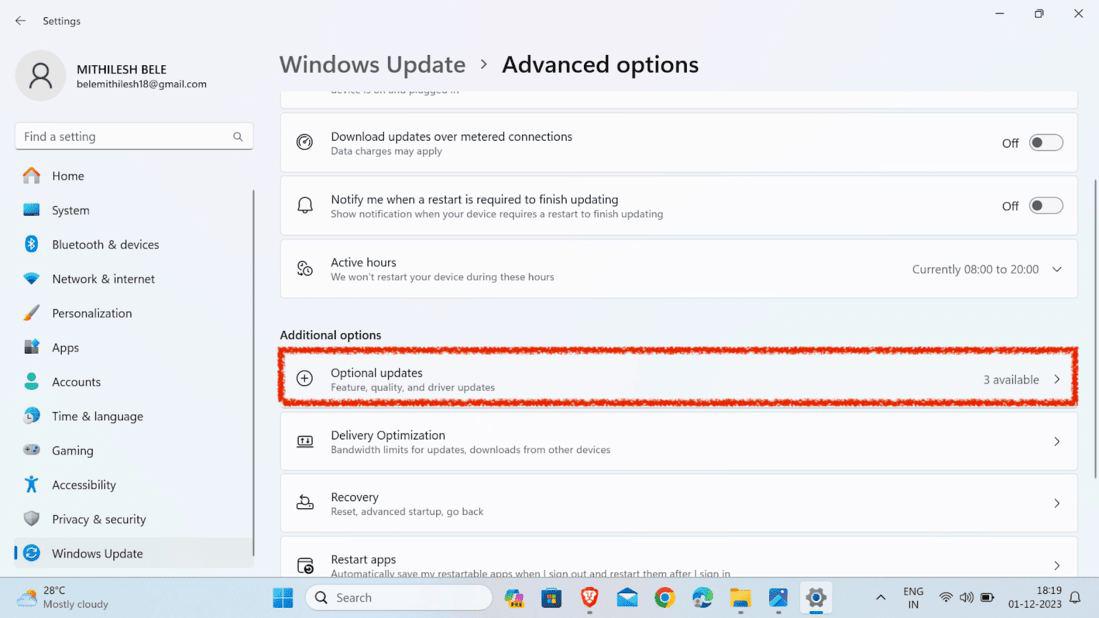
Step 1: Go to settings from the start menu, or press the win+I key on your keyboard. Right-click on the Windows Update option in the menu on the left side. Then click on advanced options.

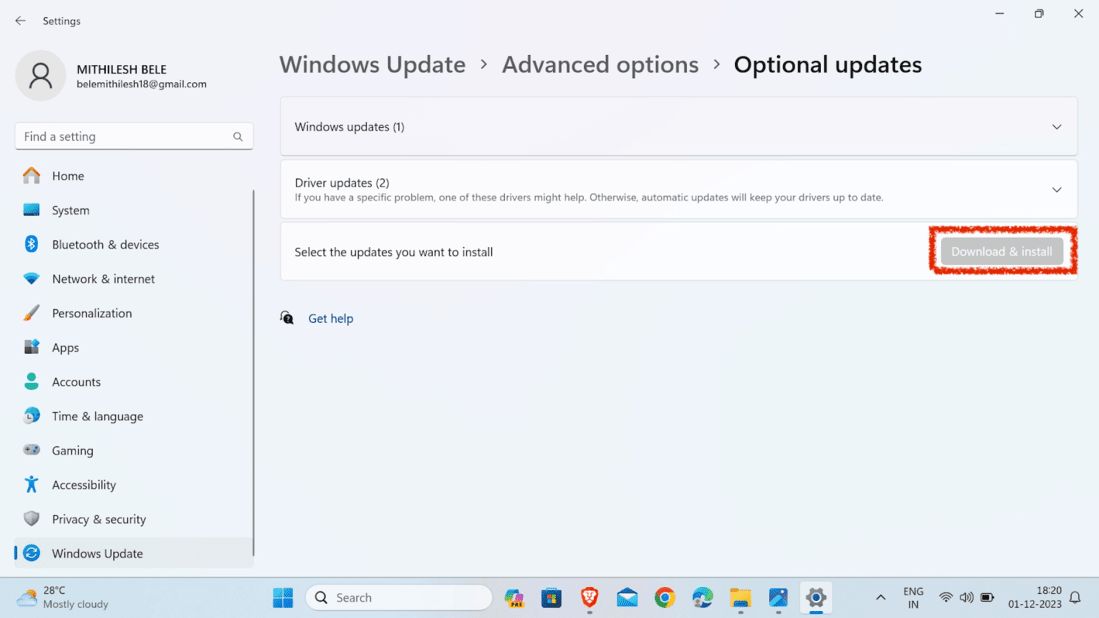
Step 2: Search for Optional Updates and click to expand it.
Step 3: On the new window, it will show if your PC has Windows updates and driver updates available. Now click on ‘driver updates’ by clicking the arrow icon, after that select all the available updates of the Intel driver, then click on the Download & Install button.
Conclusion
Updating drivers is an important part of system maintenance, as these drivers can affect system performance and reliability. In the above blog, we gave you three ways to update intel drivers on the Windows 11 version to help you enjoy a smoother experience.
Also Read
Share your thoughts in the comments
Please Login to comment...