Unit Testing in Next JS: Ensuring Code Quality in Your Project
Last Updated :
22 Feb, 2024
Unit testing is an essential aspect of software development that ensures the quality and reliability of your codebase. In the context of NextJS projects, unit testing helps validate individual components, functions, and modules to ensure they behave as expected. In a NextJS project, unit testing becomes even more essential as it involves both server-side and client-side rendering. This article will guide you through setting up and writing unit tests for your NextJS application.
Prerequisites:
Approach to implement Unit Testing in Next:
- Choose Testing Framework: Select a testing framework for your NextJS project, such as Jest or Mocha.
- Setup Testing Environment: Set up a testing environment in your NextJS project. Jest is a popular choice for testing in JavaScript projects.
- Write Test Cases: Create test cases for your components, pages, and utility functions. Use Jest testing functions to assert expected outcomes.
- Mocking: Learn how to use Jest to mock API calls, external dependencies, and other modules for isolated testing.
- React Testing Library: Explore using React Testing Library to render React components and interact with them in a testing environment.
- Test Coverage: Understand how to measure test coverage to ensure that your tests cover a significant portion of your codebase.
- Continuous Integration: Integrate unit tests into your continuous integration (CI) pipeline to automatically run tests on each code push.
Testing Frameworks for React Applications:
- Jest and React Testing Library:
Jest is a popular JavaScript testing framework, and React Testing Library is a testing utility for React applications. Together, they provide a powerful combination for unit testing Next.js projects.
- Enzyme:
Enzyme is another testing utility for React applications that provides a different approach to testing components. While React Testing Library focuses on testing how components behave from a user’s perspective, Enzyme allows for more direct manipulation of component instances.
- Cypress:
Cypress is an end-to-end testing framework that allows you to write tests that interact with your application as a user would. While not specifically for unit testing, Cypress can complement unit tests by providing comprehensive testing coverage.
Steps to Create Application (Install Required Modules):
Step 1: Create a NextJS Application using the following command.
npx create-next-app@latest
Step 2: Install Jest, React Testing Library, Enzyme, or Cypress based on your chosen approach.
For Jest and React Testing Library:
npm install --save-dev jest @testing-library/react @testing-library/jest-dom --force

For Enzyme:
npm install --save-dev enzyme enzyme-adapter-react-16 --foce

For Cypress:
npm install --save-dev cypress --force
Step 3: Set up Jest configuration (jest.config.js), React Testing Library configuration (setupTests.js), Enzyme adapter configuration, or Cypress configuration as required.
"scripts": {
    "test": "jest"
}
Step 4:Write tests: Create test files for your components, pages, or other units of code, and write tests to verify their behavior.
Step 5:Run tests: Use the appropriate command to run your tests. For Jest, use npm test. For Enzyme, configure Jest to run tests with Enzyme and then use npm test. For Cypress, use npx cypress open to open the Cypress test runner and run your tests interactively.
Step 6: To generate a Report: Ensure that you have installed the jest-html-reporter package as a development dependency in your project. You can install it using npm or yarn:
npm install --save-dev jest-html-reporter --force
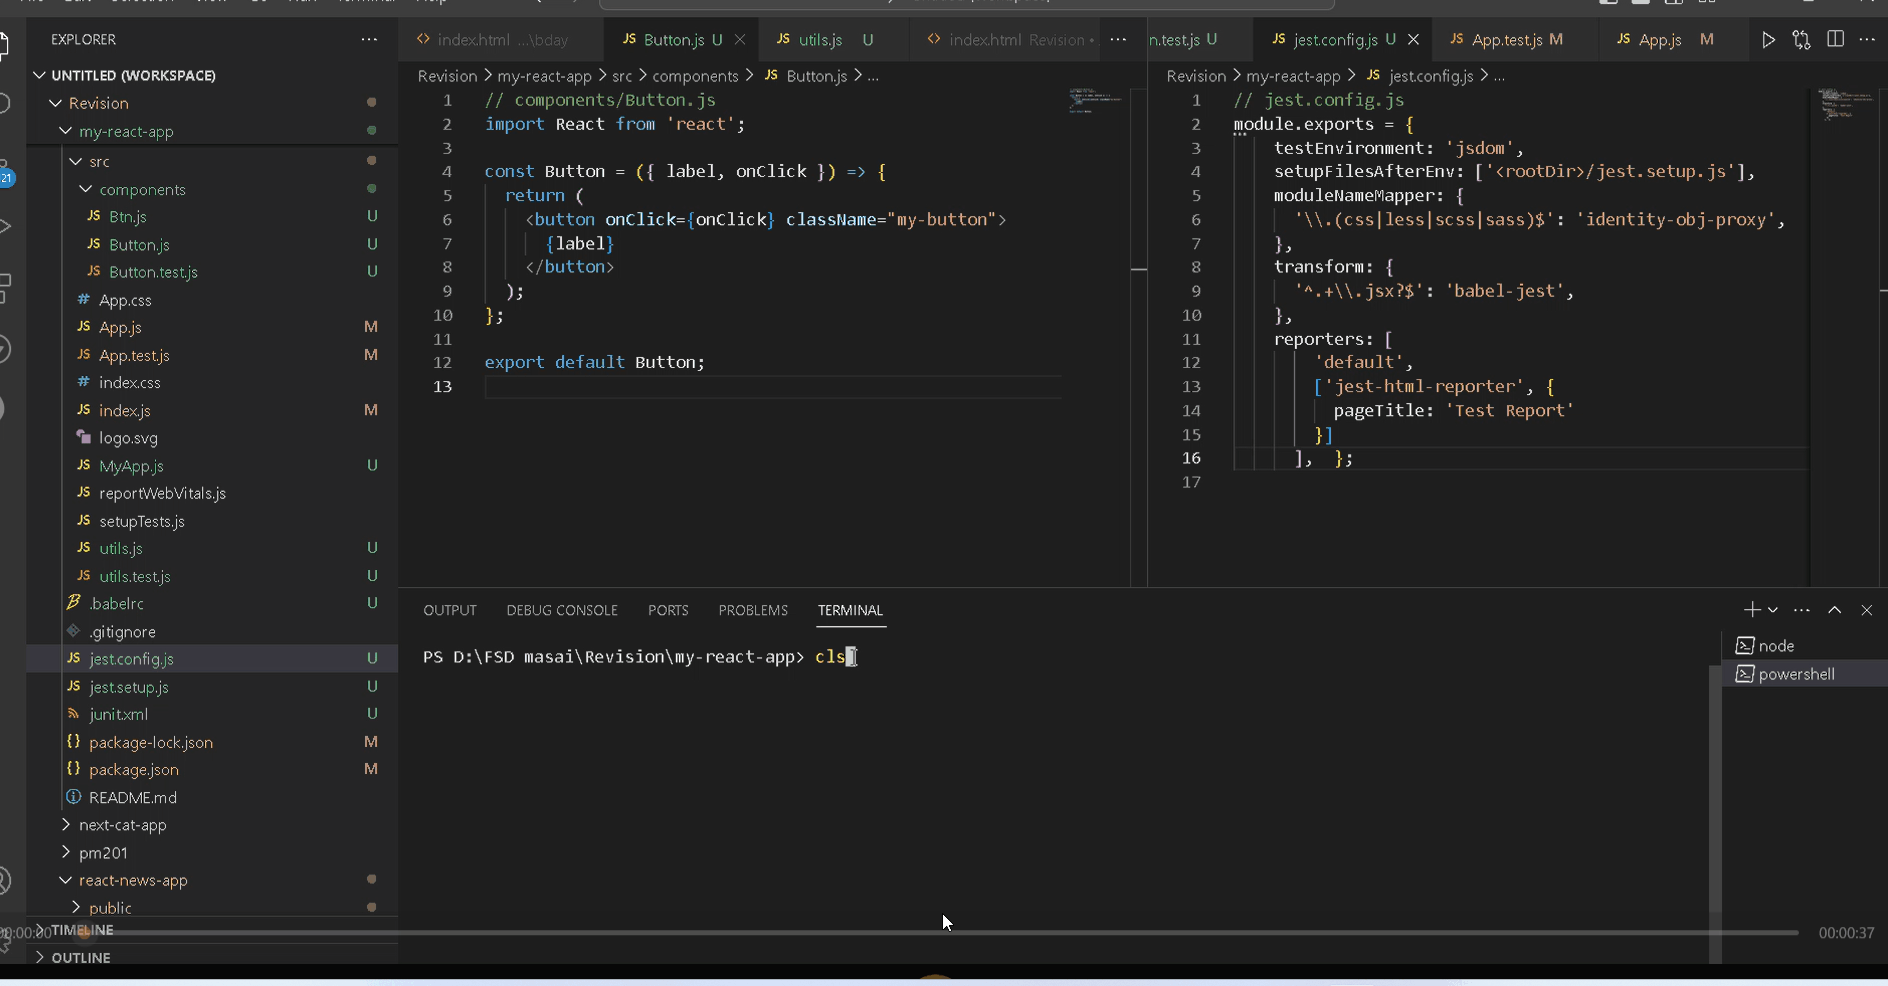
Step 7: jest.config.js like this.
module.exports = {
 // other Jest config options
    reporters: [    'default',
     [
      'jest-html-reporter',
       {
          pageTitle: 'Test Report'
       }
     ]
  ],
};
Project Structure:
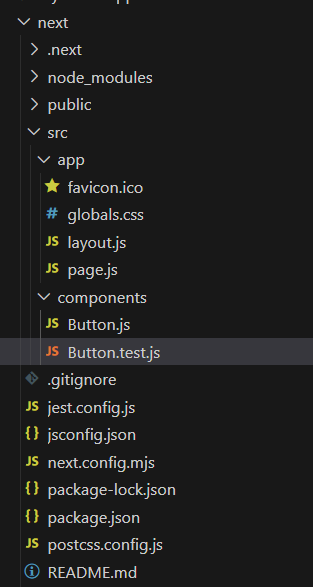
Project Structure
The updated dependencies in package.json file will look like:
"dependencies": {
    "next": "14.1.0",
    "react": "^18",
    "react-dom": "^18"
},
"devDependencies": {
  "jest": "^27.0.6",
  "@testing-library/react": "^12.1.2",
  "@testing-library/jest-dom": "^5.14.1",
  "enzyme": "^3.11.0",
  "enzyme-adapter-react-16": "^1.15.6",
  "cypress": "^8.6.0"
}
Example: Let’s consider a simple example of testing a React component in a NextJS project. Assume you have a Button component in components/Button.js:
Javascript
import React from 'react';
const Button = ({ label, onClick }) => {
return (
<button onClick={onClick} className="my-button">
{label}
</button>
);
};
export default Button;
|
Javascript
import { render, screen, fireEvent } from '@testing-library/react';
import Button from './Button';
test('Button renders correctly', () => {
render(<Button label="Click me" />);
const buttonElement = screen.getByText(/Click me/i);
expect(buttonElement).toBeInTheDocument();
});
test('Button onClick is called', () => {
const mockClick = jest.fn();
render(<Button label="Click me" onClick={mockClick} />);
const buttonElement = screen.getByText(/Click me/i);
fireEvent.click(buttonElement);
expect(mockClick).toHaveBeenCalled();
});
|
Run your application test cases using the following command and run the test-report.html file i.e. live to server.
npm test
Output :
Output
Share your thoughts in the comments
Please Login to comment...