Spring Cloud – Bootstrapping
Last Updated :
07 Mar, 2024
Spring Cloud can be defined as a collection of tools and frameworks from the Spring ecosystem. This provides the developers with building blocks for cloud-native applications. In the case of Spring Cloud, bootstrapping refers to the process of configuring and deploying Spring Cloud to start the request.
Example Project of Bootstrapping Spring Cloud
We can develop the two microservices that can connect to the eureka server and those two microservices communicate through the discovery client.
Eureka Server:
Step 1: Create the spring project using spring initializer on creating the project add the below dependencies into the project.
Dependencies:
Once create the project then the file structure looks like the below image.
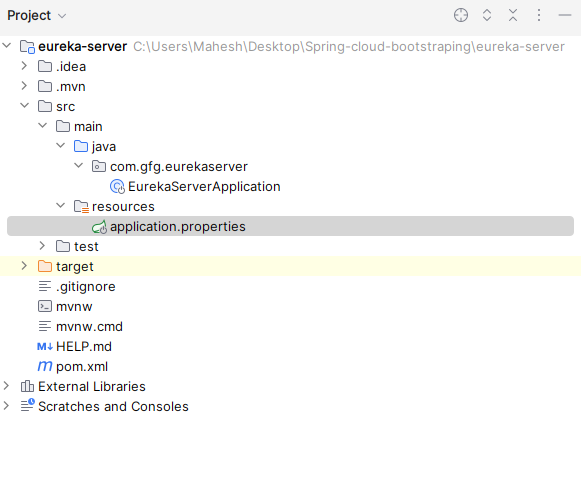
Step 2: Open the application.properties file and put the below code for the database, server port configuration of the project.
spring.application.name=eureka-server
server.port=8761
eureka.client.register-with-eureka=false
eureka.client.fetch-registry=false
Step 3: Open the main class add the @EnableEurekaServer annotation for enabling the eureka server into the project.
Java
package com.gfg.eurekaserver;
import org.springframework.boot.SpringApplication;
import org.springframework.boot.autoconfigure.SpringBootApplication;
import org.springframework.cloud.netflix.eureka.server.EnableEurekaServer;
/**
* Main class to start the Eureka server application.
*/
@SpringBootApplication
@EnableEurekaServer
public class EurekaServerApplication {
public static void main(String[] args) {
SpringApplication.run(EurekaServerApplication.class, args);
}
}
|
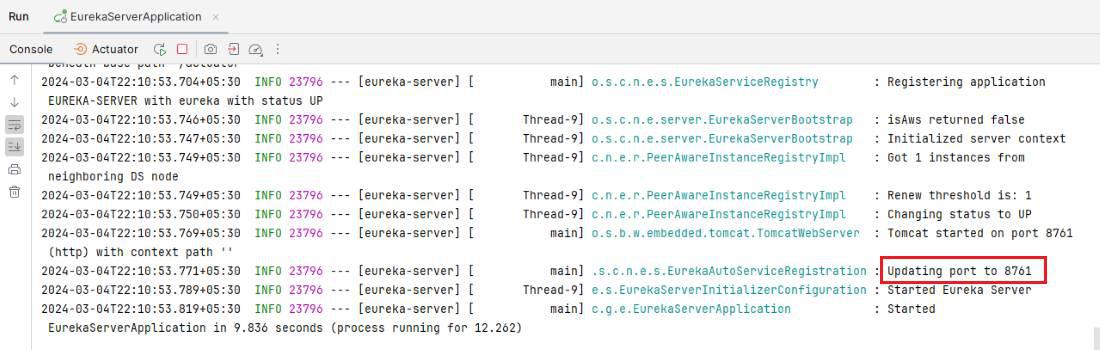
Step 4: Once complete the project then run the application as spring project it will starts on the port 8761.
Client-Service
Step 1: Create the spring project using spring initializer on creating the project add the below dependencies into the project.
Dependencies:
- Netflix Eureka Server Client
- Spring Web
- Spring Dev Tools
- Lombok
- Spring data for mongodb
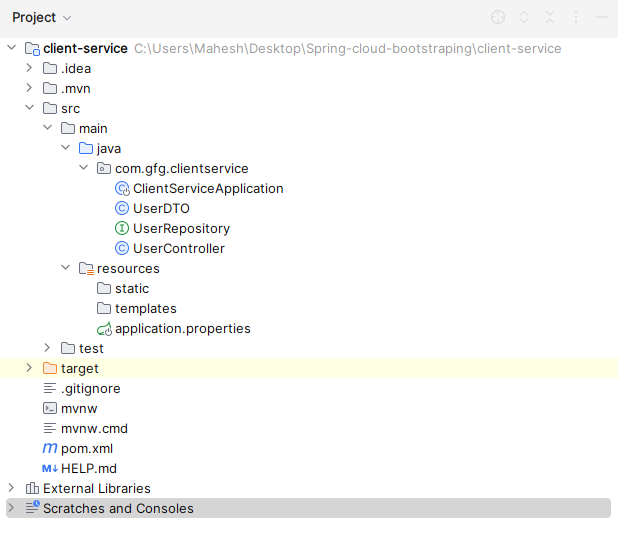
Once create the project then the file structure looks like the below image.
Step 2: Open the application.properties file and put the below code for the database, server port configuration of the project.
spring.application.name=client-service
server.port=8083
eureka.client.service-url.defaultZone=http://localhost:8761/eureka

spring.data.mongodb.uri= mongodb://localhost:27017/bootstrapping
Step 3: Create the new Java class and it named as the UserDTO and put the below code.
Go to src > clientservice > UserDTO and put the below code.
Java
package com.gfg.clientservice;
import lombok.AllArgsConstructor;
import lombok.Data;
import lombok.NoArgsConstructor;
import org.springframework.data.annotation.Id;
import org.springframework.data.mongodb.core.mapping.Document;
@Document
@Data
@AllArgsConstructor
@NoArgsConstructor
public class UserDTO {
@Id
private String id;
private String name;
private String occupation;
}
|
Step 4: Create the new Java interface and it named as the UserRepository and put the below code.
Go to src > clientservice > UserRepository and put the below code.
Java
package com.gfg.clientservice;
import org.springframework.data.mongodb.repository.MongoRepository;
import org.springframework.stereotype.Repository;
@Repository
public interface UserRepository extends MongoRepository<UserDTO, String> {
}
|
Step 5: Create the new Java class and it named as the UserController and put the below code.
Go to src > clientservice > UserController and put the below code.
Java
package com.gfg.clientservice;
import org.springframework.beans.factory.annotation.Autowired;
import org.springframework.http.HttpStatus;
import org.springframework.http.ResponseEntity;
import org.springframework.web.bind.annotation.GetMapping;
import org.springframework.web.bind.annotation.PostMapping;
import org.springframework.web.bind.annotation.RequestBody;
import org.springframework.web.bind.annotation.RestController;
import java.util.List;
/**
* Controller class for handling user-related HTTP requests.
*/
@RestController
public class UserController {
@Autowired
private UserRepository userRepository;
@PostMapping("/users")
public ResponseEntity<UserDTO> addUser(@RequestBody UserDTO user) {
UserDTO savedUser = userRepository.save(user);
return new ResponseEntity<>(savedUser, HttpStatus.CREATED);
}
@GetMapping("/users")
public ResponseEntity<List<UserDTO>> getUsers() {
List<UserDTO> users = userRepository.findAll();
return new ResponseEntity<>(users, HttpStatus.OK);
}
}
|
Step 6: Open the main class and add the @EnableDiscoveryClient for enabling the client server of the project.
Java
package com.gfg.clientservice;
import org.springframework.boot.SpringApplication;
import org.springframework.boot.autoconfigure.SpringBootApplication;
import org.springframework.cloud.client.discovery.EnableDiscoveryClient;
/**
* Main class to run the client service application.
*/
@SpringBootApplication
@EnableDiscoveryClient
public class ClientServiceApplication {
public static void main(String[] args) {
SpringApplication.run(ClientServiceApplication.class, args);
}
}
|
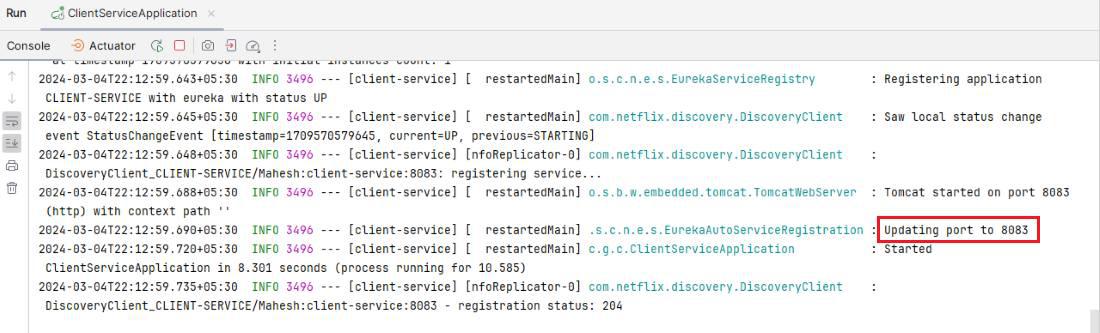
Step 7: Once complete the project then run the application as spring project it will starts on the port 8083. Refer below image for better understanding.
Server-Service
Step 1: Create the spring project using spring initializer on creating the project add the below dependencies into the project.
Dependencies:
- Netflix Eureka Server Client
- Spring Web
- Spring Dev Tools
- Lombok
- Spring data for mongodb
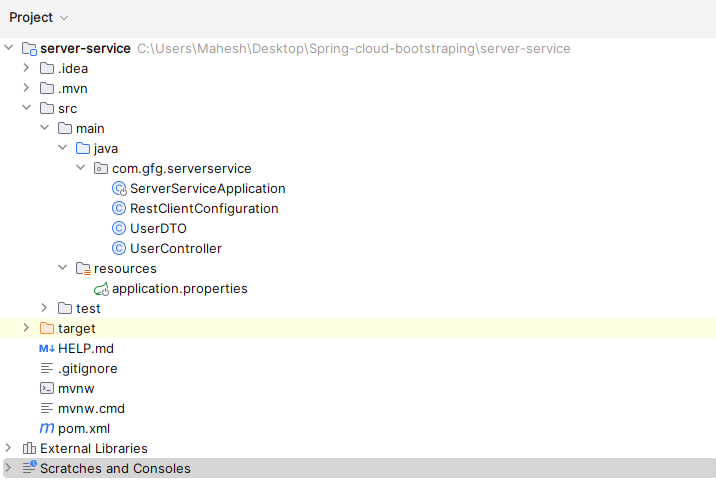
Once create the project then the file structure looks like the below image.
Step 2: Open the application.properties file and put the below code for the database, server port configuration of the project
spring.application.name=server-service
server.port=8082
eureka.client.service-url.defaultZone=http://localhost:8761/eureka
Step 3: Create the new Java class and it named as the RestClientConfiguration and put the below code.
Go to src > clientservice > RestClientConfiguration and put the below code.
Java
package com.gfg.serverservice;
import org.springframework.context.annotation.Bean;
import org.springframework.context.annotation.Configuration;
import org.springframework.web.client.RestTemplate;
/**
* Configuration class for RestTemplate bean.
*/
@Configuration
public class RestClientConfiguration {
/**
* Bean definition for RestTemplate.
*
* @return RestTemplate instance
*/
@Bean
public RestTemplate restTemplate() {
return new RestTemplate();
}
}
|
Step 4: Create the new Java class and it named as the UserController and put the below code.
Go to src > serverervice > UserController and put the below code.
Java
package com.gfg.serverservice;
import org.springframework.beans.factory.annotation.Autowired;
import org.springframework.http.HttpStatus;
import org.springframework.http.ResponseEntity;
import org.springframework.web.bind.annotation.GetMapping;
import org.springframework.web.bind.annotation.RestController;
import org.springframework.web.client.RestTemplate;
@RestController
public class UserController {
@Autowired
private RestTemplate restTemplate;
/**
* Endpoint to retrieve users from the client service.
*
* @return ResponseEntity containing the response from the client service
*/
@GetMapping("/users")
public ResponseEntity<String> getUsers() {
return new ResponseEntity<>(response, HttpStatus.OK);
}
}
|
Step 5: Open the main class and add the @EnableDiscoveryClient for enabling the client server of the project.
Java
package com.gfg.serverservice;
import org.springframework.boot.SpringApplication;
import org.springframework.boot.autoconfigure.SpringBootApplication;
import org.springframework.cloud.client.discovery.EnableDiscoveryClient;
/**
* Main class to bootstrap the Server Service application.
*/
@SpringBootApplication
@EnableDiscoveryClient
public class ServerServiceApplication {
/**
* Main method to start the Server Service application.
*/
public static void main(String[] args) {
SpringApplication.run(ServerServiceApplication.class, args);
}
}
|
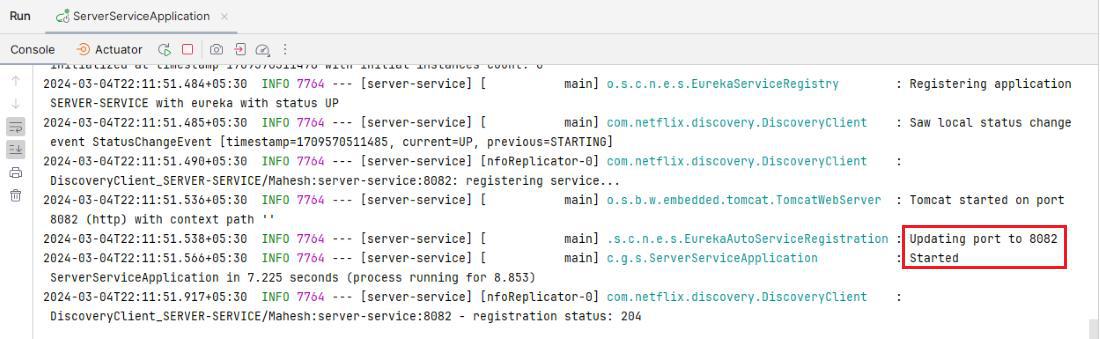
Step 6: Once complete the project then run the application as spring project it will starts on the port 8082. Refer below image for better understanding.
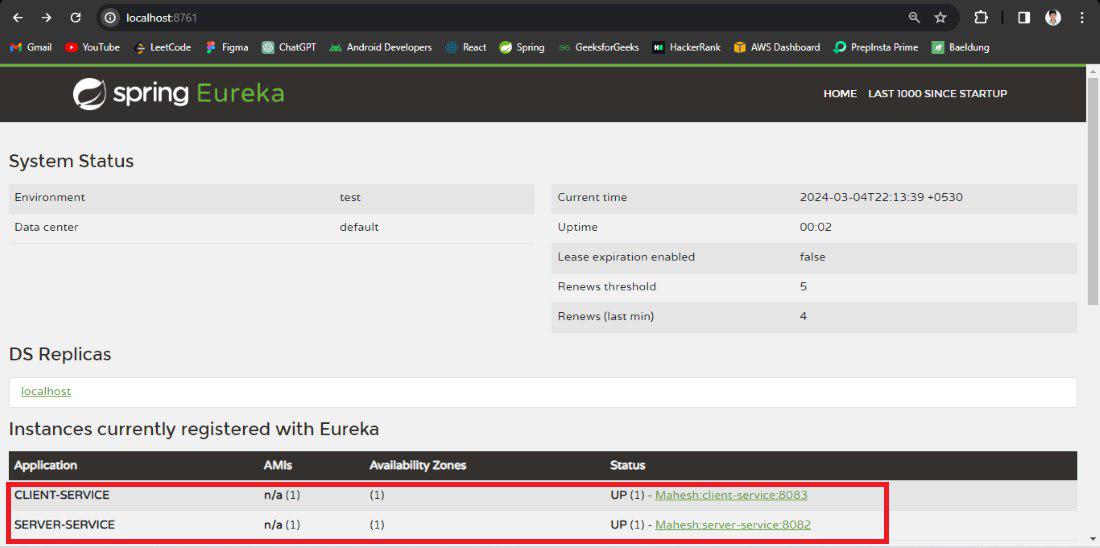
Eureka Dashboard:
Below we can see the Eureka Dashboard.
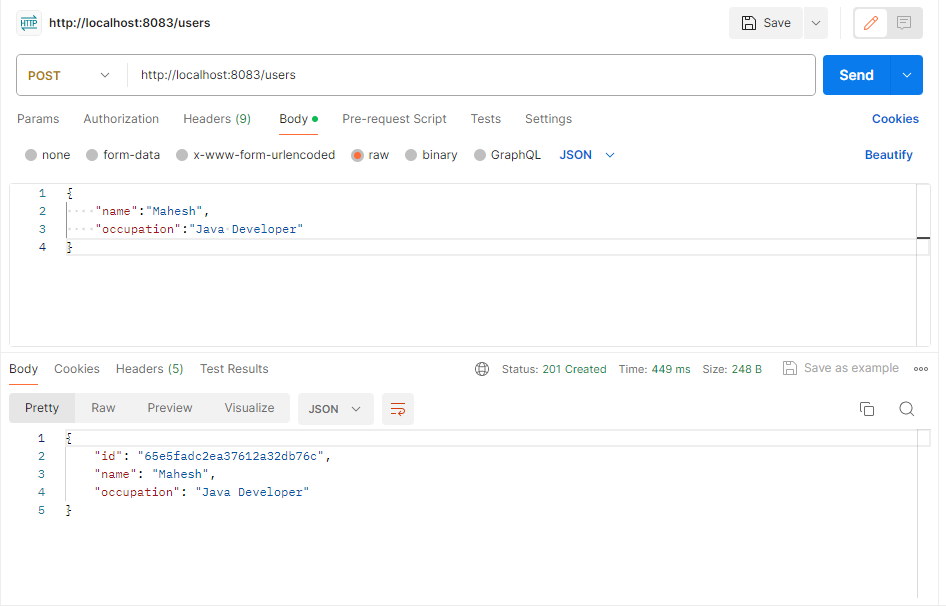
client-service:
POST http://localhost:8083/users
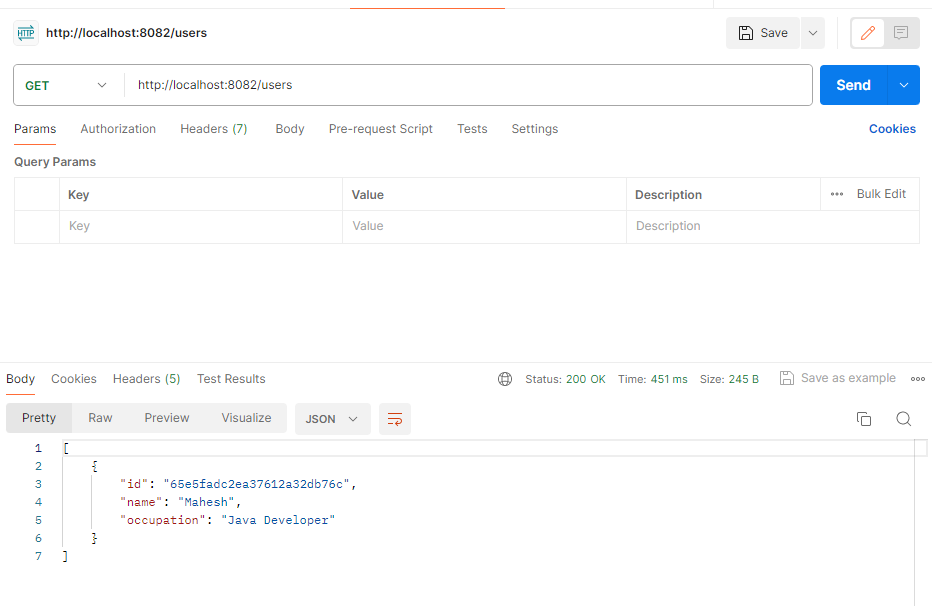
Server Service:
GET http://localhost:8082/users
We can follow the above steps for successfully the Spring Cloud bootstrapping project in the Spring Application.
Share your thoughts in the comments
Please Login to comment...