Java Spring Boot Microservices – Develop API Gateway Using Spring Cloud Gateway
Last Updated :
01 Aug, 2023
The API Gateway Pattern in some cases stands for “Backend for frontend”. It is basically the entry gate for taking entry into any application by an external source. The pattern is going on in a programmer’s mind while they are making the client’s application. It acts as a medium between the client applications and microservices. For example-Netflix is the most famous example of an API gateway. To know more about API Gateway refer to this article What is API Gateway Pattern?
Why Implement API Gateway in Microservices?
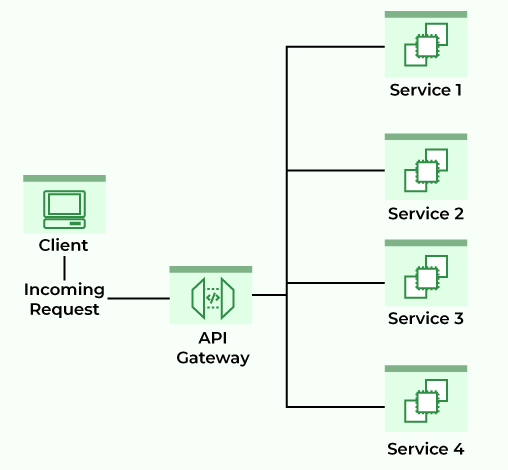
An API gateway simplifies the communication between a client and a service, whether that be between a user’s web browser and a server, or between a frontend application and the backend application that it relies on. The main purpose of integrating the API gateway in microservice communication is, API Gateway acts as a single entry point to access services. We will see the whole implementation in the example below. As of now please refer to the below image to get an idea of how the API gateway works.
What is Spring Cloud Gateway?
Spring Cloud Gateway provides a library for making API gateways on top of Spring and Java. It provides a flexible way of routing requests based on a number of criteria, as well as focuses on cross-cutting problems like security, resiliency, and monitoring. Some of the important features of Spring Cloud Gateway are:
- It is Built on Spring Framework 5, Project Reactor, and Spring Boot 2.0
- You can integrate Circuit Breaker with Spring Cloud Gateway
- You can integrate Spring Cloud DiscoveryClient
- Predicates and filters are specific to routes
- Path Rewriting
- It is able to match routes on any request attribute, etc.
Note: Please refer to this article to know more about Spring Cloud Gateway.
How to Include Spring Cloud Gateway:
For Maven:
<dependency>
      <groupId>org.springframework.cloud</groupId>
      <artifactId>spring-cloud-starter-gateway</artifactId>
</dependency>
For Gradle:
implementation("org.springframework.cloud:spring-cloud-starter-gateway")
Note: If you include the starter, but you do not want the gateway to be enabled, set
spring.cloud.gateway.enabled=false
Developing API Gateway Using Spring Cloud Gateway
Step 1: Create a New Spring Boot Project in Spring Initializr
To create a new Spring Boot project, please refer to How to Create a Spring Boot Project in Spring Initializr and Run it in IntelliJ IDEA. For this project choose the following things
- Project: Maven
- Language: Java
- Packaging: Jar
- Java: 17
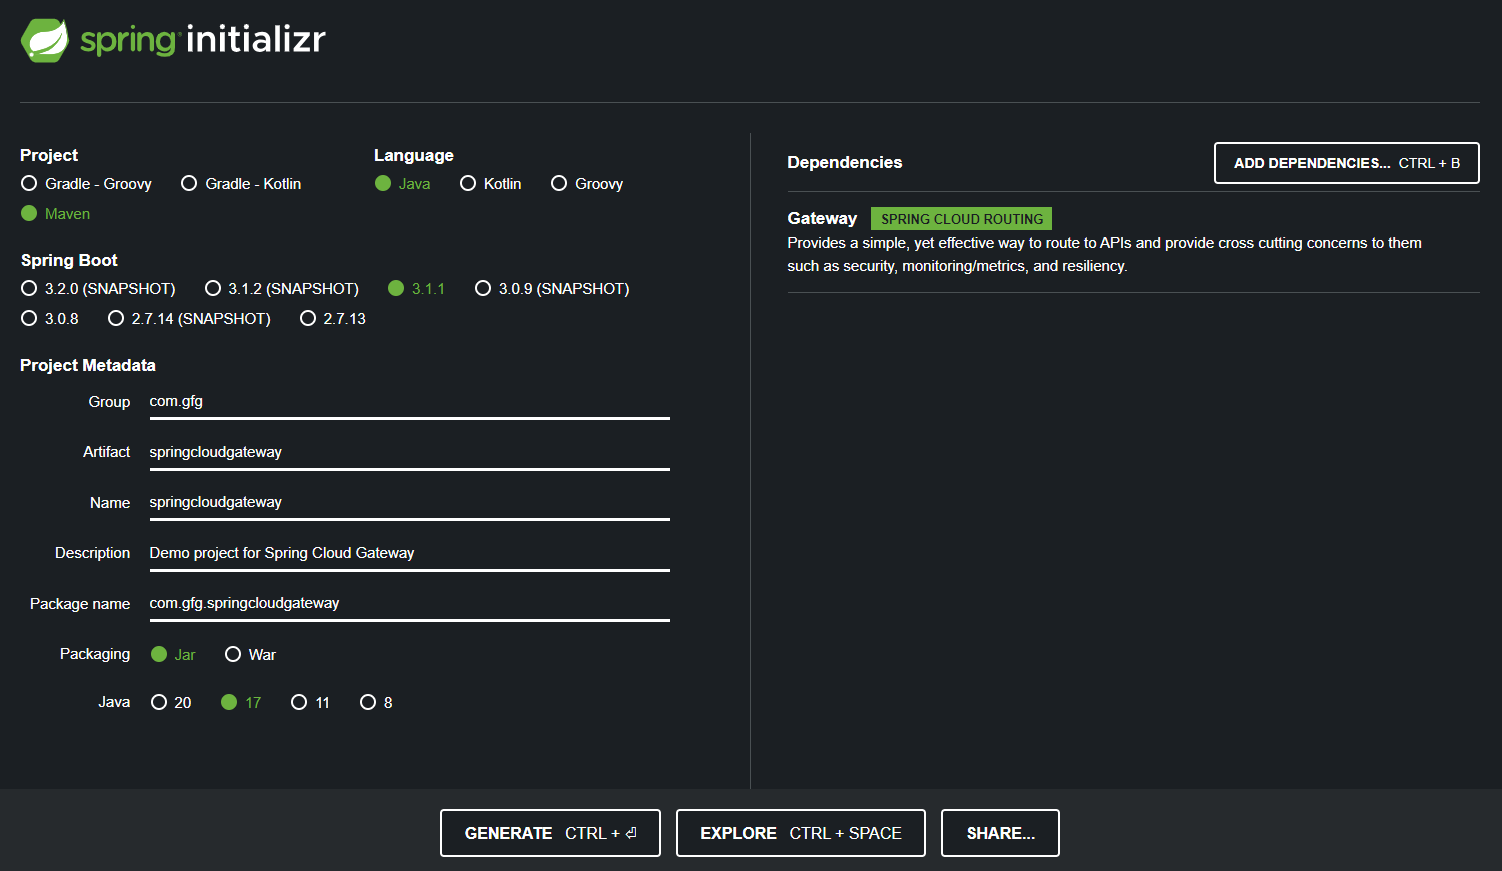
Please choose the following dependencies while creating the project.
- Gateway (SPRING CLOUD ROUTING)
Refer to the below image
Below is the complete pom.xml file. Please cross-verify if you have missed some dependencies
XML
<?xml version="1.0" encoding="UTF-8"?>
<modelVersion>4.0.0</modelVersion>
<parent>
<groupId>org.springframework.boot</groupId>
<artifactId>spring-boot-starter-parent</artifactId>
<version>3.1.1</version>
<relativePath/>
</parent>
<groupId>com.gfg</groupId>
<artifactId>spring-cloud-gateway</artifactId>
<version>0.0.1-SNAPSHOT</version>
<name>Spring Cloud Gateway</name>
<description>Spring Cloud Gateway</description>
<properties>
<java.version>17</java.version>
<spring-cloud.version>2022.0.3</spring-cloud.version>
</properties>
<dependencies>
<dependency>
<groupId>org.springframework.cloud</groupId>
<artifactId>spring-cloud-starter-gateway</artifactId>
</dependency>
<dependency>
<groupId>org.springframework.boot</groupId>
<artifactId>spring-boot-starter-test</artifactId>
<scope>test</scope>
</dependency>
</dependencies>
<dependencyManagement>
<dependencies>
<dependency>
<groupId>org.springframework.cloud</groupId>
<artifactId>spring-cloud-dependencies</artifactId>
<version>${spring-cloud.version}</version>
<type>pom</type>
<scope>import</scope>
</dependency>
</dependencies>
</dependencyManagement>
<build>
<plugins>
<plugin>
<groupId>org.springframework.boot</groupId>
<artifactId>spring-boot-maven-plugin</artifactId>
</plugin>
</plugins>
</build>
</project>
|
Step 2: Make Changes in Your application.yaml file
Now make the following changes in your application.yaml file.
server:
  port: 8085
spring:
  application:
    name: API-GATEWAY-SERVICE
  cloud:
    gateway:
      routes:
        - id: DEMO-SERVICE
          uri: http://localhost:9090
          predicates:
            - Path=/demo/**
Here,
- id: You can give any id as of now.
- uri: Here you have to provide the port in which your microservice is running
- predicates (- Path): Here we have provided the path “/demo/**”, which means any request starting with path “/demo/**” rout it to DEMO-SERVICE.
Step 3: Develop the DEMO-SERVICE
To create a new service, please refer to How to Create a Spring Boot Project in Spring Initializr and Run it in IntelliJ IDEA. For this project choose the following things
- Project: Maven
- Language: Java
- Packaging: Jar
- Java: 17
Please choose the following dependencies while creating the project.
In this MIcrosevice we have created a simple REST API in our controller class.
Java
package com.gfg.demo.controller;
import org.springframework.http.ResponseEntity;
import org.springframework.web.bind.annotation.GetMapping;
import org.springframework.web.bind.annotation.RequestMapping;
import org.springframework.web.bind.annotation.RestController;
@RestController
@RequestMapping("/demo")
public class DemoController {
@GetMapping("/gfg")
public ResponseEntity<String> getAnonymous() {
return ResponseEntity.ok("Welcome to GeeksforGeeks");
}
}
|
Now make the following changes in your application.properties file.
server.port=9090
Now run your application and test it out.
Step 4: Testing in Postman
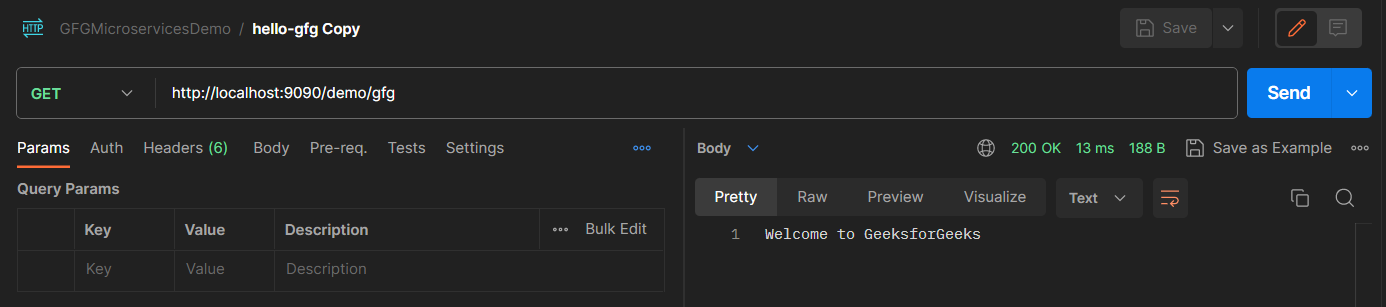
Now let’s test our API. Hit the following URL
http://localhost:9090/demo/gfg
And you are going to get a response like this
Now we can get the same response by using our API gateway port which is 8085. Now hit the following URL
http://localhost:8085/demo/gfg
And you are going to get a response like this
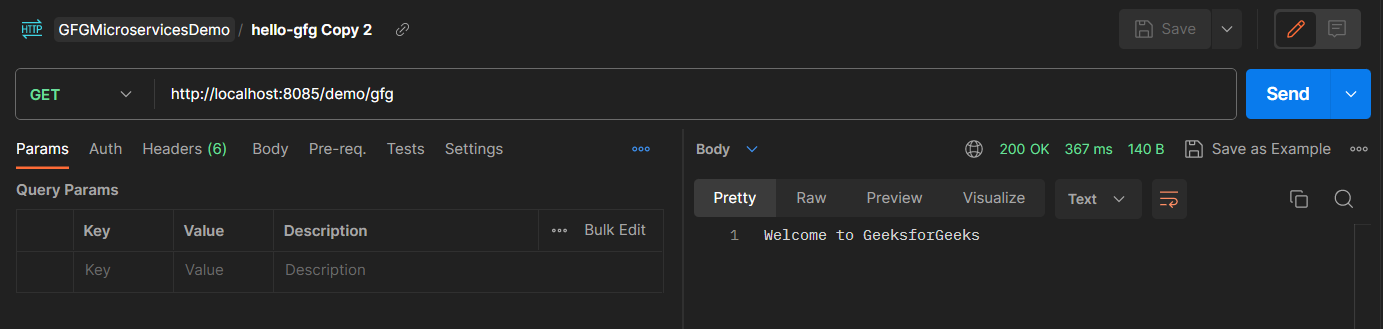
So this is how the API gateway works. If you have hundreds of microservices then you don’t need to remember the port of all microservices. You can just configure them in your API Gateway and you can access all your API by using only one port.
Share your thoughts in the comments
Please Login to comment...