Selenium IDE
Last Updated :
21 Sep, 2023
Selenium IDE (Integrated Development Environment) is an open-source web testing solution. Selenium IDE is like a tool that records what you do on a website. Subsequently, these recorded interactions can be replayed as automated tests. You don’t need much programming skills to use it. Even if you’re not great at programming, you can still make simple automated tests with it.
What is Selenium IDE?
Selenium IDE serves as an innovative toolkit for web testing, allowing users to record interactions with web applications. Selenium-IDE was initially created by Shinya Kasatani in 2006. Selenium IDE also helps to simplify the testing process. It is a friendly space for testers and developers to team up. This helps everyone quickly share important testing information and results, making things work better and feel accomplished. This article explores Selenium IDE, its features, benefits, limitations, step-by-step installation guide, and more.
Features of Selenium IDE
- Record: With Selenium IDE, users can record how they use a web application.
- Playback: Selenium IDE automatically repeats what you recorded earlier.
- Browser Check: Selenium IDE works on various browsers for testing.
- Check Elements: Users can easily look at different parts of a webpage and set up how to work with them.
- Spotting Errors: Selenium IDE helps users find and fix issues in their automated tests, one step at a time.
- Exporting Tests: You can save tests created in Selenium IDE in different programming languages (like Java, Python, or C#). This lets you use them with other Selenium tools.
Benefits of Selenium IDE
- Easy Automation: Automation is accessible even for those with limited programming skills.
- Collaborative Environment: Helps testers and developers team up, share info, and get better results.
- Quick Debugging: Built-in debugging tools help identify and rectify errors within tests.
- Export Flexibility: Sending tests to different programming languages makes them work better with other Selenium tools.
- Streamlined Testing: Provides an efficient method for testing websites, reducing manual efforts.
What is Selenese?
Selenese is the language used within Selenium IDE to create test scripts. Selenese uses commands in Selenium IDE to mimic actions on webpages like clicking buttons, typing text, and verifying correctness.
- It’s like giving instructions to a computer on how to interact with a website.
- Selenese helps testers talk to Selenium IDE without needing lots of coding knowledge.
- This makes creating test scripts easier for everyone.
Limitations of Selenium IDE
- Not Ideal for Large Projects: For big projects that need lots of testing, Selenium IDE might not be as good at handling everything and keeping things organized as other Selenium tools can.
- Limited Complexity: Complex scenarios may require additional Selenium tools beyond IDE.
- Dynamic Elements: Tests involving dynamically changing elements may face locator challenges.
- Maintenance: Regular test updates are crucial due to evolving websites.
- No Conditional Testing: Selenium IDE lacks the ability to perform conditional testing, where actions depend on certain conditions being met. This limitation might affect the testing of dynamic or changing web elements.
How to Install Selenium IDE?
Selenium IDE works with Chrome Browser and Mozilla Firefox. Follow these steps to install Selenium IDE:
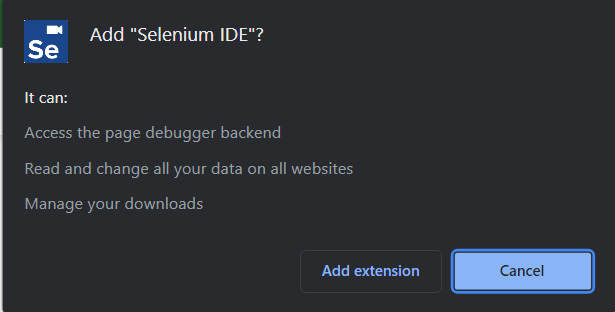
Step 1: Open your browser and visit Selenium’s website or use this link to add the extension.

Step 2: Install the Selenium IDE extension to your preferred browser (e.g., Chrome).
Step 3: Open the installed Selenium IDE extension to access its default interface.

How to Use Selenium IDE?
Record Process
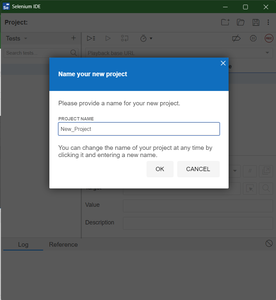
Step 1: Create a new project and name your project.
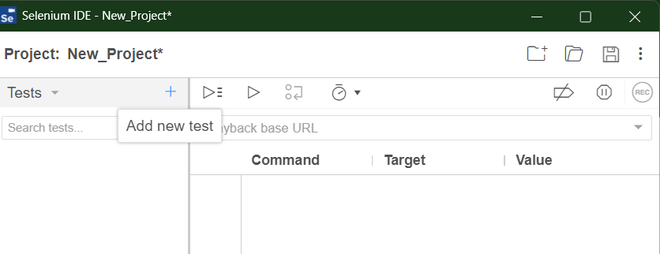
Step 2: Add a new test case by clicking ‘+’ on the Tests tab.
Step 3: Specify a playback base URL, defining where your tests will initiate, e.g., https://www.google.com.
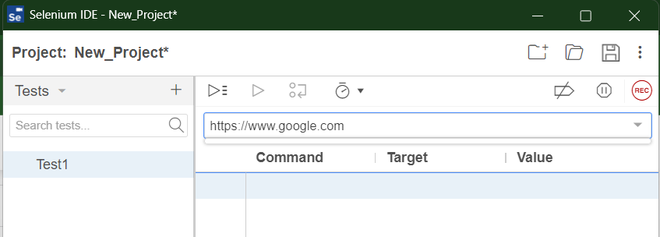
Step 4: Click the recording button on the right side to start recording. This will redirect you to the Google search page.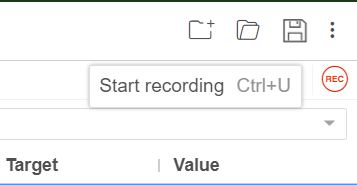
Step 5: Initiate a search for “Selenium IDE” and press Enter to initiate the search.

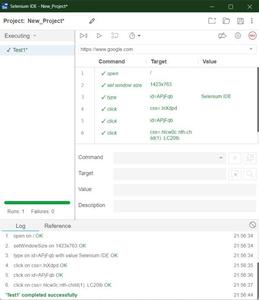
Step 6: Click the first site that will redirect you to the Selenium IDE webpage. Then, open the Selenium IDE dialog box and pause the recording. You will see all the commands you performed are saved.

Playback Process
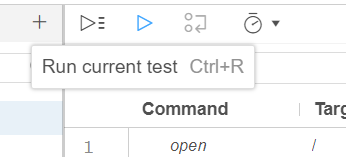
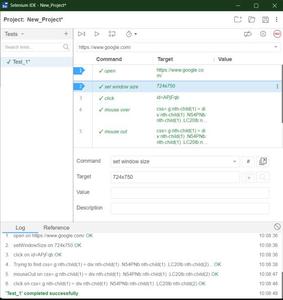
Step 1: Click “Play” to run the test and see the browser repeat your recorded actions.
Step 2: Evaluate the summary of your test case to identify any failed or passed steps.
Debugging
There are Several ways to debug your test case, some of them include:
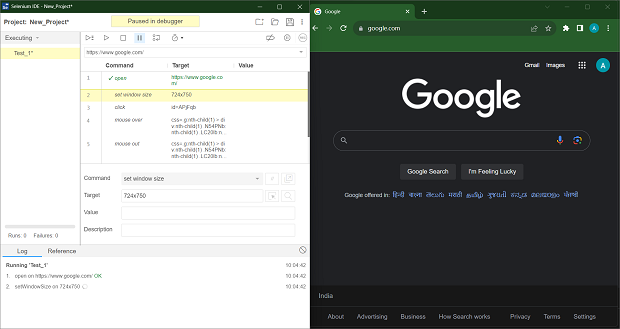
1. Step over command: If there are any problems, use the built-in debugging step over command to find out where things go wrong.
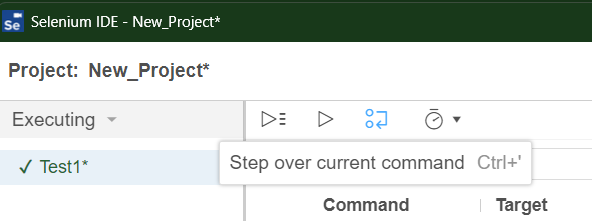
By clicking the Step over command again and again you can go through each step as shown:
2. Adding Breakpoints: You can add breakpoints on a particular step that you want to check by clicking the step number on the left side.
Then click the play button to automatically debug your test

To disable the breakpoints click on the Disable breakpoints button on the upper right side

3. Adding Debug Command : You can debug your test case by inserting a new command, click right on a step where you want to programmatically pause the debugger and click on insert a new command.

Add “debugger” in the command section then press play to run your test and it will automatically pause where you added your debug command.

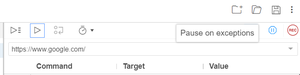
4. Pause onException: You can click on “Pause on Exception” option and then run the test to figure out what is wrong. With this option you can update your test cases easily.
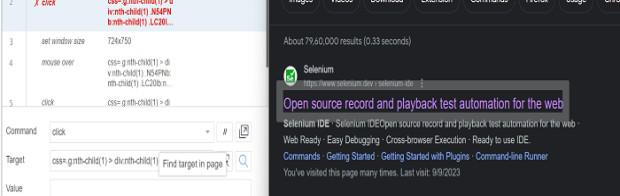
Click on the ‘Find target in page’ button to see if the required command exists on your page, if it doesn’t highlight anything on your page, it means the command does not exist.

You can click on the ‘Select target in page’ button to select the element you want to add in your particular command
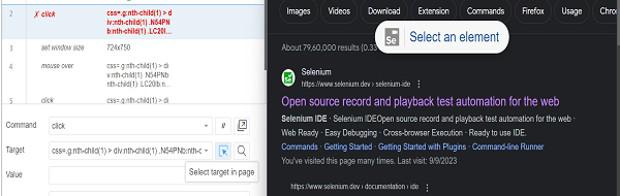
Now that your new target is added in your command, you can click on ‘Find target in page’ button and it will highlight the element that you selected.
Export the Test Case
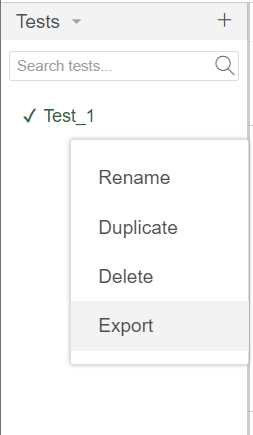
To export your test case in your desired language click on the three dots of your Test on the right side and click on ‘Export’.
It will give you options to export your test case in the given languages, select the one you want.
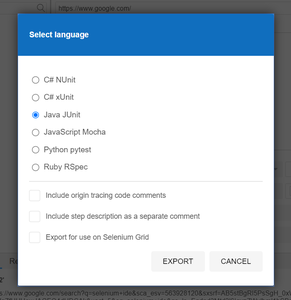
Click ‘Export’ and save at your desired location, then you can open the file in notepad to access the exported code in your selected language.

Share your thoughts in the comments
Please Login to comment...