In today’s world of software development, ensuring seamless user journeys is crucial. Login functionality lies at the heart of most web applications, making robust testing indispensable. This guide introduces us to the Selenium IDE, a powerful tool for automating login tests and streaming our software testing process.
Prerequisites
- Selenium IDE: A browser extension for recording and replaying user interactions on webpages, enabling automated testing. It is a powerful and user-friendly tool for automating tests and streamlining our software development process.
- Test Case: A set of steps defining a specific user interaction (e.g., login) to be tested.
- Locator: A way to identify an element on a webpage(e.g., by ID, name, CSS selector).
- Assertion: A verification step, checking if the expected outcome of an action matches the actual result(e.g., successful login).
Step of Login Test with Selenium IDE
Step 1: Set Up and Launch Selenium IDE
1. First of all install the Selenium IDE extension for your preferred browser(Chrome, Firefox).
2. To download the Chrome extension go to Extensions and enter to Chrome webstore in the Browser.
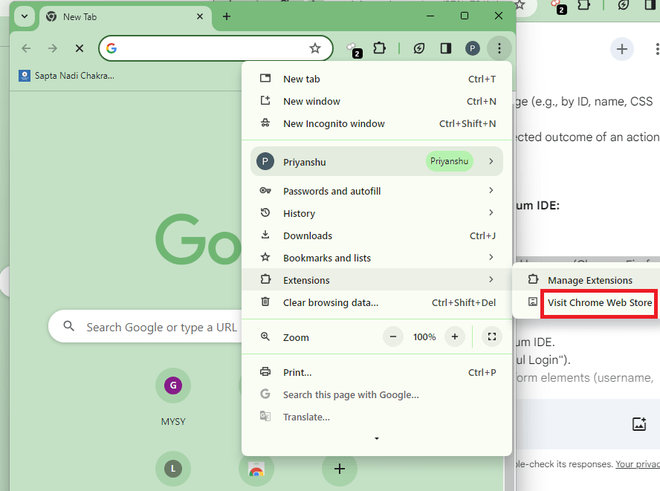
Open chrome webstore
3. Inside the Chrome Web Store search Selenium IDE and install it.
-(1)-(2)-768.png)
Install selenium IDE
4. Now open the Selenium IDE from the chrome extensions.

Open Extensions
5. Then from Extensions select the Selenium IDE Extension and open it it will show the following interface.

Selenium IDE interface
6. Now click on the create a new project for new testing project in our case we are trying to conduct the login test so we will keep our project name Login-Test.
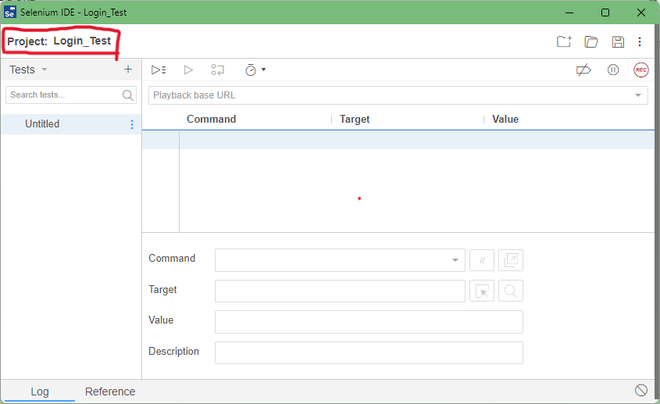
project name Login _Test
7. In the above image now you can see the real interface of the Selenium IDE ,to know the different functionalities of all these interface you can refer to this article Selenium IDE features and Its Application.
Step 2: Start Recording the Login Flow
1. Now create the new test case by clicking on the ‘+’ icon inside the test case panel and name it as the ‘TestCase1′.
2. One can create the multiple testcases within the test project using Test case panel, it even shows that which test case is successful and which test case is not, in other words it shows the summary of the execution of the test case.
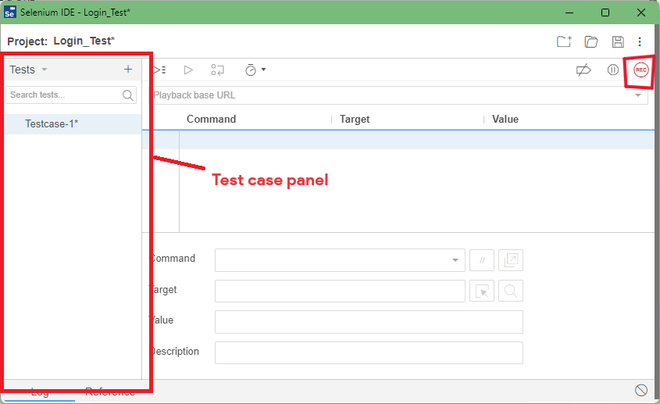
Test Case Panel
3. After creating the test case launch the test case by clicking on the Record button, as you click on the record button it will open the window which will ask for the base URL of the web application on which we have to perform the test-case.
4. Currently we will take the “https://www.geeksforgeeks.org/” as the base URL for our test case.
5. The purpose of our test case is to test the login functionality of the GFG by automating the test.
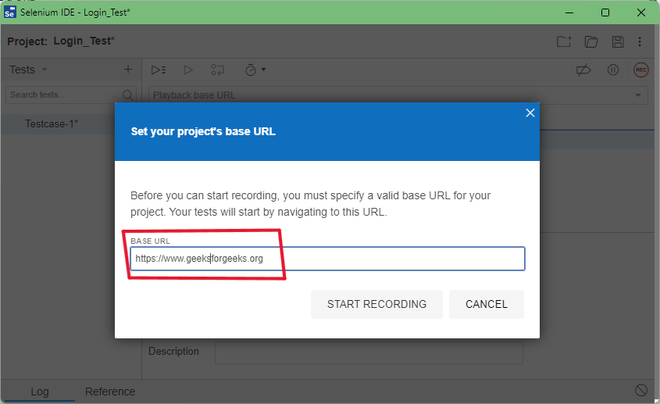
Base URL window
6. As we enter the base URL of the testing application and hit the Start Recording button, it will redirect us to the website on which we have to perform the test .
7. In our case as we have entered base URL as “https://www.geeksforgeeks.org/”, the Selenium IDE will redirect us to the gfg website, and it will record each action we perform on that website.
8. As we can see now that now we are on the home page of “Geeks for Geeks” website, now click on the sign in button on top left right corner of the website. It will open the Sign-in window, enter the user name and password and then click on the sign-in button and it will logged in to the account.
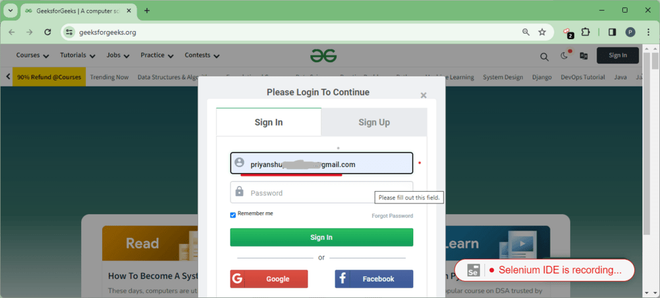
Logged in GeeksForGeeks web
9. Once you get logged in to the account after that go to the selenium IDE and stop recording by clicking on the Recording button again.
Step 3: Review the Recorded Testcase or Assertion Phase
1. Now selenium IDE had recorded all the action that we performed on the website while signing-in to the account, you can see the record of all the action in the sequence within the Test Script Editor box.
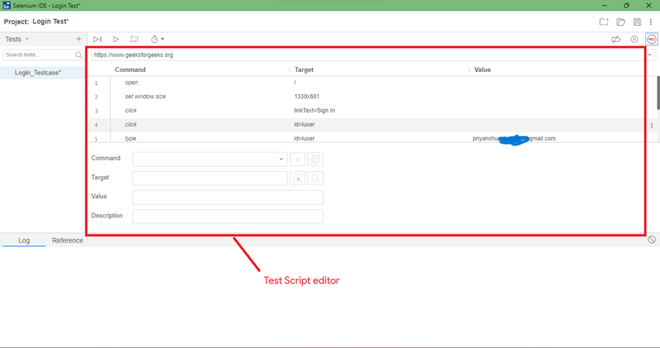
Test Script Editor
2. The actions that we perform while recording the test case are stored in the command column, the target stores the ID of the components on which the action is performed they are also known as Locators and value stores the value that are entered inside the components while recording the test-case.
3. In our case there are two values that are stored, one is email or username and another is password value for the target user and ID-password.
4. After the recording of the testcase is completed stop the recording by clicking again on the recording button, and verify all the actions performed during the recording the test case.
-660.png)
Tool bar and replay button
5. Now your test case is success fully recorded and now we can use it multiple times as per our need. So whenever we have to perform the login test inside the web application certain times by changing values of the target components.
6. Moreover to review the recorded login testcase we go to toolbar feature of the Selenium IDE and replay the testcase by clicking on the replay button and observe the execution of the test case through LOG and Reference panel.
7. Inside the log panel we can observe that each action that we performed while signing into the ‘GFG; website or while logging in to the website, they are all performed sequentially and on the right side of each action the word ‘OK’ is also being displayed.
8. It indicates that the action is being successfully performed.
-660.png)
Review the test case through log panel
9. If any error occurs while executing the test case or while performing the action of the test case then it will show the text or error message in the red color as shown in the image below inside the log and reference panel.
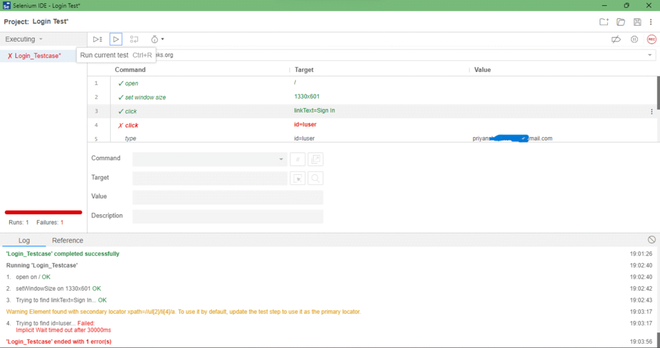
Error occured while executing test case
Step 4: Save the Test Case
1. After the successful completion of the testcase and after asserting it and verifying it properly save the test case.

Save the test case
2. The test case will be saved with the “.side” extension , you can use these file multiple times to execute the test case.
Conclusion
The selenium IDE is used for performing the test Automatically by “recording the test case once and execute it multiple times”, it makes the testing of the modules of the web application easier ,and by using the certain feature of the selenium IDE we can improve the work flow of testing phase.
As we can see that how easy is to record the test case and verify it and even run multiple times over the application using the selenium IDE, which can be easily understood by performing above Login-Test practical using Selenium IDE.
FAQs
1. How to create the test case in Selenium IDE?
We can create the certain test cases using the Test Case panel .
2. can we change the target values of the Locators within test script editor?
Yes we can make change in the target values of the locator inside the test script editor box .
3. Through which extension the testcase is saved?
TH test case created within the selenium IDE is stored using “.side” extension.
4. From where we can observe that test case is executing properly or not?
Through log and reference panel we can observe that the test case is executing properly or not
Share your thoughts in the comments
Please Login to comment...