Selenium IDE-First Test Case
Last Updated :
01 Dec, 2023
Selenium IDE is an open-source tool that is widely used in conducting automated web testing and browser automation. This tool is intended mainly for Web Application testers and developers to develop, edit, and run automated test cases for Web Applications. Selenium IDE lets you easily playback and record interactively web application activities during test automation on the browser-based interface. You don’t need much programming skills to use it. Even if you’re not great at programming, you can still make simple automated tests with it.
Key Terminologies
- Selenium IDE: Record, Edit, and Run Automated Tests for Web Applications with Selenium Integrated Development Environment.
- Test Case: One particular scenario is being tested using an automatic approach which comprises a series of instructions and commands applied on a client web application.
- Recording: Capture and Creation of Test Cases Using User Interactions in Web Applications.
- Project: A bundle of closely connected test situations.
Step-by-Step Guide to Create Your First Test Case
Selenium IDE works with Chrome Browser and Mozilla Firefox.
Step 1: Setting Up Selenium IDE
To set up Selenium IDE in your browser you can visit the Selenium IDE website or click on this link to add the extension.

Selenium IDE Installation
Step 2: Create a New Project
Open the installed Selenium IDE extension to access its default interface. Then, click “Create a New Project“.
Creating a new project
Step 3: Name your project
The next step is to assign a name to your project. You can give any name that reflects your project’s identity.
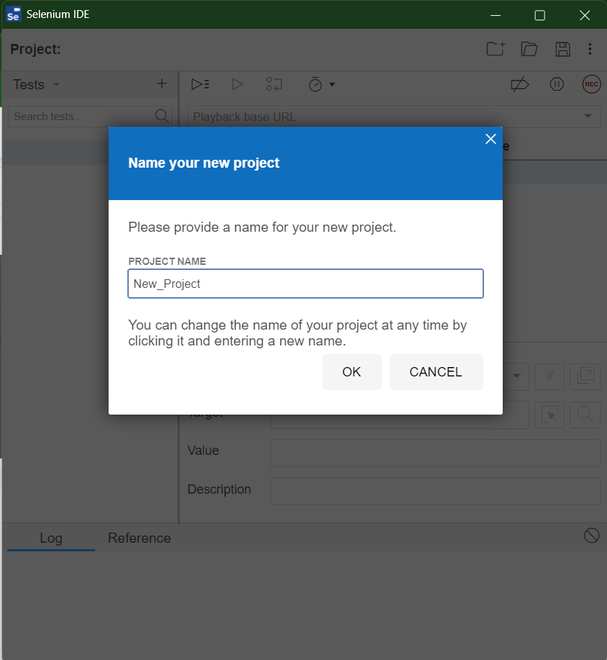
Naming project
Step 4: Creating a New Test Case
To begin the process of creating a test case for your website, add a new test case by clicking ‘+’ on the Tests tab and name your Test.
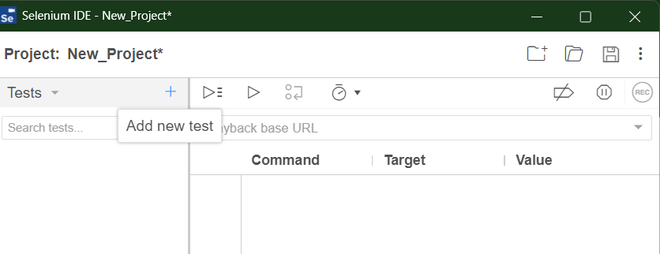
Adding a new test
Step 5: Adding Playback base URL
A playback base URL is required to execute your test case, your test case will start from the URL that you will give. Add a playback base URL e.g., https://www.geeksforgeeks.org/ in the tab as shown in the image below.
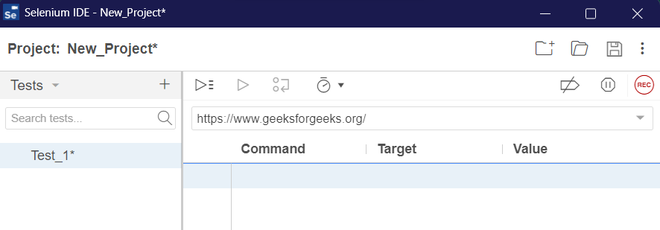
Adding a playback base url
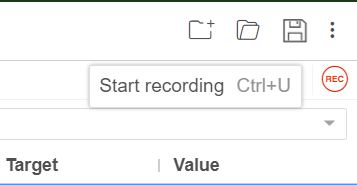
Step 6: Recording Your Test Case
To start the recording of your Test Case, click the recording button available. It will capture every interaction with the web application in real time.
Record test case
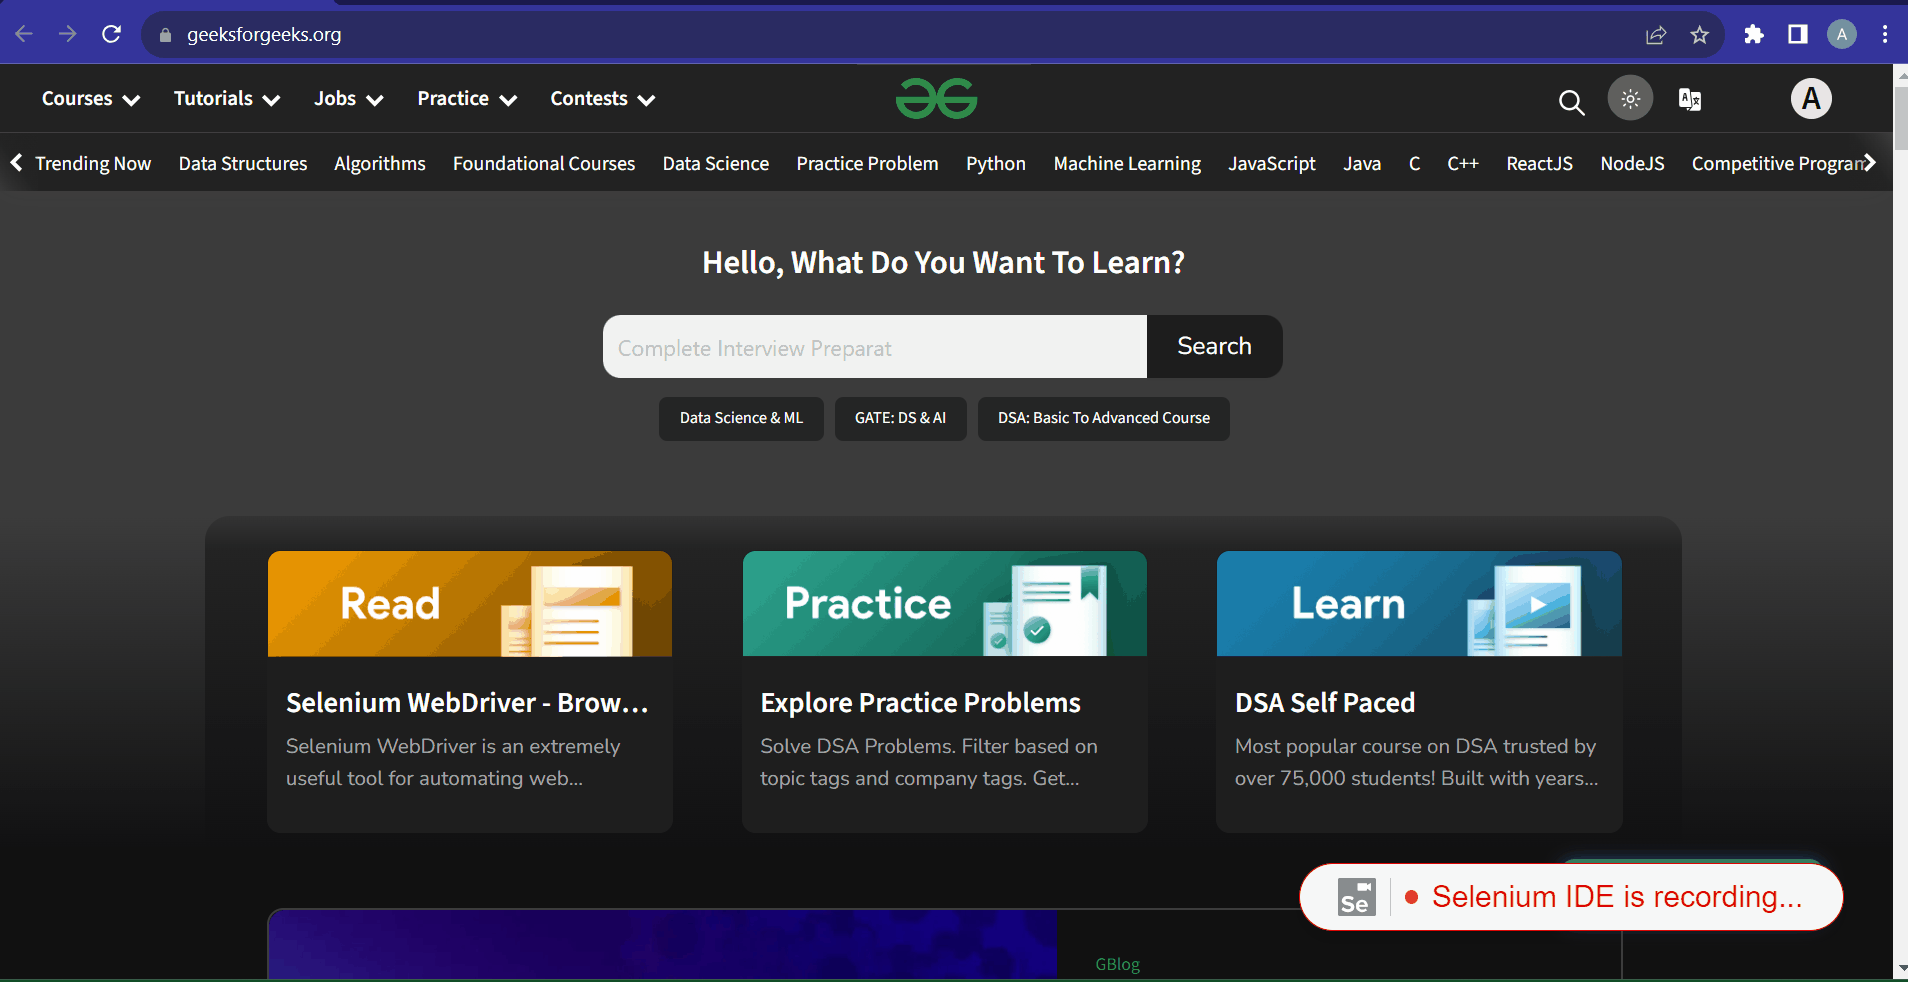
Step 7: Performing Actions
Visit the website you intend to test and carry out the specific actions you wish to incorporate into your test case. Selenium IDE will record these actions as steps in your test case.
For example, Initiate a search for “Selenium IDE” in the search bar on geeksforgeeks website and press Enter to initiate the search. Click the first article that will redirect you to the Selenium IDE article webpage.
Performing Actions
Step 8: Stopping Recording
Once you’ve completed your interactions, click the “Stop Recording” button in Selenium IDE.

Stop Recording
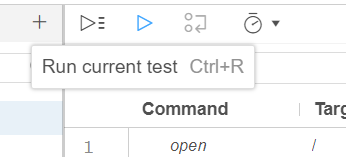
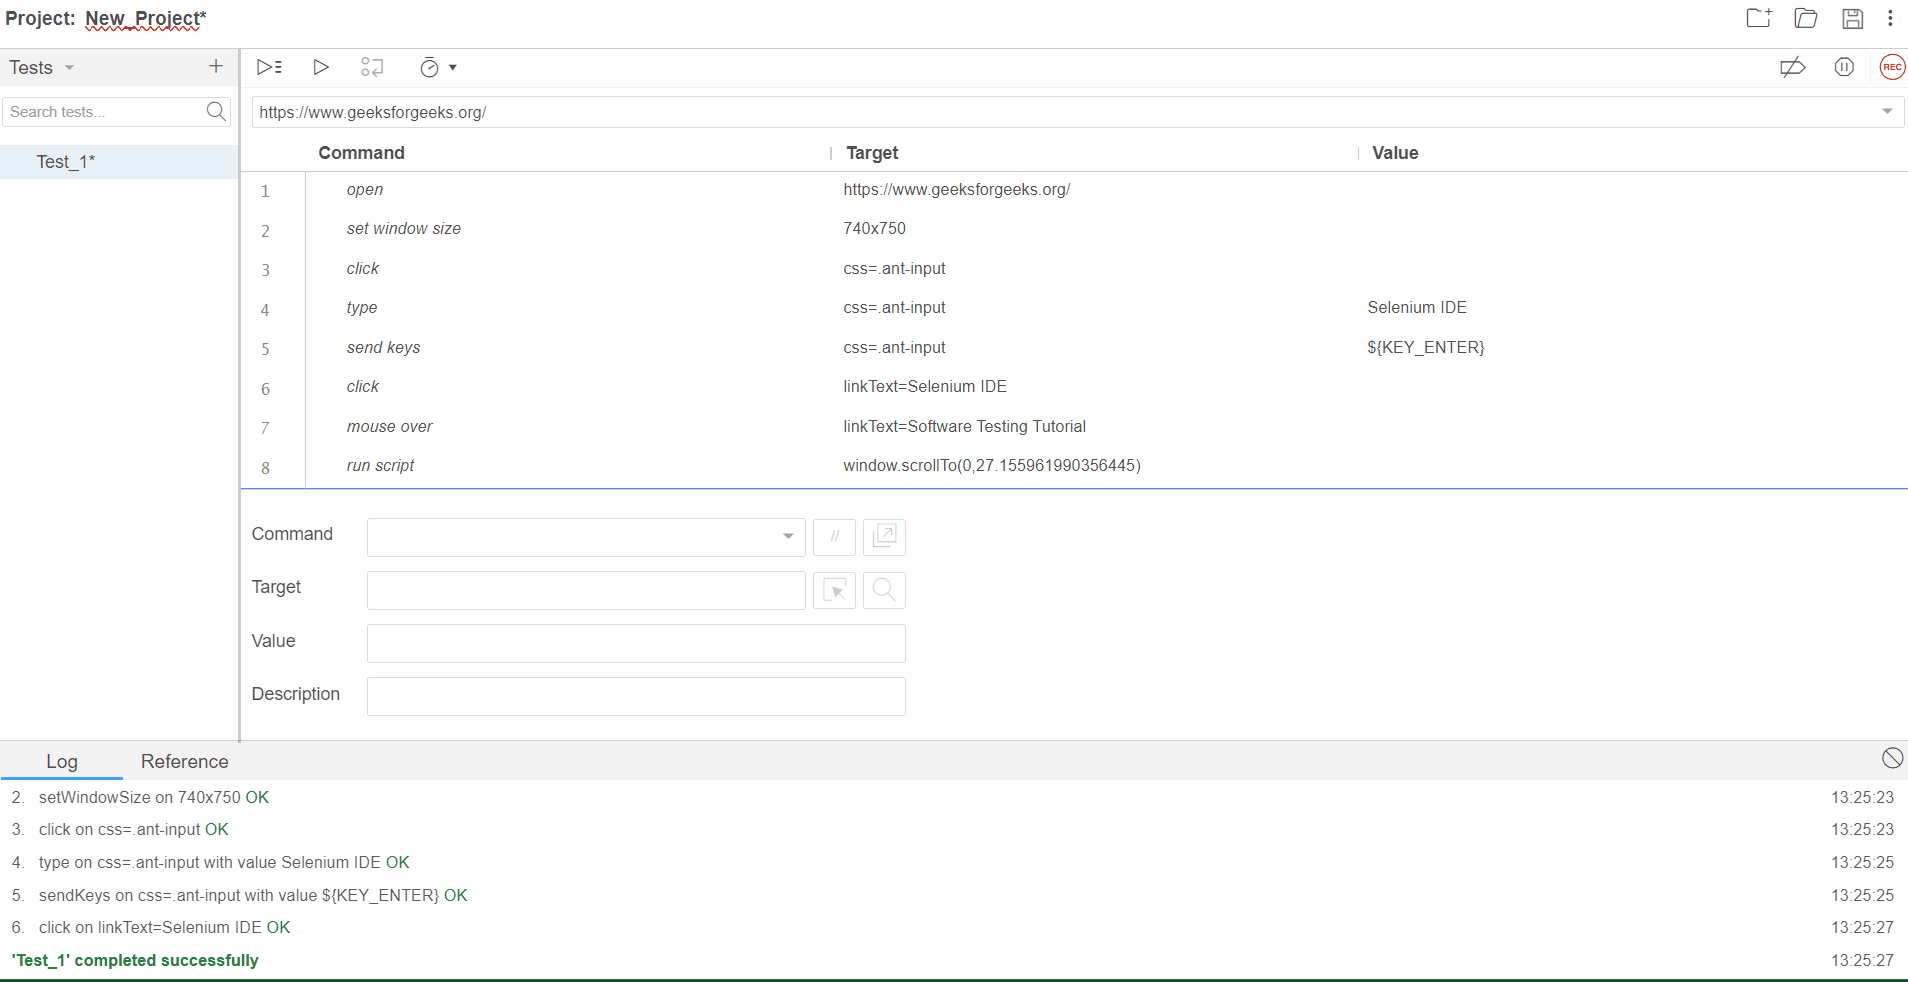
Step 9: Running Your Test Case
Click the “Run current test” button to execute your test case and it will replay the actions that you performed. Observe the interactions and you can identify any issues during the test run.
Run test case
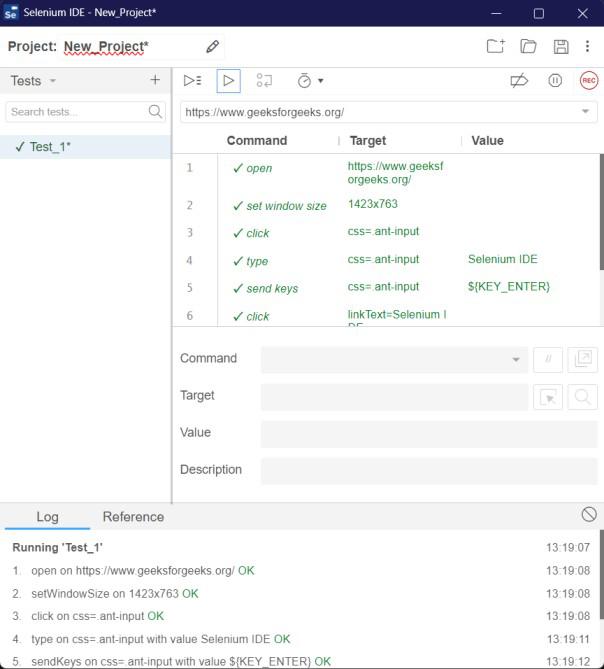
Step 10: Evaluate
You can easily evaluate the summary of your test case by checking the ‘log’ section below, which will help you identify whether any steps have failed or passed.
Evaluate test case
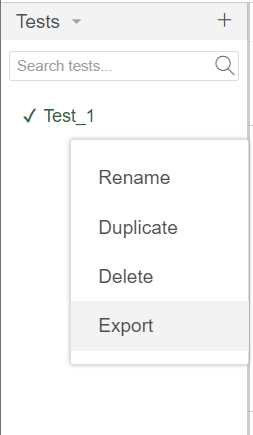
Step 11: Export Your Test Case
Click on the three dots located on the right side of your test and select ‘Export‘ to export your test case in your desired language so that you can use it with other Selenium tools and frameworks for various testing and automation purposes.
Export test
It will give you options to export your test case in the given languages. You can choose any of the given languages to export your test case.
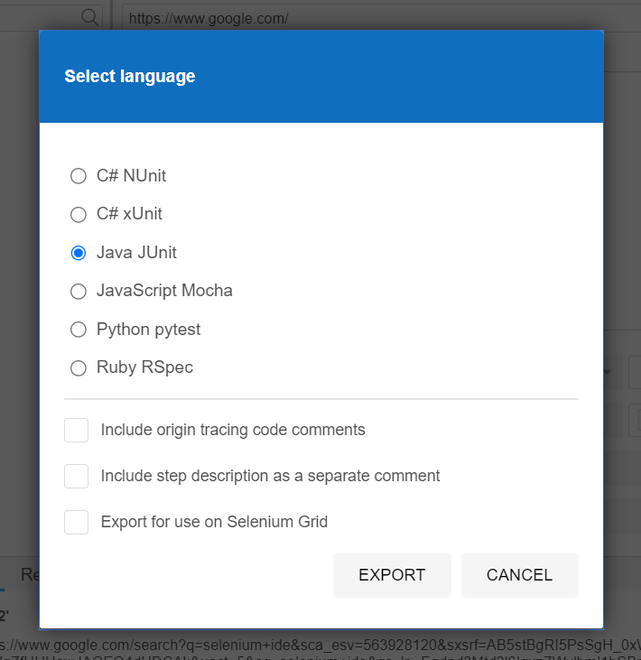
Exporting Test Case
Output:
Final Output
Explanation:
After using Selenium IDE what you get is a score of your web test case. After running a test case, you can quickly measure its performance and check on the behaviour of your web application.
- The log contains a brief description indicating the success or failure of every individual step of your testing procedure. The log shows how successful you are with your automated test.
- The log enables you to determine whether any problems or mistakes arose during the test run. This detailed feedback aids in identifying bugs, anomalies, and undesirable behaviours in your web applications.
- This ensures the web application does what it is supposed to do and conforms to set standards.
- Ultimately, it generates one that assures you of a PASS or FAIL status for every phase of testing, plus a feedback mechanism to allow tuning and enhancement of automation tests.
- The Selenium IDE helps to establish a feedback loop for maintaining the reliability and quality of web applications.
Conclusion
Selenium IDE is very easy to use, even if one does not have any programming ability; thus, it’s excellent for beginners or professionals. Selenium makes it easy for you to set up your testing stuff, take screenshots, create projects, and view the results of recorded tests. Testing a modern website can become trickier, but this application has made it so simple that it has turned into a necessity for anyone who desires a smooth and simple process of testing modern websites.
Share your thoughts in the comments
Please Login to comment...