Role of Hooks in Functional Components.
Last Updated :
21 Feb, 2024
Hooks in React are like new tools that make building components easier. Before, we had to use classes, which were like following strict instructions. But with hooks, we can do the same thing more simply and flexibly directly inside functional components. It’s like having a magic connector for building React components, allowing us to manage state, handle updates, and more without the constraints of classes. This makes our components more powerful and easier to work with.
Prerequisite:
React Hooks Overview:
- useState: Manage dynamic content easily with React’s useState hook.
- useEffect: Perform side effects at specific times in the component’s lifecycle.
- useContext: Facilitate component communication without prop drilling.
- useRef: Persist values across renders for efficient updates.
- useMemo: Optimize performance by memoizing functions.
- useReducer: Handle complex state logic in a structured manner.
- Custom Hooks: Create reusable shortcuts for repetitive tasks.
Role of Hooks in Functional Components:
- State Handling: Hooks allow functional components to manage their own state, making them as powerful as class components.
- Side Effects: With hooks like
useEffect, functional components can perform tasks like fetching data or updating the page when needed.
- Reusable Logic: Custom hooks enable users to write reusable code that can be shared among different components, reducing repetition and making code cleaner.
- Simplified Lifecycle Management: Hooks simplify handling component lifecycle events, making it easier to understand and maintain code.
- Better Organization: Hooks encourage organizing code based on what it does rather than on lifecycle methods, leading to more readable and maintainable codebases.
- Performance Optimization: Hooks provide tools like
useMemo and useCallback to optimize performance by preventing unnecessary re-renders.
Steps to Create Application (Install Required Modules):
Step 1: Create a React application using the following command:
npx create-react-app foldername
Step 2: After creating our project folder i.e. foldername, move to it using the following command:
cd foldername
Step 3: After setting up react environment on our system, we can start by creating an App.js file and create a directory by the name of components in which we will write our desired function.
Project Structure:
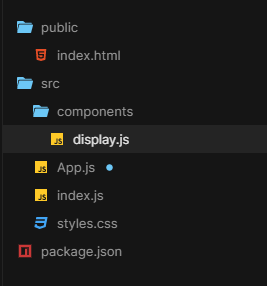
Project Structure
The updated dependencies in package.json file will look like.
"dependencies": {
    "react": "^18.2.0",
    "react-dom": "^18.2.0",
    "react-scripts": "5.0.1",
    "web-vitals": "^2.1.4",
}
Example 1: In this example, we will demonstrate how to add a function in our application.
Javascript
import Display from "./Display";
export default function App() {
return (
<div className="App">
<Display />
</div>
);
}
|
Javascript
import React, {
useState,
useEffect
} from 'react';
const Display = () => {
const [count, setCount] = useState(0);
useEffect(() => {
console.log(`You clicked ${count} times`);
}, [count]);
return (
<div>
<p>You clicked button {count} times</p>
<button onClick={() =>
setCount(count + 1)}>
Click me
</button>
</div>
);
}
export default Display;
|
Start your application using the following command.
npm start
Output:

Use of useState and useEffect Hooks
Share your thoughts in the comments
Please Login to comment...