ProhibitNullCharactersValidator in Django
Last Updated :
26 Mar, 2024
ProhibitNullCharactersValidator in Django, as applied in the code, ensures that the input provided by the user does not contain null characters. In this article, we will see how to use ProhibitNullCharactersValidator in Django.
What is ProhibitNullCharactersValidator in Django?
In Django, ProhibitNullCharactersValidator is a built-in validator used to prevent form fields from accepting input containing null characters (\x00). These null characters can cause various issues in data processing and might pose security risks, particularly in scenarios like input handling and data storage.
Advantages
- Enhances security by preventing null character injection attacks.
- Maintains data integrity by rejecting input with null characters.
- Improves user experience with clear error messages.
- Facilitates compliance with security standards and regulations.
How to Use ProhibitNullCharactersValidator in Django
Below is the example Implementation of how to use ProhibitNullCharactersValidator in Django in Python:
Starting the Project Folder
To start the project use this command
django-admin startproject core
cd core
To start the app use this command
python manage.py startapp home
Now add this app to the ‘settings.py’
INSTALLED_APPS = [
    "django.contrib.admin",
    "django.contrib.auth",
    "django.contrib.contenttypes",
    "django.contrib.sessions",
    "django.contrib.messages",
    "django.contrib.staticfiles",
    "home",
]
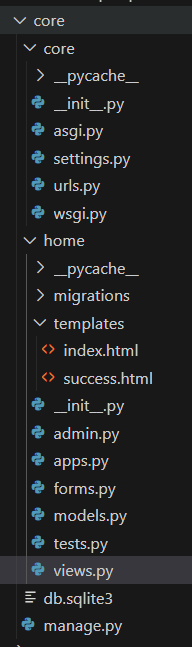
File Structure
Setting Necessary Files
views.py: This Django view function handles form submission: it validates the form data, extracts the cleaned name field, and renders either a success or index template based on the form’s validity, passing relevant data accordingly.
Python3
from django.shortcuts import render
from .forms import MyForm


def my_view(request):
    if request.method == 'POST':
        form = MyForm(request.POST)
        if form.is_valid():
            name = form.cleaned_data['my_field']  # Retrieve the submitted name
            # Pass the name to the success template
            return render(request, 'success.html', {'name': name})
    else:
        form = MyForm()
    return render(request, 'index.html', {'form': form})
forms.py : The ProhibitNullCharactersValidator in Django, as applied in this code, ensures that the input provided for the field my_field in the MyForm class does not contain null characters. This validator helps prevent issues related to null characters.
Python3
from django import forms
from django.core.validators import ProhibitNullCharactersValidator


class MyForm(forms.Form):
    my_field = forms.CharField(
        validators=[ProhibitNullCharactersValidator()],
        label="Enter some text",
        max_length=100,
        widget=forms.TextInput(attrs={'class': 'form-control'})
    )
urls.py : This Django urlpatterns list maps URL patterns to views. It connects the root URL to the my_view function from the home app’s views.
Python3
from django.contrib import admin
from django.urls import path
from home.views import my_view

urlpatterns = [
    path('admin/', admin.site.urls),
    path('', my_view, name='my_view'),
]
Creating GUI
templates/index.html : This HTML template is for rendering a form generated from the MyForm class. It includes styling using CSS. The form includes a text input field labeled “Enter some text” and a submit button. Django template tags are used to handle CSRF protection and display form errors if any occur.
HTML
<!DOCTYPE html>
<html lang="en">
<head>
    <meta charset="UTF-8">
    <title>My Form</title>
    <style>
        body {
            font-family: 'Times New Roman', Times, serif;
            background-color: #f4f4f4;
        }
        h1 {
            color: green;
        }
        form {
            max-width: 400px;
            background-color: #fff;
            padding: 20px;
            border-radius: 8px;
            box-shadow: 0 0 10px rgba(0, 0, 0, 0.1);
        }
        label {
            display: block;
            margin-bottom: 5px;
            color: #333;
        }
        input[type="text"] {
            width: 90%;
            padding: 10px;
            margin-bottom: 10px;
            border: 1px solid #ccc;
            border-radius: 4px;
        }
        button {
            background-color: #4CAF50;
            color: white;
            padding: 10px 20px;
            border: none;
            border-radius: 4px;
            cursor: pointer;
        }
        button:hover {
            background-color: #45a049;
        }
    </style>
</head>
<body>
    <h1>GeeksforGeeks </h1>
    <form method="post">
        {% csrf_token %}
        {{ form.my_field.errors }}
        <div>
            <label for="{{ form.my_field.id_for_label }}">{{ form.my_field.label }}</label>
            {{ form.my_field }}
        </div>
        <button type="submit">Submit</button>
    </form>
</body>
</html>
templates/success.html : This HTML template is for rendering a success message after form submission. It includes styling using CSS. The success message displays the submitted name (passed from the view) and informs the user that the form has been successfully submitted.
HTML
<!DOCTYPE html>
<html lang="en">
<head>
    <meta charset="UTF-8">
    <title>Success</title>
    <style>
        body {
            font-family: Arial, sans-serif;
            background-color: #f4f4f4;
        }
        h1 {
            color: green;
            font-family: 'Times New Roman', Times, serif;
        }
        p {
            color: black;
            font-family: 'Times New Roman', Times, serif;
            font-size: 20px;
        }
    </style>
</head>
<body>
    <h1>Success!</h1>
    <p><strong>"{{ name }}"</strong>   Your form has been successfully submitted.</p>
</body>
</html>
Deployment of the Project
Run these commands to apply the migrations:
python3 manage.py makemigrations
python3 manage.py migrate
Run the server with the help of following command:
python3 manage.py runserver
Output
Share your thoughts in the comments
Please Login to comment...