How to Move Installed Programs to Another Drive in Windows 11?
Last Updated :
19 Jan, 2024
Quick Solution!
Here is a quick solution for our active and speedy learners. Follow these steps to move installed programs to another drive on your Windows PC
- Go to Settings > Apps > Installed Apps
- Select the App to move > click on the 3-dots button > click Move.
- Choose the destination drive from the drop-down and click Move again.
The program is now on the new drive!
If you have several programs installed on your computer you might encounter storage issues on your C drive impacting the performance and stability of your PC. Luckily Windows 11 offers the option to transfer installed programs to a drive allowing you to free up space and optimize your system.
In this article, we will show you three methods, for moving Windows 11 apps to another drive.
Method 1: Move Installed Apps to Another Drive Using Settings
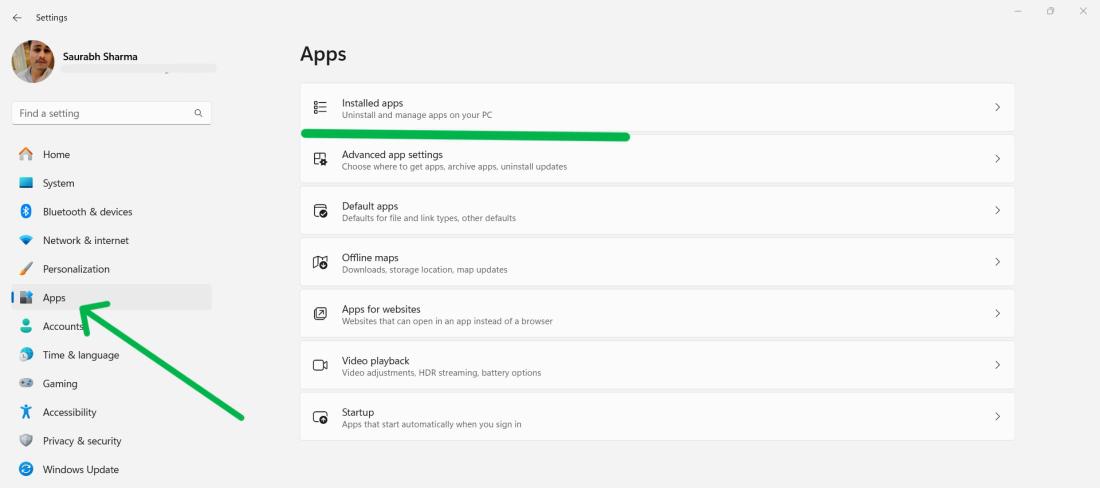
Step 1: Open Settings by pressing Win + I, then click on “Apps.”
Step 2: Select “Installed apps” from the right sidebar.
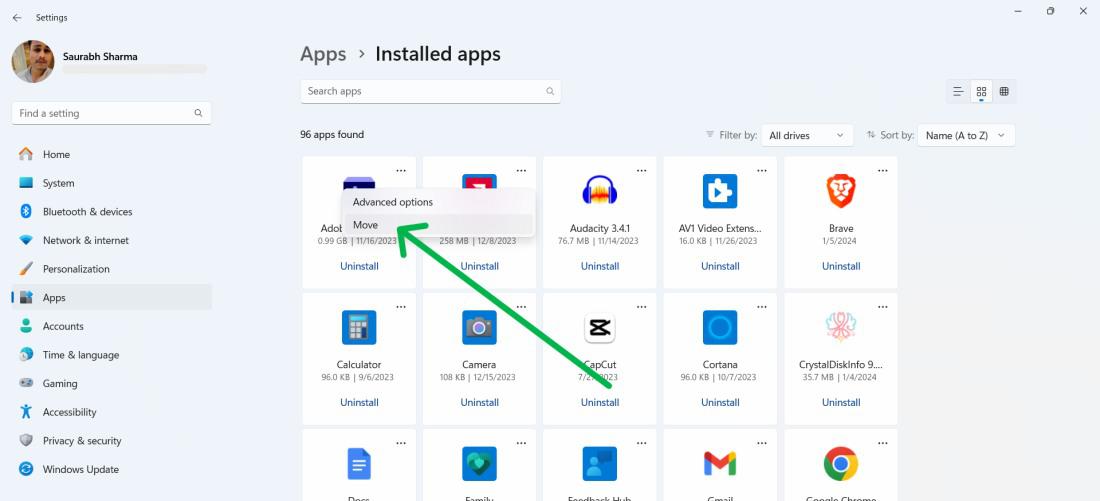
Step 3: Scroll through the list and find the app you want to move.
Step 4: Look for the three dots (…) next to the app’s name, then click “Move“.
Method 2: Move Installed Apps to Another Drive Using Registry Editor
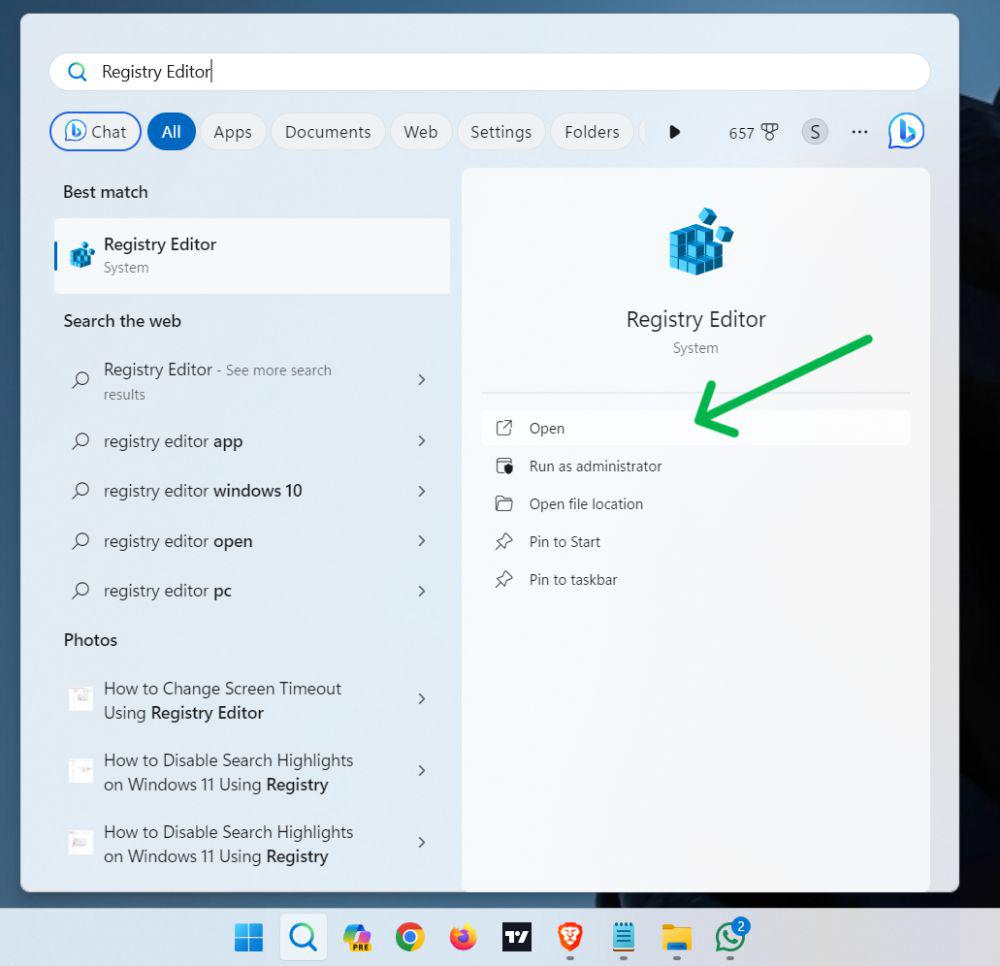
Step 1: To open Registry Editor, Press Win + S then on search bar “Registry Editor”
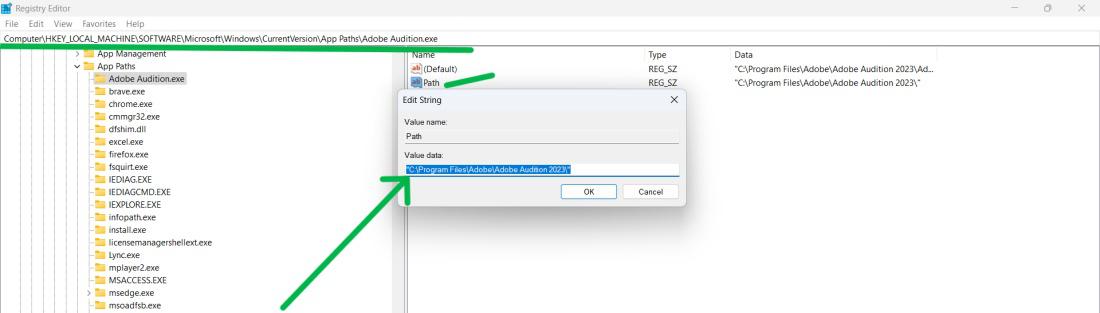
Step 2: To this path
HKEY_LOCAL_MACHINE\SOFTWARE\Microsoft\Windows\CurrentVersion\App Paths.
Locate the subkey with your program’s name or developer.
Step 3: Double-click the “Path” entry, change the path to your new drive location, and save.
Step 4: Restart your PC to ensure the changes take effect.
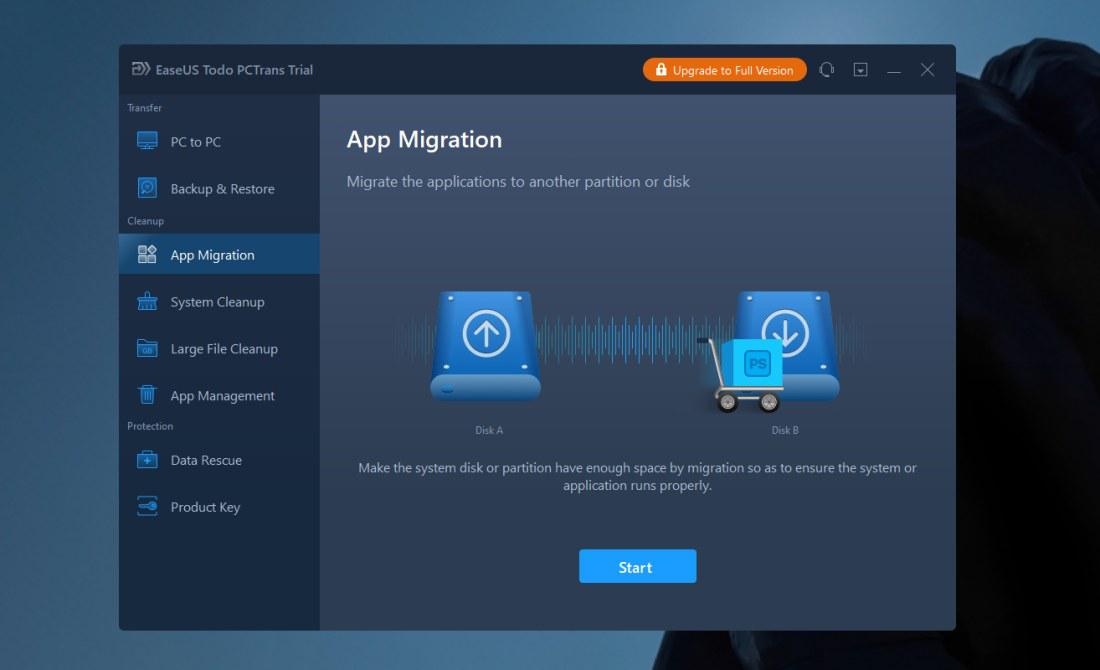
Step 1: Download and install from this link.
Step 2: Open the EaseUS Todo PCTrans
Step 3: On right sidebar click on “App Migration” then click on “Start“
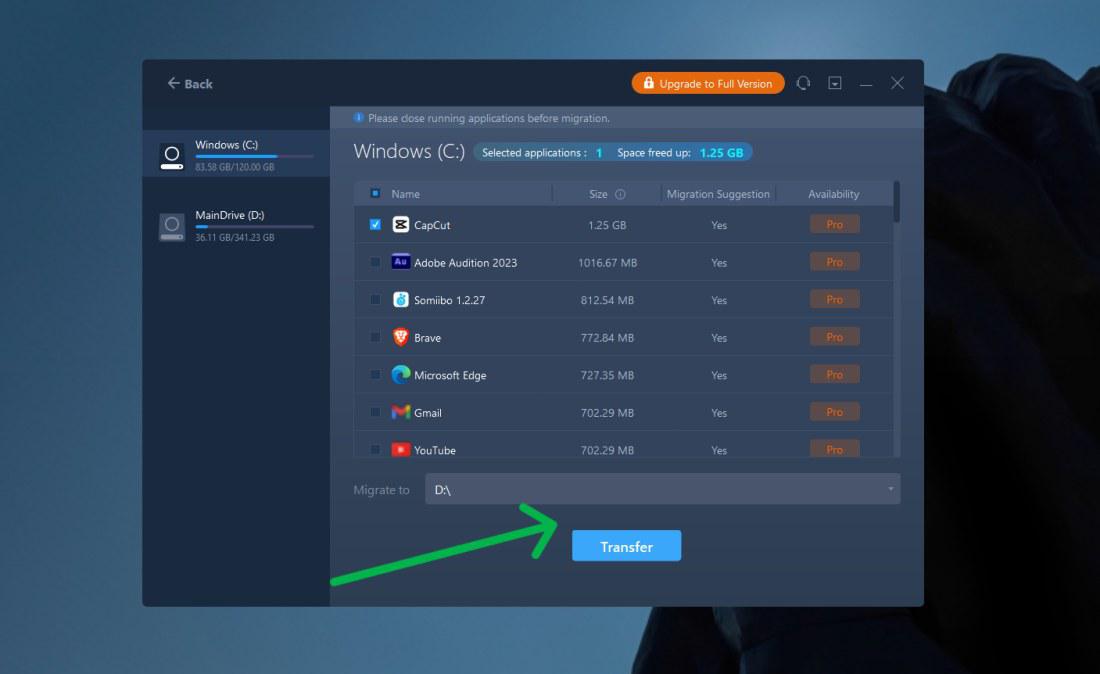
Step 4: Locate the desired programs for relocation and select them. Additionally, click the triangle icon to choose the destination for migrating the programs. Then Click on “Transfer“
How to Change the Default Installation Path on Windows 11?
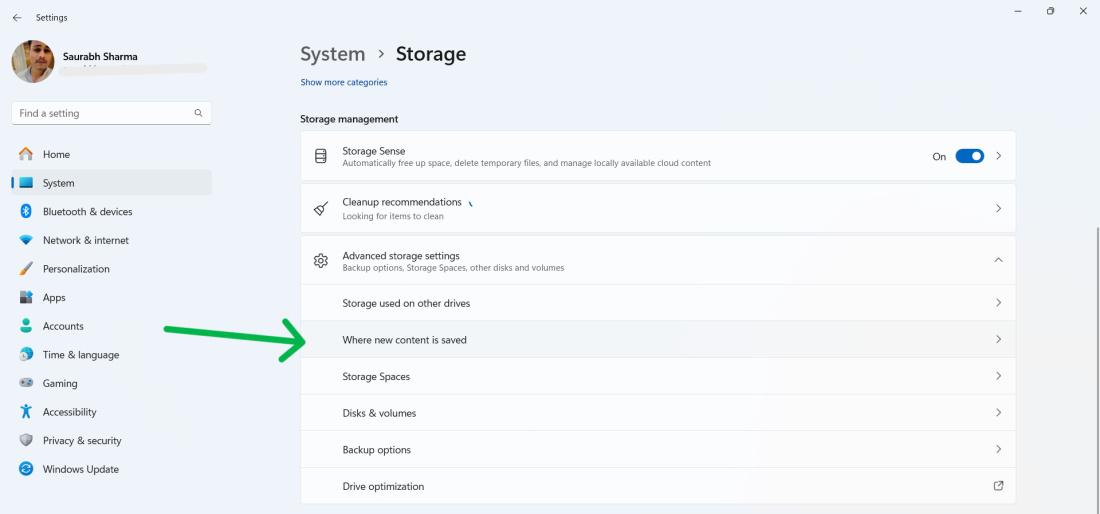
Step 1: Open Settings by pressing Win + I, Navigate to “System” > “Storage“.
Step 2: Click “Advanced storage settings” then “Where new content is saved”.
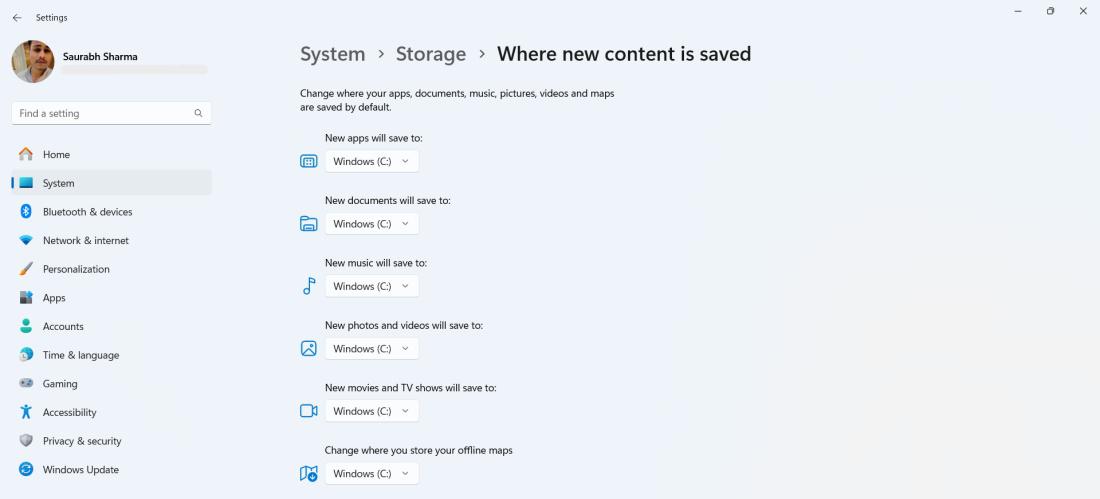
Step 3: Select the desired drive for “New apps will save to” and “documents“.
Conclusion
In Conclusion, If you’re running low on space on your C drive and want to enhance your system’s performance shifting installed programs to another drive, in Windows 11 can be beneficial. We’ve outlined three methods to accomplish this task along with instructions on modifying the default installation path for applications. You can select the method that best aligns, with your requirements and personal preferences.
Also Read
FAQs: How to Move Installed Programs to Another Drive in Windows 11?
How to Move Installed Programs to Another Drive in Windows 11?
To move installed programs on Windows, navigate to Settings > Apps > Installed Apps. Choose the app, click the 3-dots button, and select Move. Pick the destination drive from the drop-down and click Move.
Can I move programs to an external drive on Windows 11?
Yes it is possible to transfer programs to a drive, on Windows 11. However please ensure that the drive is formatted with the NTFS file system and connected to your PC.
Can I move programs back to the C drive on Windows 11?
If you want to move the programs to the C drive, navigate to Settings > Apps > Installed Apps. Choose the app, click the 3-dots button, and select Move. Select Local Disk ( C: ) from the drop-down and click Move.
Why move programs to another drive on Windows 11?
Shifting programs in Windows 11 yields benefits like freeing up space, organizing preferences, and safeguarding programs from system issues.
Share your thoughts in the comments
Please Login to comment...