JPA – ORDER BY Clause
Last Updated :
02 Apr, 2024
JPA in Java can be defined as the Java Persistence API and consists of Java instructions for accessing and managing data between Java objects and related databases. JPA provides ways for us to access object-oriented and complex databases through SQL queries and database connections. There are many clauses in JPA and the ORDER BY clause is one of them. The ORDER BY clause can be used to sort the query results in ascending or descending order based on the fields.
ORDER BY Clause in JPA
The ORDER BY clause in JPA is used to sort query results generated in a JPQL (Java Persistence Query Language) query. This allows us to format the query results in the desired format and simplifies data interpretation and manipulation.
Steps to Implement ORDER BY Clause:
- Define the JPQL query with the SELECT statement of the JPA application.
- We can append the ORDER BY clause to the query and it can specify the fields by which results should be sorted.
- Execute the query and retrieve the sorted results of the program.
1. Sorting in Ascending Order
In the JPA Application, we can sort the query results in ascending order and it can specify the fields in the ORDER BY clause without the additional keywords.
Example:
//to sort the employee list in ascending order
TypedQuery<Employee> query = entityManager.createQuery("SELECT e FROM Employee e ORDER BY e.firstName", Employee.class);
List<Employee> results = query.getResultList();
2. Sorting in Descending Order
We can sort the query results in descending order add the DESC keyword after the field in the ORDER BY clause.
Example:
TypedQuery<Employee> query = entityManager.createQuery("SELECT e FROM Employee e ORDER BY e.salary DESC", Employee.class);
List<Employee> results = query.getResultList();
3. Sorting by Multiple Fields
We can sort the query results by the multiple fields by the listing in the ORDER BY clause separated by the commas.
Example:
TypedQuery<Employee> query = entityManager.createQuery("SELECT e FROM Employee e ORDER BY e.department, e.salary DESC", Employee.class);
List<Employee> results = query.getResultList();
4. Using Entity Relationships for Sorting
Entity relationships such as the one-to-many or many-to-one associations and it can be leveraged for the sorting. It can be performed based on the attributes of the related entities.
Example:
Sorting the employees by the name of their department or by date of joining where the department information or the joining date is stored in the related entities.
Step-by-Step Implementation of JPA ORDER BY Clause
We can develop the simple JPA application that can demonstrate the ORDER BY clause of the application.
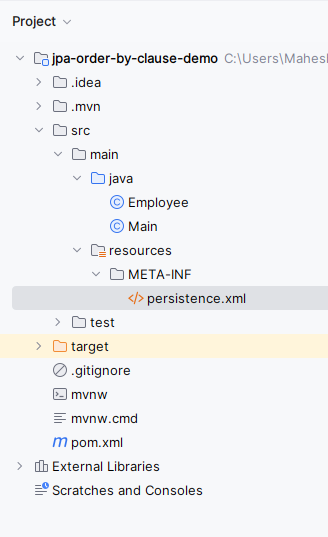
Step 1: Create the new JPA project using the Intellj Idea named jpa-order-by-clause-demo. After creating the project, the file structure looks like the below image.
Step 2: Open the open.xml and add the below dependencies into the project.
<dependency>
            <groupId>org.hibernate.orm</groupId>
            <artifactId>hibernate-core</artifactId>
            <version>6.0.2.Final</version>
        </dependency>
        <dependency>
            <groupId>org.glassfish.jaxb</groupId>
            <artifactId>jaxb-runtime</artifactId>
            <version>3.0.2</version>
        </dependency>
        <dependency>
            <groupId>org.junit.jupiter</groupId>
            <artifactId>junit-jupiter-api</artifactId>
            <version>${junit.version}</version>
            <scope>test</scope>
        </dependency>
        <dependency>
            <groupId>org.junit.jupiter</groupId>
            <artifactId>junit-jupiter-engine</artifactId>
            <version>${junit.version}</version>
            <scope>test</scope>
        </dependency>

        <dependency>
            <groupId>mysql</groupId>
            <artifactId>mysql-connector-java</artifactId>
            <version>8.0.28</version>
        </dependency>
Step 3: Open the persistence.xml and put the below code into the project and it can configure the database of the project.
XML
<?xml version="1.0" encoding="UTF-8" standalone="yes"?>
<persistence xmlns="https://jakarta.ee/xml/ns/persistence"
             xmlns:xsi="http://www.w3.org/2001/XMLSchema-instance"
             xsi:schemaLocation="https://jakarta.ee/xml/ns/persistence https://jakarta.ee/xml/ns/persistence/persistence_3_0.xsd"
             version="3.0">
    <persistence-unit name="persistence-unit-name">
        <class>Employee</class>
        <properties>
            <property name="javax.persistence.jdbc.url" value="jdbc:mysql://localhost:3306/example"/>
            <property name="javax.persistence.jdbc.user" value="root"/>
            <property name="javax.persistence.jdbc.password" value=""/>
            <property name="javax.persistence.jdbc.driver" value="com.mysql.jdbc.Driver"/>
            <property name="hibernate.dialect" value="org.hibernate.dialect.MySQL5Dialect"/>
            <property name="hibernate.hbm2ddl.auto" value="update"/>
        </properties>
    </persistence-unit>
</persistence>
Step 4: Create the table in MySQL database using the below SQL query:
CREATE TABLE employees (
    id BIGINT AUTO_INCREMENT PRIMARY KEY,
    first_name VARCHAR(50),
    last_name VARCHAR(50),
    salary DECIMAL(10, 2)
);
Step 5: Create the new Entity Java class named as the Employee.
Go to src > main > java > Employee and put the below code.
Java
import jakarta.persistence.*;

/**
 * @Entity annotation represents an Employee entity in the application.
 */
@Entity
@Table(name = "employees")
public class Employee {

    @Id
    @GeneratedValue(strategy = GenerationType.IDENTITY)
    private Long id; // Unique identifier for the address.


    @Column(name = "first_name")  //mapping to frist_name column of employee table
    private String firstName;

    @Column(name = "last_name")
    private String lastName;

    @Column(name = "salary")
    private double salary;

    @Column(name = "department")
    private String department;

    // Constructors, getters, and setters
    public Employee() {
    }

    public Employee(String firstName, String lastName, double salary, String department) {
        this.firstName = firstName;
        this.lastName = lastName;
        this.salary = salary;
        this.department = department;
    }

    // Getters and setters
    public Long getId() {
        return id;
    }

    public void setId(Long id) {
        this.id = id;
    }

    public String getFirstName() {
        return firstName;
    }

    public void setFirstName(String firstName) {
        this.firstName = firstName;
    }

    public String getLastName() {
        return lastName;
    }

    public void setLastName(String lastName) {
        this.lastName = lastName;
    }

    public double getSalary() {
        return salary;
    }

    public void setSalary(double salary) {
        this.salary = salary;
    }

    public String getDepartment() {
        return department;
    }

    public void setDepartment(String department) {
        this.department = department;
    }
}
Step 6: Create the new Java main class named as the Main.
Go to src > main > java > Main and put the below code.
Java
import jakarta.persistence.EntityManager;
import jakarta.persistence.EntityManagerFactory;
import jakarta.persistence.Persistence;
import jakarta.persistence.TypedQuery;
import java.util.List;

/**
 * A class demonstrating basic usage of JPA (Java Persistence API).
 */

public class Main {

    public static void main(String[] args) {
        // Create an EntityManagerFactory using persistence unit name
        EntityManagerFactory entityManagerFactory = Persistence.createEntityManagerFactory("persistence-unit-name");

        // Create an EntityManager
        EntityManager entityManager = entityManagerFactory.createEntityManager();

        // Begin a transaction
        entityManager.getTransaction().begin();


        // Create and persist Employee objects
        Employee employee1 = new Employee("mahesh", "Kadambala", 80000,"IT Department");
        Employee employee2 = new Employee("Eswar", "Beta", 75000, "Sales Department");
        Employee employee3 = new Employee("Jagan", "Mala", 60000,"Testing Department");
        Employee employee4 = new Employee("Raju", "Seepana", 79000, "IT Department");


        entityManager.persist(employee1);
        entityManager.persist(employee2);
        entityManager.persist(employee3);
        entityManager.persist(employee4);

        // Execute JPQL query to select employees ordered by salary in descending order
        TypedQuery<Employee> query = entityManager.createQuery("SELECT e FROM Employee e ORDER BY e.salary DESC", Employee.class);
        List<Employee> results = query.getResultList();

        // Print the sorted list of employees
        for (Employee employee : results) {
           System.out.println(employee.getFirstName() + " " + employee.getLastName() + " - " + employee.getSalary());
        }

        // Commit the transaction
        entityManager.getTransaction().commit();

        // Close the EntityManager and EntityManagerFactory
        entityManager.close();
        entityManagerFactory.close();
    }
}
pom.xml:
XML
<?xml version="1.0" encoding="UTF-8"?>
<project xmlns="http://maven.apache.org/POM/4.0.0"
         xmlns:xsi="http://www.w3.org/2001/XMLSchema-instance"
         xsi:schemaLocation="http://maven.apache.org/POM/4.0.0 https://maven.apache.org/xsd/maven-4.0.0.xsd">
    <modelVersion>4.0.0</modelVersion>

    <groupId>org.example</groupId>
    <artifactId>jpa-order-by-clause-demo</artifactId>
    <version>1.0-SNAPSHOT</version>
    <name>jpa-order-by-clause-demo</name>

    <properties>
        <project.build.sourceEncoding>UTF-8</project.build.sourceEncoding>
        <maven.compiler.target>11</maven.compiler.target>
        <maven.compiler.source>11</maven.compiler.source>
        <junit.version>5.9.2</junit.version>
    </properties>

    <dependencies>
        <dependency>
            <groupId>org.hibernate.orm</groupId>
            <artifactId>hibernate-core</artifactId>
            <version>6.0.2.Final</version>
        </dependency>
        <dependency>
            <groupId>org.glassfish.jaxb</groupId>
            <artifactId>jaxb-runtime</artifactId>
            <version>3.0.2</version>
        </dependency>
        <dependency>
            <groupId>org.junit.jupiter</groupId>
            <artifactId>junit-jupiter-api</artifactId>
            <version>${junit.version}</version>
            <scope>test</scope>
        </dependency>
        <dependency>
            <groupId>org.junit.jupiter</groupId>
            <artifactId>junit-jupiter-engine</artifactId>
            <version>${junit.version}</version>
            <scope>test</scope>
        </dependency>

      <!-- Database Driver (MySQL in this example) -->
        <dependency>
            <groupId>mysql</groupId>
            <artifactId>mysql-connector-java</artifactId>
            <version>8.0.28</version>
        </dependency>
    </dependencies>

    <build>
        <plugins>
        </plugins>
    </build>
</project>
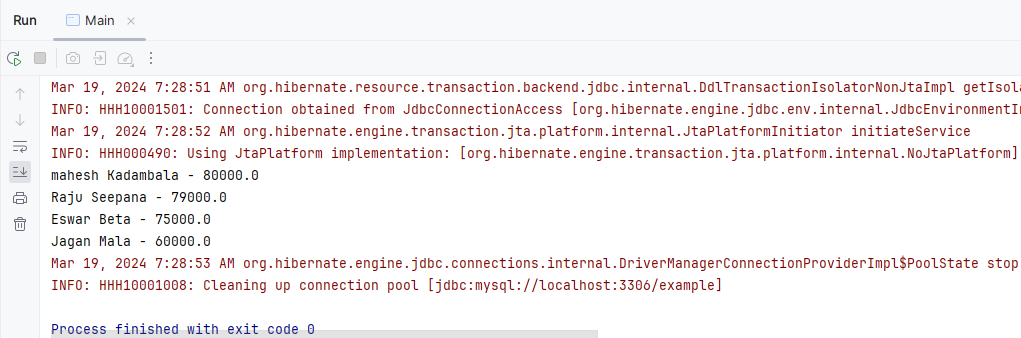
Step 7: Once the project is completed, run the application. It will then show the Employee name and salary by the descending order as output. Refer the below output image for the better understanding of the concept.
By the following the above steps of the article, developers can gain the soild understanding of the how to effectively use the ORDER BY clause in their JPA applications.
Share your thoughts in the comments
Please Login to comment...