JPA – Criteria Having Clause
Last Updated :
05 Apr, 2024
The JPA Criteria API in Java provides a systematic way to build dynamic queries at runtime without relying on static string-based queries.
The JPA Criteria Having Clause is used to extract query results based on the conditions used on the collected data with aggregation functions such as COUNT, SUM, and AVG. It allows the developers to specify the conditions on the aggregated values after the grouping is performed.
Steps to Use Criteria Having Clause
Below are the steps to use the JPA Criteria Having Clause.
1. Create Criteria Query
We can begin by obtaining the CriteriaBuilder instance from the EntityManager, then instantiate the CriteriaQuery object representing the type of query.
CriteriaBuilder cb = em.getCriteriaBuilder();
CriteriaQuery<Object[]> query = cb.createQuery(Object[].class);
2. Create Root Object
Define the root entity to specify the main entity from which to the fetch data and it can serves as the starting point for the query.
Root<Employee> root = query.from(Employee.class);
3. Define Grouping and Aggregation
We can use the CriteriaBuilder to define grouping and apply the aggregate functions to query and it can involves selecting specific columns for the grouping and applying the aggregate functions to them.
Expression<Long> countExpression = cb.count(root);
query.multiselect(root.get("department"), countExpression);
query.groupBy(root.get("department"));
4. Apply the Having Clause
We can use the CriteriaQuery’s having() method to the specify the condition to filter the grouped data. This condition can typically involves the comparisons with the aggregate functions results.
Predicate havingPredicate = cb.gt(countExpression, 5); // Example: More than 5 employees
query.having(havingPredicate);
5. Execute the Query
We can obtain the TypedQuery object from the CriteriaQuery and it can execute the query to retrieve the results. After executing the query, the process and handles the results as the needed.
TypedQuery<Object[]> typedQuery = em.createQuery(query);
List<Object[]> resultList = typedQuery.getResultList();
Key Features:
- Grouping by the multiple Columns: In the addition to grouping by the single column, the Having clause can be used with the Criteria group by the multiple columns.
- Complex Conditions: The Having clause can support the complex conditions using the logical operators such as the AND, OR and NOT It can allowing for the more advanced the filtering of the grouped data.
Project to Implement Criteria Having clause in JPA
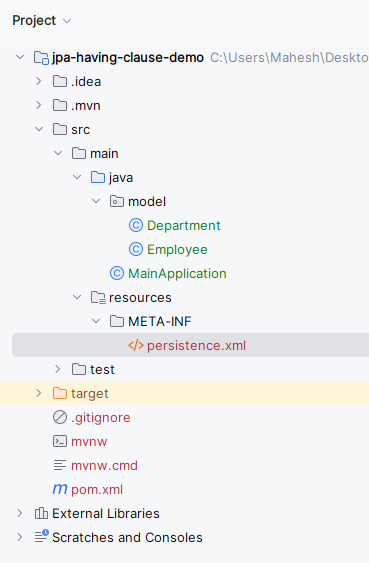
Step 1: Create the new JPA project using the IntelliJ Idea named jpa-having-clause-demo. After successfully project creation done, the project structure will look like below image.
Step 2: Open the pom.xml and add the below dependencies into the project.
<dependency>
            <groupId>org.hibernate.orm</groupId>
            <artifactId>hibernate-core</artifactId>
            <version>6.0.2.Final</version>
        </dependency>
        <dependency>
            <groupId>org.glassfish.jaxb</groupId>
            <artifactId>jaxb-runtime</artifactId>
            <version>3.0.2</version>
        </dependency>
        <dependency>
            <groupId>org.junit.jupiter</groupId>
            <artifactId>junit-jupiter-api</artifactId>
            <version>${junit.version}</version>
            <scope>test</scope>
        </dependency>
        <dependency>
            <groupId>org.junit.jupiter</groupId>
            <artifactId>junit-jupiter-engine</artifactId>
            <version>${junit.version}</version>
            <scope>test</scope>
        </dependency>
        <dependency>
            <groupId>mysql</groupId>
            <artifactId>mysql-connector-java</artifactId>
            <version>8.0.28</version>
        </dependency>
Step 3: Open the persistence.xml and paste the below code into the project to configure the project database.
XML
<?xml version="1.0" encoding="UTF-8" standalone="yes"?>
<persistence xmlns="https://jakarta.ee/xml/ns/persistence"
             xmlns:xsi="http://www.w3.org/2001/XMLSchema-instance"
             xsi:schemaLocation="https://jakarta.ee/xml/ns/persistence https://jakarta.ee/xml/ns/persistence/persistence_3_0.xsd"
             version="3.0">
    <persistence-unit name="jpa-example">

        <properties>
            <property name="javax.persistence.jdbc.url" value="jdbc:mysql://localhost:3306/example"/>
            <property name="javax.persistence.jdbc.user" value="root"/>
            <property name="javax.persistence.jdbc.password" value=""/>
            <property name="javax.persistence.jdbc.driver" value="com.mysql.jdbc.Driver"/>
            <property name="hibernate.dialect" value="org.hibernate.dialect.MySQL5Dialect"/>
            <property name="hibernate.hbm2ddl.auto" value="update"/>
        </properties>

    </persistence-unit>
</persistence>
Step 4: Create the Java package named as the model in that package create the Java class named as the Employee.
Go to src > main > java > model > Employee and write the below code.
Java
package model;

import jakarta.persistence.*;

@Entity
public class Employee {
    @Id
    @GeneratedValue(strategy = GenerationType.IDENTITY)
    private Long id;
    private String name;

    @ManyToOne
    private Department department;

    // Constructors, getters, and setters
    public Long getId() {
        return id;
    }

    public void setId(Long id) {
        this.id = id;
    }

    public String getName() {
        return name;
    }

    public void setName(String name) {
        this.name = name;
    }

    public Department getDepartment() {
        return department;
    }

    public void setDepartment(Department department) {
        this.department = department;
    }
}
Step 5: Then create the Java package named as the model. In that package, create the Java class named as the Department.
Go to src > main > java > model > Department and write the below code.
Java
package model;

import jakarta.persistence.*;

import java.util.List;

@Entity
public class Department {
    @Id
    @GeneratedValue(strategy = GenerationType.IDENTITY)
    private Long id;
    private String name;

    @OneToMany(mappedBy = "department")
    private List<Employee> employees;

    // Constructors, getters, and setters
    public Long getId() {
        return id;
    }

    public void setId(Long id) {
        this.id = id;
    }

    public String getName() {
        return name;
    }

    public void setName(String name) {
        this.name = name;
    }

    public List<Employee> getEmployees() {
        return employees;
    }

    public void setEmployees(List<Employee> employees) {
        this.employees = employees;
    }
}
Step 6: Now, create the Java class named as the MainApplication.
Go to src > main > java > MainApplication and write the below code.
Java
import jakarta.persistence.EntityManager;
import jakarta.persistence.EntityManagerFactory;
import jakarta.persistence.Persistence;
import jakarta.persistence.TypedQuery;
import jakarta.persistence.criteria.*;
import model.Department;
import model.Employee;


import java.util.List;

public class MainApplication
{
    public static void main(String args[])
    {
        EntityManagerFactory emf = Persistence.createEntityManagerFactory("jpa-example");
        EntityManager em = emf.createEntityManager();

        // Adding departments
        em.getTransaction().begin();
        Department department1 = new Department();
        department1.setName("Engineering");
        em.persist(department1);

        Department department2 = new Department();
        department2.setName("Marketing");
        em.persist(department2);
        em.getTransaction().commit();

        // Adding employees
        em.getTransaction().begin();
        for (int i = 0; i < 7; i++) {
            Employee employee = new Employee();
            employee.setName("Employee " + i);
            employee.setDepartment(department1);
            em.persist(employee);
        }

        for (int i = 0; i < 3; i++)
        {
            Employee employee = new Employee();
            employee.setName("Employee " + (i + 7));
            employee.setDepartment(department2);
            em.persist(employee);
        }
        em.getTransaction().commit();

        // Executing query with Having clause
        CriteriaBuilder cb = em.getCriteriaBuilder();
        CriteriaQuery<Object[]> query = cb.createQuery(Object[].class);
        Root<Employee> root = query.from(Employee.class);

        Expression<Long> countExpression = cb.count(root);
        query.multiselect(root.get("department"), countExpression);
        query.groupBy(root.get("department"));

        Predicate havingPredicate = cb.gt(countExpression, 5); // More than 5 employees
        query.having(havingPredicate);

        TypedQuery<Object[]> typedQuery = em.createQuery(query);
        List<Object[]> resultList = typedQuery.getResultList();

        // Printing departments with more than 5 employees
        for (Object[] result : resultList)
        {
            Department department = (Department) result[0];
            Long employeeCount = (Long) result[1];
            System.out.println("Department: " + department.getName() + ", Employee Count: " + employeeCount);
        }

        em.close();
        emf.close();
    }
}
- This MainApplication utilizes JPA’s Criteria API to dynamically construct a query to retrieve departments along with their respective employee counts.
- It adds departments and employees to the database, then executes a query to group departments and filter those with more than 5 employees.
- Finally printing the results showing department names and their employee counts meeting the specified condition.
pom.xml:
Below is the XML file after adding all dependencies at the time of project creation.
XML
<?xml version="1.0" encoding="UTF-8"?>
<project xmlns="http://maven.apache.org/POM/4.0.0"
         xmlns:xsi="http://www.w3.org/2001/XMLSchema-instance"
         xsi:schemaLocation="http://maven.apache.org/POM/4.0.0 https://maven.apache.org/xsd/maven-4.0.0.xsd">
    <modelVersion>4.0.0</modelVersion>

    <groupId>org.example</groupId>
    <artifactId>jpa-having-clause-demo</artifactId>
    <version>1.0-SNAPSHOT</version>
    <name>jpa-having-clause-demo</name>

    <properties>
        <project.build.sourceEncoding>UTF-8</project.build.sourceEncoding>
        <maven.compiler.target>11</maven.compiler.target>
        <maven.compiler.source>11</maven.compiler.source>
        <junit.version>5.9.2</junit.version>
    </properties>

    <dependencies>
        <dependency>
            <groupId>org.hibernate.orm</groupId>
            <artifactId>hibernate-core</artifactId>
            <version>6.0.2.Final</version>
        </dependency>
        <dependency>
            <groupId>org.glassfish.jaxb</groupId>
            <artifactId>jaxb-runtime</artifactId>
            <version>3.0.2</version>
        </dependency>
        <dependency>
            <groupId>org.junit.jupiter</groupId>
            <artifactId>junit-jupiter-api</artifactId>
            <version>${junit.version}</version>
            <scope>test</scope>
        </dependency>
        <dependency>
            <groupId>org.junit.jupiter</groupId>
            <artifactId>junit-jupiter-engine</artifactId>
            <version>${junit.version}</version>
            <scope>test</scope>
        </dependency>
        <dependency>
            <groupId>mysql</groupId>
            <artifactId>mysql-connector-java</artifactId>
            <version>8.0.28</version>
        </dependency>
    </dependencies>

    <build>
        <plugins>
        </plugins>
    </build>
</project>
Step 7: Once the project is completed, run the application, it will show the department and employees count as output. Refer the below output image for the better understanding of the concept.

Share your thoughts in the comments
Please Login to comment...