Show SQL from Spring Data JPA/Hibernate in Spring Boot
Last Updated :
25 Mar, 2024
In Spring Boot, Spring Data JPA is part of the larger Spring Data Project that can simplify the development of the data access layers in the spring applications using the Java Persistence API and it can provide a higher-level abstraction over the JPA API. It can reduce the boilerplate code and make it easier to work with the database.
Spring Data JPA can simplify the implementation of the data access layers by automatically generating the repository implementations at the runtime from the repository interfaces and it can provide the CRUD operations and the query methods based on the method names and it can reduce the need for the manual implementation of the data access code.
Key Terminologies:
- Hibernate: It is an Object Relational Mapping (ORM) framework for the Java programming language and provides a framework for mapping to relational databases and is a popular and commonly used JPA implementation in Java applications
- JPA: Can be defined as Java Persistence API which can create context to transfer and maintain persistence between Java objects and relational databases and also provide API context for Java objects mapped to database tables and execute query exercises.
- SQL: can be defined as Structured Query Language and is a domain-specific language used to manage and query relational databases. Hibernate allows you to create application-defined SQL statements and queries based on JPA entities.
- Logging level: This allows you to specify the severity of logging messages to capture and display and the commonly used logging levels are DEBUG, INFO, WARN, ERROR, and TRACE To set the logging level to DEBUG for Hibernate SQL output then capture and display the logging system by Hibernate SQL statement created.
How to Show SQL from Spring Data JPA/Hibernate in Spring Boot
To show the SQL from Spring Data JPA or Hibernate in Spring Boot set the below log level.
Set the Logging Level:
Configure the logging levels for the Hibernate SQL output in the application.properties file and it can be set the logging level to DEBUG for the org.hibernate.SQL package.
logging.level.org.hibernate.SQL=DEBUG
View the logs:
Once we run the spring application, then the Hibernate SQL statements will be logged to the console or the logging output with the configured logging level.
Step-by-Step Implementation:
We have developed a simple spring boot project to show the SQL from JPA/hibernate of the project.
Step 1: We can create the project using Spring STS IDE and on creating the project adding the below dependencies into the project.
Dependencies:
- Spring Web
- MySQL Drivers
- Spring data for JPA
- Lombok
- Spring Dev Tools
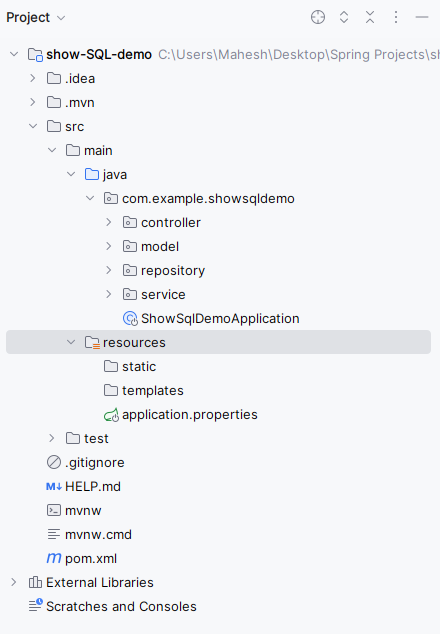
Once the project is created, the file structure looks like the below image.
Step 2: Open the application.properties file and put the below code for MySQL database configuration and logging the SQL debug of the project.
spring.application.name=show-SQL-demo

# Data Source properties
spring.datasource.url=jdbc:mysql://localhost:3306/example
spring.datasource.username=root
spring.datasource.password=
spring.datasource.driver-class-name=com.mysql.cj.jdbc.Driver

# Hibernate properties
spring.jpa.hibernate.ddl-auto=update
spring.jpa.properties.hibernate.dialect=org.hibernate.dialect.MySQL8Dialect

# Logging level for Hibernate SQL
logging.level.org.hibernate.SQL=DEBUG
Step 3: Create the new Java package named as model in that package create the new Java class named as User.
Go to src > main > java > showsqldemo > model > User and put the code below.
Java
package com.example.showsqldemo.model;

import jakarta.persistence.Entity;
import jakarta.persistence.GeneratedValue;
import jakarta.persistence.GenerationType;
import jakarta.persistence.Id;
import lombok.AllArgsConstructor;
import lombok.Data;
import lombok.NoArgsConstructor;

@Entity
@Data
@AllArgsConstructor
@NoArgsConstructor
public class User {
    // Unique identifier for the user
    @Id
    @GeneratedValue(strategy = GenerationType.IDENTITY)
    private Long id;

    // Name of the user
    private String name;

    // Email address of the user
    private String email;
}
Step 4: Create the new Java package named as repository in that package create the new Java class named as UserRepository.
Go to src > main > java > showsqldemo > repository > UserRepository and put the code below.
Java
package com.example.showsqldemo.repository;

import com.example.showsqldemo.model.User;
import org.springframework.data.jpa.repository.JpaRepository;
import org.springframework.stereotype.Repository;

// Repository interface for managing User entities
@Repository
public interface UserRepository extends JpaRepository<User, Long> {
}
Step 5: Create the new Java package named as service in that package create the new Java class named as UserService.
Go to src > main > java > showsqldemo > service > UserService and put the code below.
Java
package com.example.showsqldemo.service;

import com.example.showsqldemo.model.User;
import com.example.showsqldemo.repository.UserRepository;
import org.springframework.beans.factory.annotation.Autowired;
import org.springframework.stereotype.Service;

import java.util.List;

// Service class for managing User entities
@Service
public class UserService {

    // UserRepository dependency
    private final UserRepository userRepository;

    @Autowired
    public UserService(UserRepository userRepository) {
        this.userRepository = userRepository;
    }

    // Method to get all users
    public List<User> getAllUsers() {
        return userRepository.findAll();
    }
}
Step 6: Create the new Java package named as controller in that package create the new Java class named as UserController.
Go to src > main > java > showsqldemo > service > UserService and put the code below.
Java
package com.example.showsqldemo.controller;

import com.example.showsqldemo.model.User;
import com.example.showsqldemo.service.UserService;
import org.springframework.beans.factory.annotation.Autowired;
import org.springframework.web.bind.annotation.GetMapping;
import org.springframework.web.bind.annotation.RequestMapping;
import org.springframework.web.bind.annotation.RestController;

import java.util.List;

// Controller class for managing user-related endpoints
@RestController
@RequestMapping("/api/users")
public class UserController {

    // UserService dependency
    private final UserService userService;

    @Autowired
    public UserController(UserService userService) {
        this.userService = userService;
    }

    // Endpoint to get all users
    @GetMapping
    public List<User> getAllUsers() {
        return userService.getAllUsers();
    }
}
Step 7: Open the main class file and put the below code.
Note: No changes are required in main class (Keep the default code generated by the project creation).
Java
package com.example.showsqldemo;

import org.springframework.boot.SpringApplication;
import org.springframework.boot.autoconfigure.SpringBootApplication;

@SpringBootApplication
public class ShowSqlDemoApplication {

    public static void main(String[] args) {
        SpringApplication.run(ShowSqlDemoApplication.class, args);
    }

}
pom.xml:
XML
<?xml version="1.0" encoding="UTF-8"?>
<project xmlns="http://maven.apache.org/POM/4.0.0" xmlns:xsi="http://www.w3.org/2001/XMLSchema-instance"
         xsi:schemaLocation="http://maven.apache.org/POM/4.0.0 https://maven.apache.org/xsd/maven-4.0.0.xsd">
    <modelVersion>4.0.0</modelVersion>
    <parent>
        <groupId>org.springframework.boot</groupId>
        <artifactId>spring-boot-starter-parent</artifactId>
        <version>3.2.3</version>
        <relativePath/> <!-- lookup parent from repository -->
    </parent>
    <groupId>com.example</groupId>
    <artifactId>show-SQL-demo</artifactId>
    <version>0.0.1-SNAPSHOT</version>
    <name>show-SQL-demo</name>
    <description>show-SQL-demo</description>
    <properties>
        <java.version>17</java.version>
    </properties>
    <dependencies>
        <dependency>
            <groupId>org.springframework.boot</groupId>
            <artifactId>spring-boot-starter-data-jpa</artifactId>
        </dependency>
        <dependency>
            <groupId>org.springframework.boot</groupId>
            <artifactId>spring-boot-starter-web</artifactId>
        </dependency>

        <dependency>
            <groupId>org.springframework.boot</groupId>
            <artifactId>spring-boot-devtools</artifactId>
            <scope>runtime</scope>
            <optional>true</optional>
        </dependency>
        <dependency>
            <groupId>com.mysql</groupId>
            <artifactId>mysql-connector-j</artifactId>
            <scope>runtime</scope>
        </dependency>
        <dependency>
            <groupId>org.projectlombok</groupId>
            <artifactId>lombok</artifactId>
            <optional>true</optional>
        </dependency>
        <dependency>
            <groupId>org.springframework.boot</groupId>
            <artifactId>spring-boot-starter-test</artifactId>
            <scope>test</scope>
        </dependency>
    </dependencies>

    <build>
        <plugins>
            <plugin>
                <groupId>org.springframework.boot</groupId>
                <artifactId>spring-boot-maven-plugin</artifactId>
                <configuration>
                    <excludes>
                        <exclude>
                            <groupId>org.projectlombok</groupId>
                            <artifactId>lombok</artifactId>
                        </exclude>
                    </excludes>
                </configuration>
            </plugin>
        </plugins>
    </build>

</project>
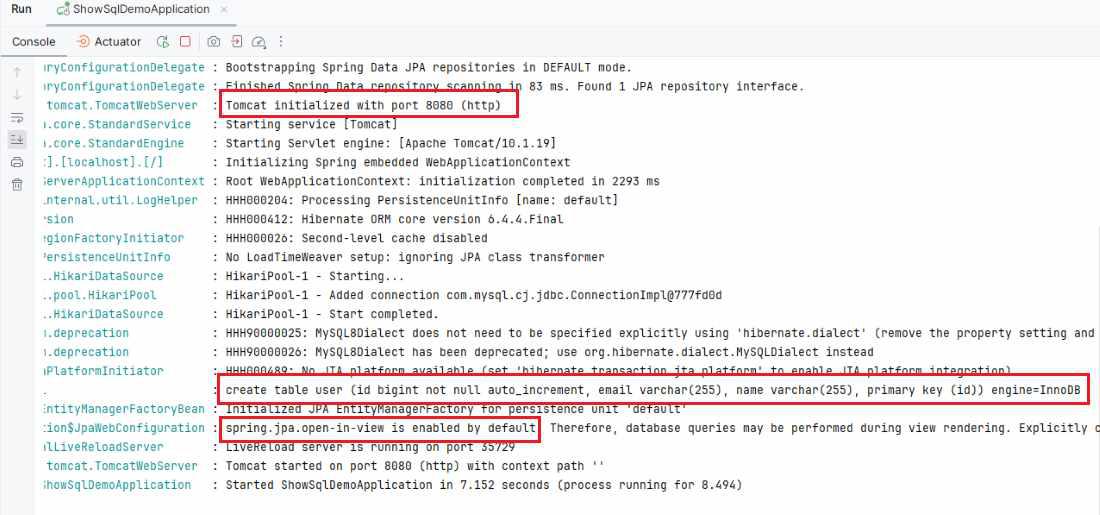
Step 7: Once the project completed, then run the application as a spring project then it run at port 8080.
If we observe the below image, then we can find the logging data of the table creation of the project into the MySQL database.
If we follow the above steps, then we can successfully implement this showing SQL from the Spring Data JPA/hibernate into the project.
Share your thoughts in the comments
Please Login to comment...