How To Use Kind To Deploy Kubernetes Clusters?
Last Updated :
07 Mar, 2024
Kind also referred to as Kubernetes in Docker is a popular open-source tool used for running a Kubernetes cluster locally. Kind uses Docker containers as Cluster Nodes making it substantially faster than its alternatives like Minikube or Docker Desktop which uses a Virtual Machine. Kind is commonly used to test Kubernetes clusters on local machines. Kind is useful specifically when the user wants to create a multi-Node cluster since Minikube or Docker Desktop does not provide any such functionality. In this article we will learn about KinD and see how to use KinD for Deploying Kubernetes clusters.
What Does Kind Do?
Kind also referred to as Kubernetes in Docker is a popular open-source tool used for running a Kubernetes cluster locally. Kind uses Docker containers as Cluster Nodes making it substantially faster than its alternatives like Minikube or Docker Desktop which uses a Virtual Machine. Kind is commonly used to test Kubernetes clusters on local machines. Kind is useful specifically when the user wants to create a multi-Node cluster since Minikube or Docker Desktop does not provide any such functionality. It can also be useful when the user wants to test his or her application when one Node goes down or when the application is shut down on one Node and restarts on another. Kind consists of the following packages and tools:
- Go packages implementing cluster creation, image build, etc.
- A command line interface (kind)
- Docker image(s) written to run systemd, Kubernetes, etc.
- quietest integration
For Linux users, Kind comes as a better option than Minikube also because of the reason that it does not create a Virtual Machine when used in Linux hence it is much more faster than Minikube. This is not the case for Windows and MacOS since they cannot run containers.
Features Of Kind
Kind has five important features as a tool for running Kubernetes locally:
- Kind enables users to create multi-Node clusters.
- Kind also supports building Kubernetes release builds from source.
- Kind has support for make/bash or docker, in addition to pre-published builds.
- Kind supports Linux, macOS, and Windows and can be used across these Operating Systems with some minor differences.
- Kind is a CNCF-certified conformant Kubernetes installer.
Deploying An Application On Kind Kubernetes Cluster: A Step-By-Step Guide
Step 1: Installation Of Kind
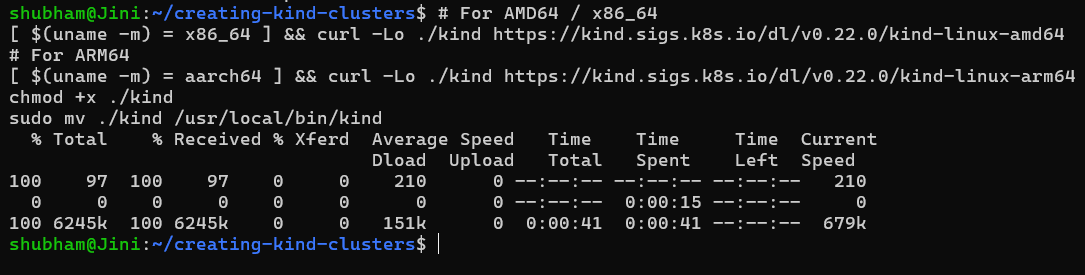
- You can install Kind using may ways. Here we are installing Kind using Binaries for my WSL (Windows Subsystem for Linux) by using the following command:
# For AMD64 / x86_64
[ $(uname -m) = x86_64 ] && curl -Lo ./kind https://kind.sigs.k8s.io/dl/v0.22.0/kind-linux-amd64
# For ARM64
[ $(uname -m) = aarch64 ] && curl -Lo ./kind https://kind.sigs.k8s.io/dl/v0.22.0/kind-linux-arm64
chmod +x ./kind
sudo mv ./kind /usr/local/bin/kind
- To confirm if Kind is installed in your machine enter the following command:
kind
And you will see the following result as confirmation:

Step 2: Creating A Kind Cluster
- We have two ways to create a Kubernetes Cluster using Kind.
- We can create a Cluster without defining any name for the cluster and the default name is “kind”.
- For that you have to enter the following command:
kind create cluster
- To create a cluster with a specific name. Enter the following command:
kind create cluster --name [NAME_OF_THE_CLUSTER]
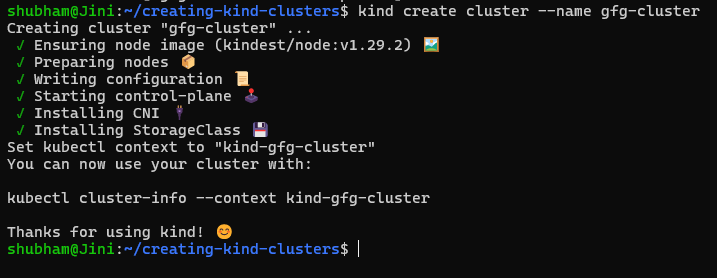
- For now I am creating a Cluster named gfg-cluster, for that I have entered the following command:
kind create cluster --name gfg-cluster
- And this created a new cluster for me called gfg-cluster:
Step 3: Checking The Number Of Nodes In The Cluster
- Kind runs Kubernetes Nodes as containers, so if we check out the list of containers using the following Docker command:
docker container ls
- We will see our kindest/node Node running, so for now this is a single Node cluster.

- We can also confirm this by checking out the list of Nodes in our Cluster. Enter the following kubectl command:
kubectl get nodes

And we can see a single Node running by the name “gfg-cluster-control-plane”.
Step 4: Creating Multiple Clusters Using Kind
- The steps we followed till now are pretty common for other methods of creating local Kubernetes clusters such as using Minikube or using Docker Desktop.
- What Kind offers better than its alternatives is the ability to create multiple clusters.
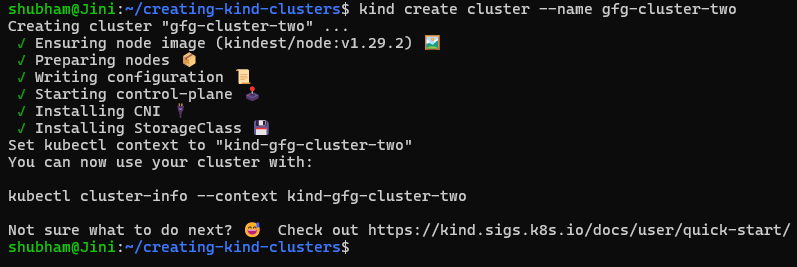
- To create another cluster using Kind, enter the following command:
kind create cluster --name gfg-cluster-two
- And you will have another cluster created called “gfg-cluster-two”:
- Now that we have created two cluster for no use, let’s delete the second clusters. To delete a Kind cluster, enter the following command:
kind delete cluster --name gfg-cluster-two
- And you will get a similar result when you Cluster will be deleted:
 Step 5: Creating Cluster Using Config Files
- The one key differentiator why Kind is better than its alternatives is creating multiple clusters.
- But other than this, a very important factor for many engineers using Kind is that we can create a Cluster using a config file.
- Here is a sample config file we will use to create our Kind cluster:
kind: Cluster
apiVersion: kind.x-k8s.io/v1alpha4
nodes:
- role: control-plane
  kubeadmConfigPatches:
  - |
    kind: InitConfiguration
    nodeRegistration:
      kubeletExtraArgs:
        node-labels: "ingress-ready=true"
  extraPortMappings:
  - containerPort: 80
    hostPort: 80
    protocol: TCP
  - containerPort: 443
    hostPort: 443
    protocol: TCP
- role: control-plane
- role: control-plane
- role: worker
- role: worker
- role: worker
- Using the above config file, we can create a Kind cluster that has 3 Control Plane Nodes and 3 Worker Nodes.
- For creating a Cluster using this config file, create a new file using the following command:
touch multi-node-cluster.yaml
- And Enter the following code in the file (for the sake of simplicity, we are creating a cluster with 2 Nodes:
kind: Cluster
apiVersion: kind.x-k8s.io/v1alpha4
name: kind
nodes:
- role: control-plane
  kubeadmConfigPatches:
  - |
    kind: InitConfiguration
    nodeRegistration:
      kubeletExtraArgs:
        node-labels: "ingress-ready=true"
  extraPortMappings:
  - containerPort: 80
    hostPort: 8080
    protocol: TCP
  - containerPort: 443
    hostPort: 44300
    protocol: TCP
- role: worker
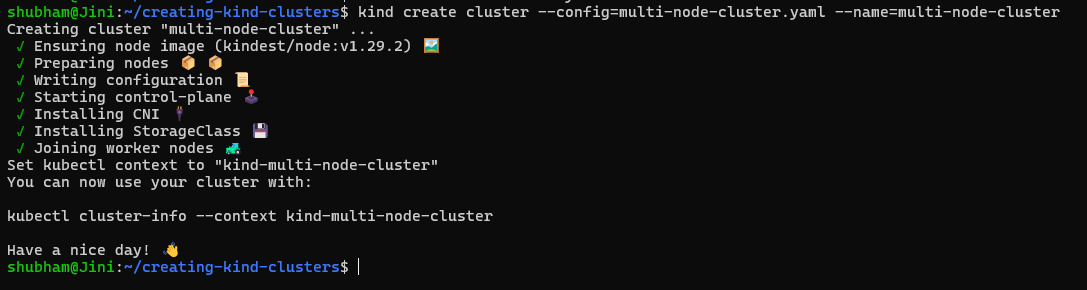
- To create a cluster using this configuration file, enter the following command:
kind create cluster --config=multi-node-cluster.yaml --name=multi-node-cluster
- You will get a similar output on the terminal:
- So now when we checkout the list of Nodes in our cluster using the following command:
kubectl get nodes
- We can find our two Nodes in the list:

Step 6: Creating The Configuration File
Now that we have a Cluster up and running, let’s deploy an application on that cluster. Here is a configuration file that will deploy a simple HTTP echo server on our Cluster, it has three sections:
- The first section of the config file contains the name and the Docker image for the pods along with the “args” field that contains the arguments to run in the container.
- The second section is defines the Service and the port it will use.
- The third section defines the Ingress section for setting up networking for the service.
kind: Pod
apiVersion: v1
metadata:
  name: test-app
  labels:
    app: test-app
spec:
  containers:
  - name: test-app
    image: hashicorp/http-echo:latest
    args:
    - "-text=The test has been successful!"
---
kind: Service
apiVersion: v1
metadata:
  name: test-service
spec:
  selector:
    app: test-app
  ports:
  - port: 5678
---
apiVersion: networking.k8s.io/v1
kind: Ingress
metadata:
  name: test-ingress
spec:
  rules:
  - http:
      paths:
      - pathType: Prefix
        path: "/app"
        backend:
          service:
            name: test-service
            port:
              number: 5678
- Create a new file called test-app.yaml by entering the following command and then copy paste the configuration above:
touch test-app.yaml
Step 7. Deploying The Application
- Enter the following command to apply the config file to the cluster:
kubectl apply -f test-app.yaml
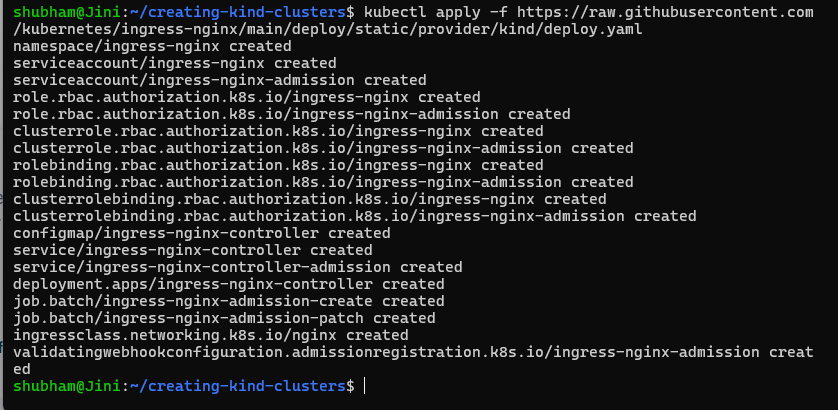
- Now that our Pod and Service have been deployed, we can apply the ingress NGINX controller using the the following command:
kubectl apply -f https://raw.githubusercontent.com/kubernetes/ingress-nginx/main/deploy/static/provider/kind/deploy.yaml
- In this configuration, ingress works as the cluster’s reverse proxy and load balancer.
- This command will create multiple Kubernetes objects and you will get a similar output:
- After that enter the following command to set up port forwarding for the service (make sure that your Pod is up and running before forwarding the port, if not give it some time for the container to start running):
kubectl port-forward service/test-service 5678:5678
- You will get a similar result and with that your application has been deployed on the cluster and the port has been forwarded:

Step 7: Testing The application
- Now that our application has been deployed, the final step would be to see if everything is working fine or not.
- For that open a new terminal window and go to the localhost:5678 using the following command:
curl localhost:5678
- And you will get the message “The test has been successful” that we specified in the args section of the configuration file test-app.yaml. You will get a similar result:

- And with that we have completed our tutorial where we learned how to use Kind to deploy Kubernetes clusters.
- Pat yourself on the back and let’s move ahead to the most common Kind commands you should know.
Some Common Kind Commands
1. Creating A Cluster
- Enter the following command to create a Kind Kubernetes Cluster (default name is “kind”):
kind create cluster
- Enter the following command to create a Kind Kubernetes Cluster with a custom name:
kind create cluster --name=[NAME_OF_CLUSTER]
- Enter the following command to create a cluster with a custom node image:
kind create cluster --image=[IMAGE]
- Enter the following command to create a Kind Kubernetes Cluster using a custom configuration for the cluster:
kind create cluster --config=[FILE_NAME]
- Enter the following command to create a Kind Kubernetes Cluster while assigning a waiting time for the control plane to go up:
kind create cluster --wait [TIME]
2. Loading An Image Into Your Cluster
- Docker images can be loaded into your cluster nodes using the following command:
kind load docker-image [DOCKER_IMAGE_NAME]
- Image archives can be loaded using the following command:
kind load image-archive /my-image-archive.tar
3. Get The List Of Clusters
- To check out the list of cluster you created using Kind, enter the following command:
kind get clusters
4. Exporting Logs
- In order to export logs of your Kind Cluster, enter the following command:
kind export logs
5. Deleting The Kind Cluster
- You just have to simply enter the following command to delete the Kind cluster.
kind delete cluster
- or if you have named your cluster, then enter the name using the –name flag.
kind delete cluster --name [NAME_OF_CLUSTER]
Conclusion
In this article we learned about KinD and how to use it to deploy Kubernetes clusters. KinD also referred as Kubernetes in Docker is a popular open-source tool used for running a Kubernetes clusters locally. Kind uses Docker containers as Cluster Nodes making it substantially faster than it’s alternatives like Minikube or Docker Desktop which uses a Virtual Machine. Kind is commonly used to test Kubernetes clusters on local machines. We hope that this article taught you about what Kind is, how it works and how to deploy an application using Kind. Make sure to follow other articles on GeeksforGeeks to know about more tools in DevOps.
Kubernetes Kind – FAQ’s
What Are The Prerequisites Before Learning Kind?
Before studying about Kind. You should have fundamental knowledge of Docker and Kubernetes.
What Are The Ways To Create A Cluster Using Kind?
There are two ways you can create a Kubernetes cluster using Kind:
1. Using the following terminal command
kind create cluster –name [NAME_OF_THE_CLUSTER]
2. Using a configuration file
What Is Kind Used For?
Kind is used to create Kubernetes Clusters on your local machines.
Is Kind Better Than Minikube?
The answer to this depends which use case you want these tools for. What Kind offers better than its alternatives like Minikube or Docker Desktop is the ability to create multiple clusters. Other than this Kind also allows the users to create clusters using config files.
Is Kind Open-source Tool?
Yes, Kind is an open-source tool under Kubernetes project.
Share your thoughts in the comments
Please Login to comment...