How To Deploy Dashboard UI On A Kubernetes Cluster Locally ?
Last Updated :
26 Mar, 2024
Docker Desktop is easily the most popular containerization software for developers and teams. But Docker Desktop would not only allow you to play with containers but can enable you to use Kubernetes without downloading any external cluster like Minikube. Docker Desktop is a secure, out-of-the-box containerization software that offers developers a robust, hybrid toolkit to build, share, and run applications anywhere. You can also use Docker Desktop to enable Kubernetes in your local machine and you can have a Kubernetes cluster running in your local machine with just a click of a button. In this article, we will discuss how to deploy Dashboard UI on Kubernetes Cluster locally using Docker Desktop.
How to Deploy Kubernetes Dashboard UI – Tutorial
Step 1: Installing Docker Desktop
You can skip this step if you already have Docker Desktop installed in your local machines. You you haven’t downloaded Docker Desktop, go to “https://www.docker.com/products/docker-desktop/” and download Docker Desktop. You can then simply install it from the setup.

Step 2: Enabling Kubernetes
- Once you are done with the setup and Docker Desktop is installed, open the application and you will get a similar interface:

- Docker Desktop does not allow Kubernetes by default so we need to go to the settings and enable Kubernetes. In your Docker Desktop application, go to the settings icon present in the top right corner of the screen:

- You will see a sidebar with multiple options. Click on the Kubernetes option and you will see a similar interface. Enable Kubernetes by click on the Enable Kubernetes checkbox and then click on “Apply and Restart”.
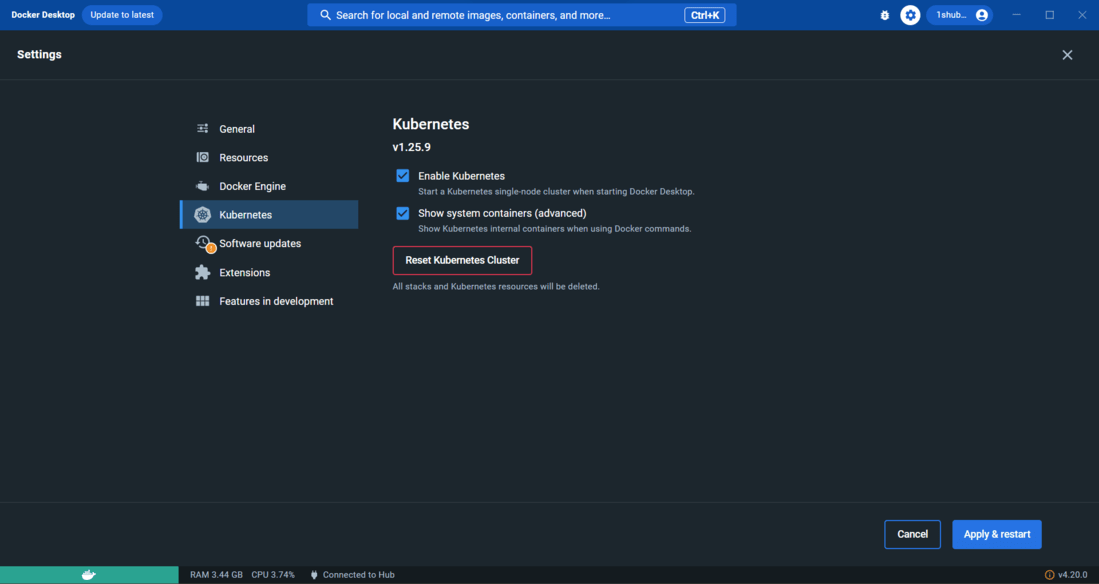
- You will have to wait for a few minutes till Docker Desktop starts a Kubernetes cluster in your local machine, as soon as the cluster starts, you will see a small Kubernetes tab in the bottom left corner of the application saying that Kubernetes is running.

Step 3: Working On Terminal
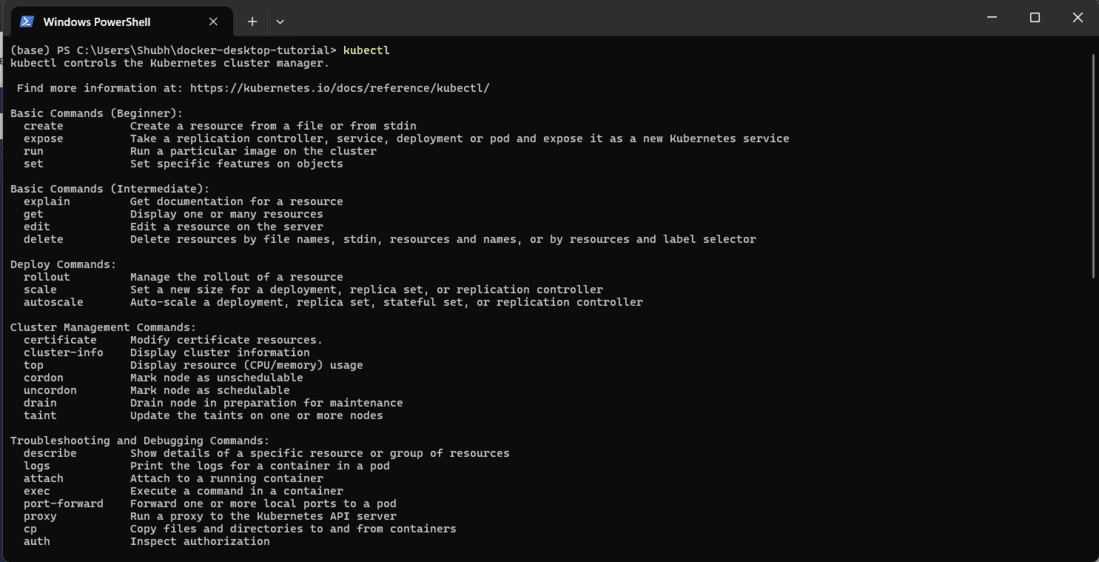
- Now that our cluster is up and running, we should open a terminal to confirm and work on our cluster. You can confirm that Kubernetes is running by entering the following command:
kubectl
- kubectl is the command line tool for Kubernetes so if Kubernetes cluster is running in your machine you will get a similar output.
- You can enter the following command to see all the Kubernetes components you have in your cluster:
kubectl get all
- For now since we haven’t added any Kubernetes component to the cluster, you will only see a Service that is added by default by Docker Desktop:

Step 4: Adding Components
- Let us deploy some components to our Kubernetes Cluster now, Kubernetes provides a Dashboard UI application for clusters that visually represents what’s happening in the cluster. It tells us about the number of Pod, CPU usage, etc.
- Let’s deploy this Dashboard UI to our Kubernetes cluster, for that enter the following commands to deploy all the components required:
kubectl apply -f https://raw.githubusercontent.com/kubernetes/dashboard/v2.7.0/aio/deploy/recommended.yaml
- Add you will see that multiple Kubernetes components are deployed, which includes a new namespace called kubernetes-dashboard, 3 Secrets, 1 Configmap, along with other components:

- How to create a new user using the Service Account mechanism of Kubernetes, grant this user admin permissions and login to Dashboard using a bearer token tied to this user.
Step 5. Creating And Applying Configuration File
- Now we need to create a new user create in order to use the Service Account mechanism of Kubernetes, for that create a new file called ‘dashboard-adminuser.yaml’:
New-Item -Path "./dashboard-adminuser.yaml" -ItemType "file"
- Paste the following code inside that file:
apiVersion: v1
kind: ServiceAccount
metadata:
  name: admin-user
  namespace: kubernetes-dashboard
- We just created a configuration file, in order to apply this file inside the Kubernetes cluster, enter the following command:
kubectl apply -f dashboard-adminuser.yaml
- You will see a similar result:

Step 6: Adding A New User
- Enter the following command to get the token you will need for logging in:
kubectl -n kubernetes-dashboard create token admin-user
- You will get a token as an output, here is an example token that I got, you will get a similar one, copy this token in your clipboard:

Step 7: Accessing The Dashboard
- With that our Dashboard application has been deployed to Kubernetes cluster, in order to enable the access to our application, enter the following command:
kubectl proxy
- You will get a similar result and with that our Dashboard application is not accessible through our browser:

Step 8: Browsing The Dashboard UI
- Without closing the terminal window, go to your bowser and go to the following URL:
http://localhost:8001/api/v1/namespaces/kubernetes-dashboard/services/https:kubernetes-dashboard:/proxy/
- You will get a Login window:
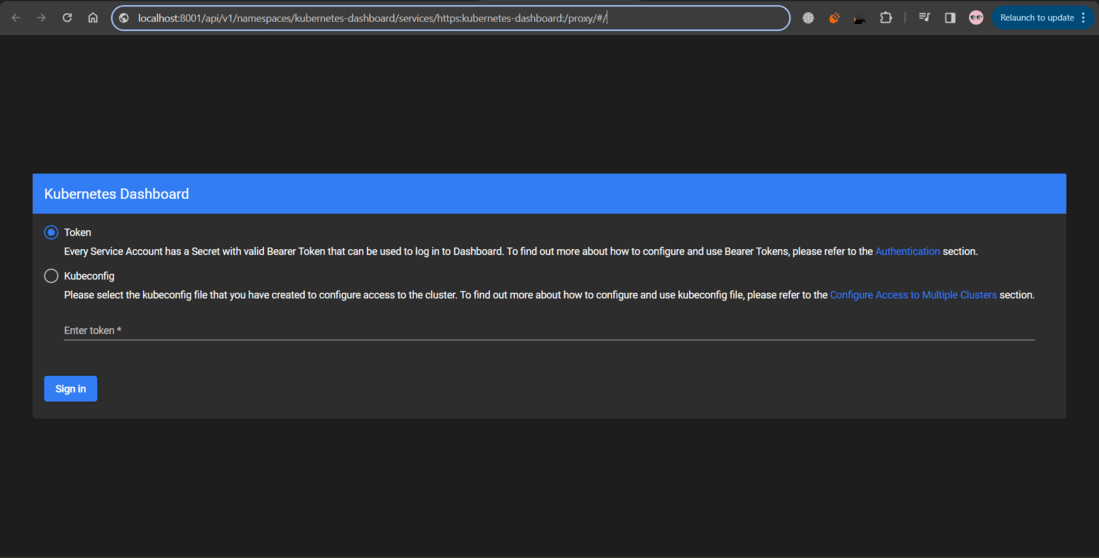
- Simply enter your token and click on the sign in button. Upon clicking the sign in button you will see the Dashboard application with the text “There is nothing to display here” since we haven’t added any component to our Cluster other than this application.

- And with that we finally have deployed the Kubernetes Dashboard UI locally using Docker Desktop. Put yourself on the back since you have completed the tutorial on how to deploy Dashboard UI on Kubernetes Cluster locally.
Conclusion
Docker Desktop is a secure, out of the box containerization software that offers developers a robust, hybrid toolkit to build, share, and run applications anywhere. You can also use Docker Desktop to enable Kubernetes in your local machine and you can have a Kubernetes cluster running in your local machine with just a click of a button. In this tutorial we discussed the process of deploying the Kubernetes Dashboard UI in our cluster using Docker Desktop. Make sure to follow through the tutorial to get a better understanding on deploying Kubernetes Dashboard UI. Make sure to follow other articles on GeeksforGeeks to know about more tools in DevOps.
Docker Desktop – FAQ’s
What Are The Prerequisites Before Learning Docker Desktop?
You should have fundamental knowledge of Docker and containerization before learning about Docker Desktop.
What Are Alternatives To Docker Desktop For Creating Kubernetes Clusters?
Following are the alternatives to Docker Desktop for creating Kubernetes Clusters:
- KinD
- Minikube
- Kubeadm
- Kubespray
- Kops
Is Docker Desktop Same As Docker Engine?
No, Docker Desktop is an application that uses Docker Engine and also other technologies, and has a lot of features like GUI, CLI as well. While Docker Engine is a core technology of Docker Desktop used for building and containerizing applications.
Can Docker Run Without Internet?
Yes, Docker can run without Internet. But most of the Docker features requires an active internet connection.
Is Docker Desktop Free To Use?
For Students, individual professionals or a small company with less than 250 employees, Docker Desktop is free. But for a larger company it requires a paid subscription depending on their needs.
Share your thoughts in the comments
Please Login to comment...