How to Use File History in Windows?
Last Updated :
29 Apr, 2024
It’s a good habit to back up all the essential data and directories. Windows has a helpful tool called File History that makes it easy and automated for the users to periodically back up all the required files that are kept in the contacts, desktop, favorites, and libraries folders in the system. This type of security enables a major feature to retrieve all the required data that users may have inadvertently erased or altered from the system.
In this article, we’ll discuss File History in Windows and how to use File History in Windows efficiently.
What is the main feature of File History in Windows?
After releasing the File History feature for Windows 8, Microsoft has made improvements to the feature throughout time. You may back up important files and folders to an external drive with the File History feature. It is distinct from a Windows backup or system image since it copies only particular files and folders, not the entire C: drive.
The File History feature often creates backups of Desktop folders, OneDrive offline files, music, pictures, documents, downloads, and videos. However, you can use File History to add other directories that you wish to backup.
How to use file history in Windows?
Here, we’ll discuss some methods to use file history in Windows.
Method 1: By using Windows Settings
The full File History choices are available in the settings app for Windows 8.1 and Windows 10. It allows you to add or remove folders, adjust the frequency and storage device, and activate the file history feature.
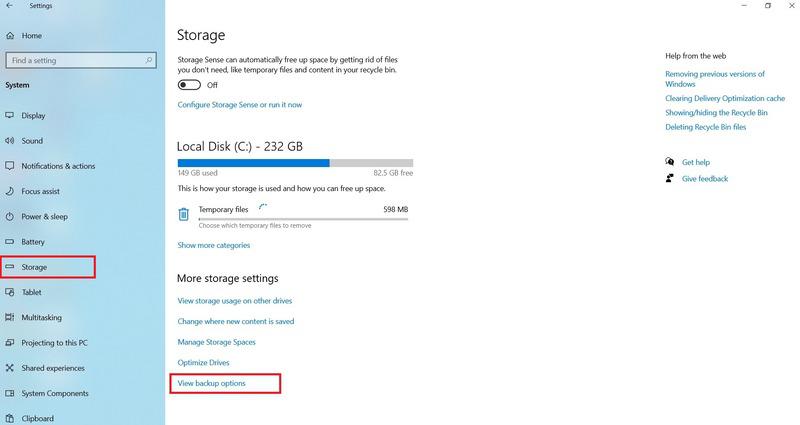
Step 1: Press Windows + I > Click on System > Select Storage
Step 2: Select More Storage Settings > Click on View Backup Options from the system.
Step 3: Check and activate the toggle button Automatically Backup my files > See Add a Drive option > Select External Storage drive to backup the required files.
Step 4: Click on More options > Tap on the Backup Now button.
Note: You can click on the toggle button again to disable the feature.
Method 2: By using Control Panel
The File History option was completely removed from the Settings program in Windows 11. Although Microsoft changed a lot of the settings in Windows 11, you can still use the Control Panel to access File History. From there, you can control all the settings and enable/disable the feature.
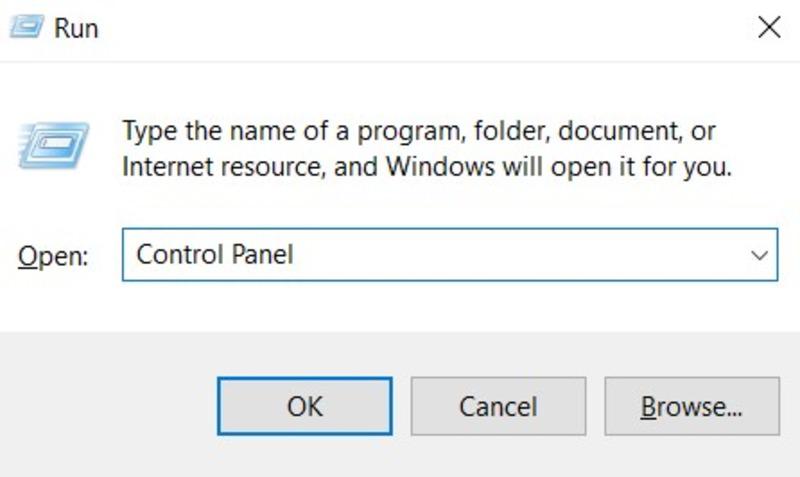
Step 1: Press Windows + R > Type Control Panel > Press Enter
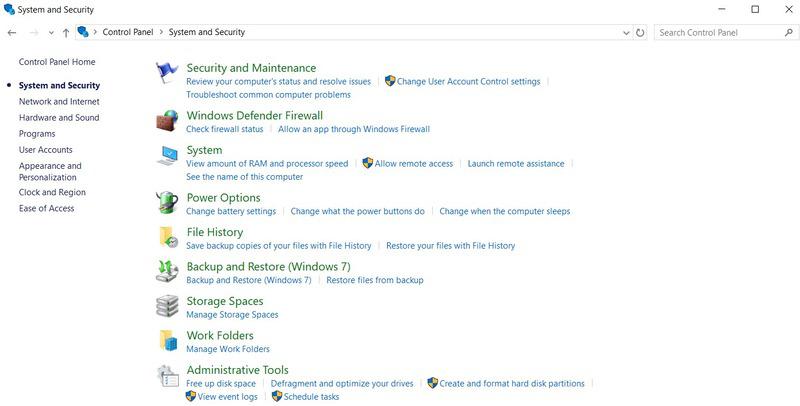
Step 2: Click on System & Security > Adjust the system settings > Click on the File History option.
Step 3: See File History is off > Click on the “Turn On” button to enable the required file history.
Method 3: By using the Group Policy Editor
You can enable File History on your Windows Pro or Enterprise version computer by using the Group Policy editor. The Group Policy Editor isn’t available by default on Windows Home, but there is a workaround to access it there, so make sure to complete it before moving on.
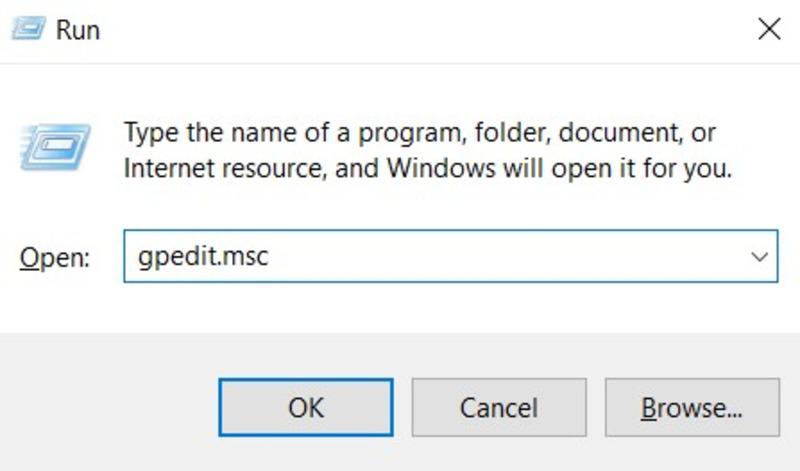
Step 1: Press Windows + R > Type gpedit.msc > Press Enter
Step 2: Launch the Group Policy Editor > Navigate to System Configuration or Administrative Templates or Windows internal Components.
Step 3: Locate File History policy > Double click on Turn Off File History > Choose Enabled or Disabled as per requirement.
Method 4: By using the Registry Editor
To enable File History on your computer, perform a quick registry edit. But before making any changes, you should always save a registry backup. For additional information, see our registry backup guide.
Step 1: Press the Windows key > Type Regedit > Right-click on the first required search option > Select Run as Administrator.
Step 2: Go to the internal Address bar and paste the below-mentioned path
Computer\HKEY_LOCAL_MACHINE\Software\Policies\Microsoft\Windows
Step 3: Right-click on Windows > Choose New and Key
Note: Name the new key as FileHistory
Step 4: Click on the File History Key > Navigate the data to the right-hand side pane > Select New > DWORD (32-bit) Value option.
Step 5: Double-click the value Disabled to change it after giving it a name. Decide to set the Value Data to 0. Your system will continue to use the functionality as a result.
Step 6: Set the Value Data to 1 to turn off File History.
Conclusion
Windows’s File History is a very useful tool that can protect your data from unintentional loss or corruption. You can make sure that your digital data are safe and easily recoverable by customizing your backup options, setting up File History with an external disc or network location, and understanding how to restore files. You can use the Control Panel to enable it if you have Windows 11. To enable or disable File History, you can also try using the Registry Editor or Group Policy Editor.
Also Read
Backup & Restore Files using Windows File History
File Systems in Operating System
How to Fix Broken Registry Issues on Windows?
How to use file history in Windows – FAQs
Should I use Windows file history for important data?
You can retrieve instant files from your backup by using File History, including those from your documents, desktop, and other system folders. However, not many people use it because it’s not the best tool for creating personal backups.
What is the main disadvantage or drawback of Windows File History?
First of all, by default it is not enabled because it consumes free disc space. On contemporary portable PCs, which frequently have only one disc and little storage anyhow, this is especially problematic.
What is the main purpose or advantage of File History in Windows?
File History, which is compatible with Windows 10 and 11, may automatically backup files from designated PC folders to an external device or network destination. Depending on the interval you specify, your backups operate in the background.
Share your thoughts in the comments
Please Login to comment...