How to use Angular MatTabsModule with routing in Angular 17?
Last Updated :
01 May, 2024
The Angular Material library provides a tab component called MatTabsModule that allows you to organize content into separate tabs. When combined with Angular routing, you can create a seamless navigation experience where each tab loads its content from a different route. In this article, we’ll explore how to use MatTabsModule with routing in an Angular 17 application.
Prerequisites:
Approach
- Angular Material Integration: The first step will be integrating Angular Material into your Angular project. Use Angular CLI to add Angular Material and select the desired theme. This step sets up the foundation for using MatTabsModule in your application.
- Routing Setup: Define your application’s routes using Angular’s built-in routing mechanism. Each route corresponds to a different tab in the tabbed layout. Ensure that each route is associated with a specific component to render the content for that tab.
- MatTabsModule Implementation: Import MatTabsModule into your Angular module file. This module provides the necessary components and directives to create tabbed navigation.
- Dynamic Content Loading: Utilize Angular’s router outlet to dynamically load the content of each tab based on the active route. As users navigate between tabs, Angular’s router seamlessly renders the corresponding component for each route, providing a responsive and efficient user experience.
Steps to use Angular MatTabsModule
Step 1: Create an angular application
We can use the below commands to create a new angular application using the angular cli,
ng new mat-tab-routing
cd mat-tab-routing
Step 2: Add @angular/material package
@angular/material is a UI library provided by the angular team that is based on material design. To add it in our project we can use below command,
ng add @angular/material
Step 3: Creating routes
In order to add routes, we must create some components in our applications.
ng g c summary
ng g c team-info
ng g c setting
This will create three components for summary, team info and setting. We will need to define route config for our components.
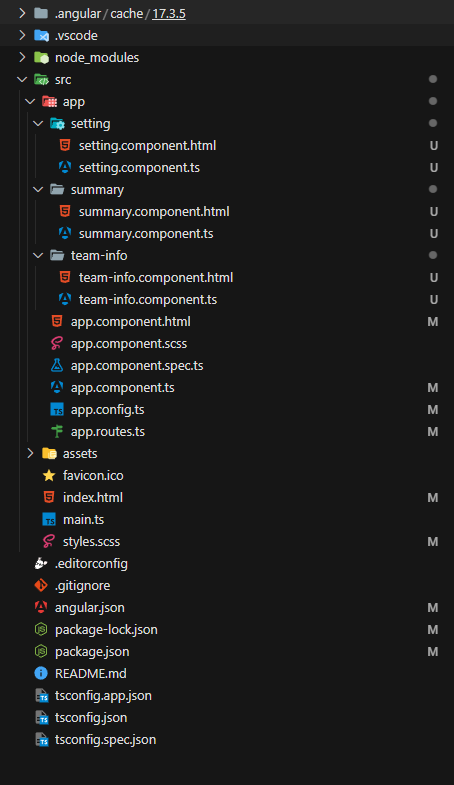
Folder Structure:
Dependencies:
"dependencies": {
    "@angular/animations": "^17.3.0",
    "@angular/cdk": "^17.3.4",
    "@angular/common": "^17.3.0",
    "@angular/compiler": "^17.3.0",
    "@angular/core": "^17.3.0",
    "@angular/forms": "^17.3.0",
    "@angular/material": "^17.3.4",
    "@angular/platform-browser": "^17.3.0",
    "@angular/platform-browser-dynamic": "^17.3.0",
    "@angular/router": "^17.3.0",
    "rxjs": "~7.8.0",
    "tslib": "^2.3.0",
    "zone.js": "~0.14.3"
  },
Example: This example demonstrates MatTabsModule in Angular.
HTML
<!-- app.component.html -->

<nav
  mat-tab-nav-bar
  mat-stretch-tabs="false"
  mat-align-tabs="start"
  [tabPanel]="tabPanel"
>
  @for (link of links; track link) {
  <a
    mat-tab-link
    (click)="activePath = link.path"
    [active]="link.path == activePath"
    [routerLink]="link.path"
  >
    {{ link.label }}
  </a>
  }
</nav>
<mat-tab-nav-panel #tabPanel>
  <router-outlet (activate)="onActivate($event.path)"></router-outlet>
</mat-tab-nav-panel>
// app.component.ts

import { Component } from '@angular/core';
import { RouterLink, RouterOutlet } from '@angular/router';
import { MatTabsModule } from '@angular/material/tabs';

interface ILink {
    path: string;
    label: string;
}

@Component({
    selector: 'app-root',
    standalone: true,
    imports: [RouterOutlet, MatTabsModule, RouterLink],
    templateUrl: './app.component.html',
    styleUrl: './app.component.scss',
})
export class AppComponent {
    title = 'mat-tab-routing';

    links: ILink[] = [
        { path: 'summary', label: 'Summary' },
        { path: 'team-info', label: 'Team Info' },
        { path: 'setting', label: 'Setting' },
    ];

    activePath = this.links[0].path;

    onActivate(path: string) {
        this.activePath = path;
    }
}
// summary.component.ts

import { Component } from '@angular/core';

@Component({
    selector: 'app-summary',
    standalone: true,
    imports: [],
    templateUrl: './summary.component.html',
    styles: ``
})
export class SummaryComponent {
    readonly path = 'summary';
}
// team-info.component.ts

import { Component } from '@angular/core';

@Component({
    selector: 'app-team-info',
    standalone: true,
    imports: [],
    templateUrl: './team-info.component.html',
    styles: ``
})
export class TeamInfoComponent {
    readonly path = 'team-info';
}
// setting.component.ts

import { Component } from '@angular/core';

@Component({
    selector: 'app-setting',
    standalone: true,
    imports: [],
    templateUrl: './setting.component.html',
    styles: ``
})
export class SettingComponent {
    readonly path = 'setting';
}
// app.routes.ts

import { Routes } from '@angular/router';

export const routes: Routes = [
    {
        path: '',
        redirectTo: 'summary',
        pathMatch: 'full',
    },
    {
        path: 'summary',
        loadComponent: () =>
            import('./summary/summary.component').then((m) => m.SummaryComponent),
    },
    {
        path: 'team-info',
        loadComponent: () =>
            import('./team-info/team-info.component').then(
                (m) => m.TeamInfoComponent
            ),
    },
    {
        path: 'setting',
        loadComponent: () =>
            import('./setting/setting.component').then((m) => m.SettingComponent),
    },
];
To start the application run the following command
ng serve --open
Output:

Share your thoughts in the comments
Please Login to comment...