How to use routing in Vue.js ?
Last Updated :
02 Jul, 2021
Vue router: Vue Router helps link between the browser’s URL/History and Vue’s components allowing for certain paths to render whatever view is associated with it. A vue router is used in building single-page applications (SPA).
The vue-router can be set up by default while creating your new project. In this article, we will install it separately. So we can see how it works.
Project Setup and Module Installation:
-
Step 1: Vue Router can be installed through Npm with the package named vue-router using below command.
npm install vue-router // OR
vue add router
It can be used via a script tag as shown below.
<script src="https://unpkg.com/vue-router"></script>
-
Step 2: Create our Vue project using the following command.
vue create router-page
-
Step 3: After creating our project we will add our Vue router using the following command.
vue add router
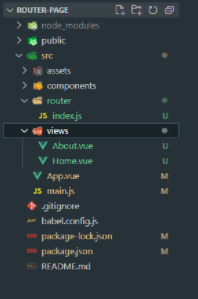
Project Structure: It will look like this.
Example:
main.js
import Vue from 'vue'
import App from './App.vue'
import router from './router'
Vue.config.productionTip = false
new Vue({
router,
render: h => h(App)
}).$mount('#app')
|
Home.vue
<template>
<div class="home">
<img alt="Vue logo" src="../assets/logo.png">
<HelloWorld msg="Welcome to Your Vue.js App"/>
</div>
</template>
|
About.vue
<template>
<div class="about">
<h1>This is an about page</h1>
</div>
</template>
|
index.js
import Vue from 'vue'
import VueRouter from 'vue-router'
import Home from '../views/Home.vue'
import Profile from '../views/Profile.vue'
Vue.use(VueRouter)
const routes = [
{
path: '/',
name: 'Home',
component: Home
},
{
path: '/profile',
name: 'Profile',
Component: Profile
},
{
path: '/about',
name: 'About',
component:()=> import(
'../views/About.vue'
)
},
]
const router = new VueRouter({
mode: 'history',
base: process.env.BASE_URL,
routes
})
export default router
|
Now let’s add our new route to that application in our App.vue and index.js file. Before we add the new route we need to create our new component named Profile.vue in our views folder.
App.vue
<template>
<div id="app">
<div id="nav">
<router-link to="/">Home</router-link> |
<router-link to="/about">About</router-link> |
added a new route to our app.vue file//
<router-link to="/profile">Profile</router-link>
</div>
<router-view/>
</div>
</template>
|
The <router-view> can be used to display the routing components based on the routes. When applied to an element in a template, makes that element a link that initiates the navigation to a route. Navigation opens one or more routed components in one or more <router-link> locations on the page. This means when we route to another view the application just hides some information and displays the requested information.
Profile.vue
<template>
<div class="profile">
<h1>This is a profile page</h1>
</div>
</template>
|
Step to run the application: Run the server using the following command.
npm run serve
Output: Open your browser and go to http://localhost:8080/ you will see the following output.

Like Article
Suggest improvement
Share your thoughts in the comments
Please Login to comment...