How to Password Protect an Excel File
Last Updated :
02 Apr, 2024
In today’s world, keeping your data safe is crucial. One of the best ways to do this is by password-protecting your Excel sheets. Making sure your Excel documents are secure is key to avoiding data leaks and keeping your information private. Whether you’re new to Excel or have been using it for a while, this guide will help you learn how to secure your Excel sheets effectively.
Note: The password protection may not work for CSV files in some MS Excel versions.
How to Protect an Excel File
Follow the below steps to set a password on an already existing Excel file.
Step 1: Open an existing Excel file.
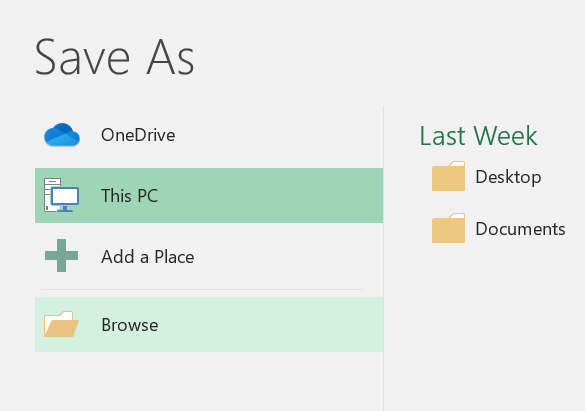
Step 2: Click on the Save As button and then click Browse.
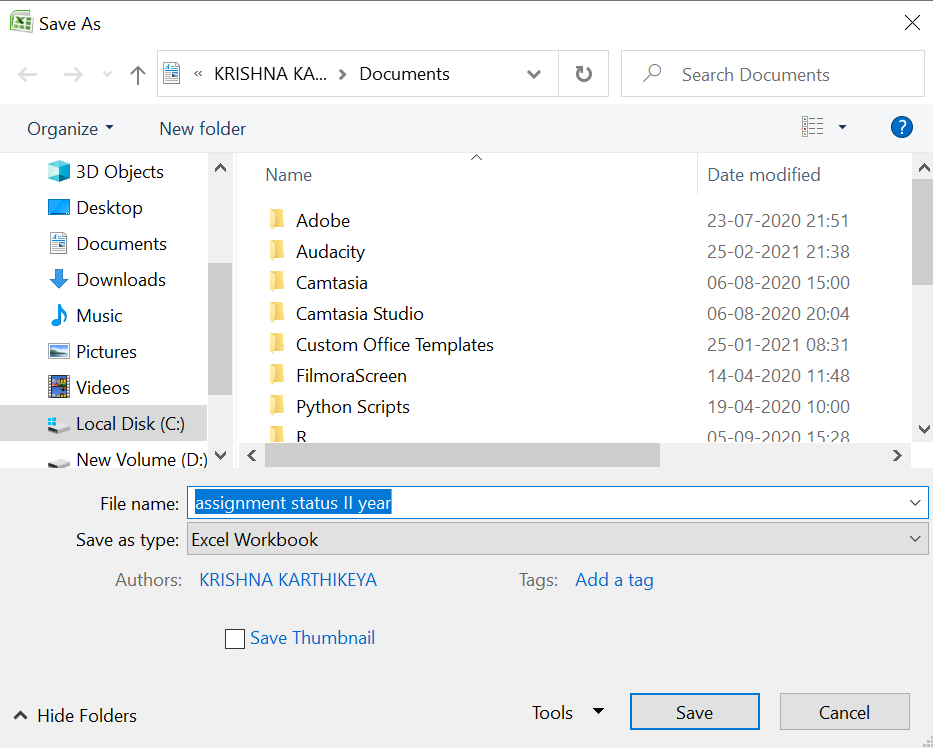
Step 3: Click on the drop-down list called Tools.
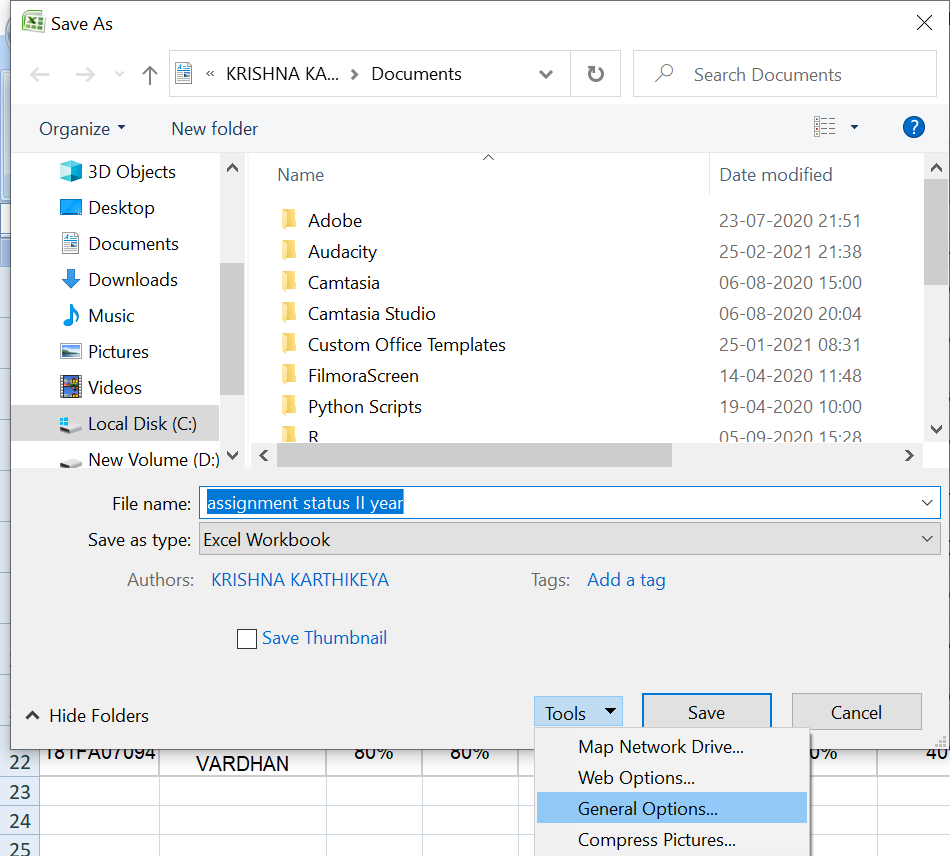
Step 4: In the drop-down list select the General option.
Step 5: Set a password for opening the sheet and for writing and click OK.
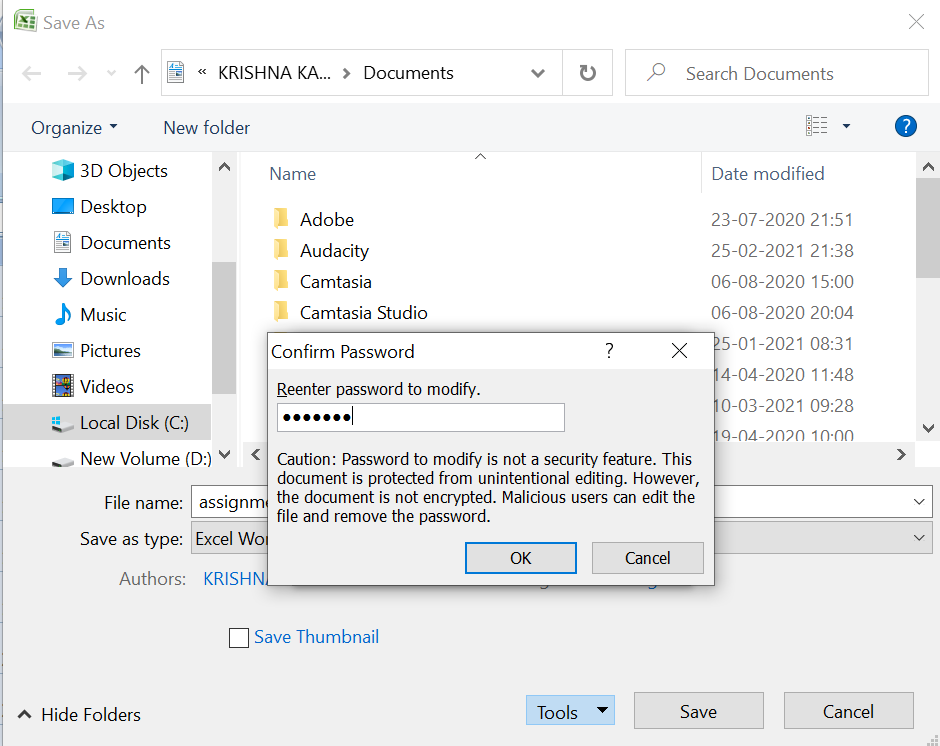
Step 6: After setting the password click on the Save button.
After setting the password, open the encrypted Excel file, we will find a dialog box with a text box for entering the password.
How to Protect an Excel Sheet
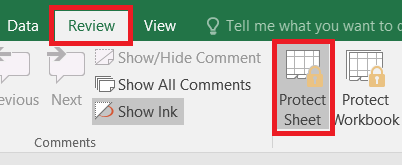
In this section, we will learn how to protect an Excel Sheet via Ribbon using the Review Tab.
Step 1: Click on the Review tab select “Protect Sheet”.
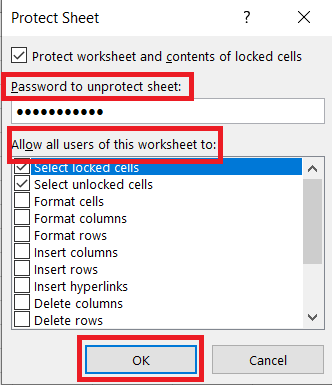
Step 2: A popup of Protect Sheet will appear. Add the Password (optional) along with the actions that are allowed to the user to perform. Then Click OK.
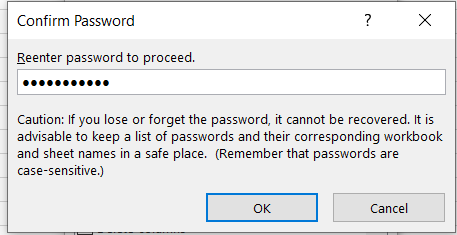
Step 3: A Confirm Password dialog box will pop-up to retype an confirm the password. After retyping, Click OK.
How to Unprotect Excel Sheet
There are three ways to unprotect a sheet in Excel. These are:
1. Unprotect Excel Sheet via Sheet Tab
Step 1: Right-Click on the sheet tab and Click on Unprotect Sheet.
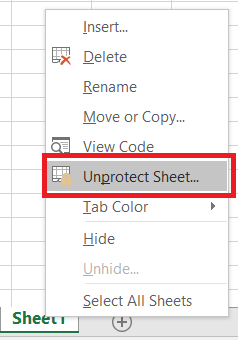
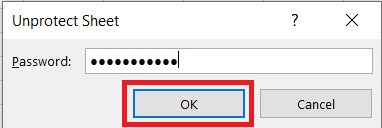
Step 2: Type the password and click OK to unprotect the sheet.

2. Unprotect Excel Sheet via Review Tab
Step 1: Click on the Review tab select “Unprotect Sheet”.
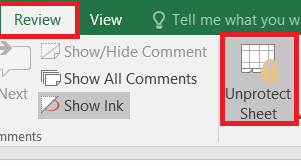
Step 2: Type the password and click OK to unprotect the sheet.
3. Unprotect Excel Sheet via Home Tab
Step 1: Click on the Home Tab and select the “Unprotect Sheet” option in the Format Section.
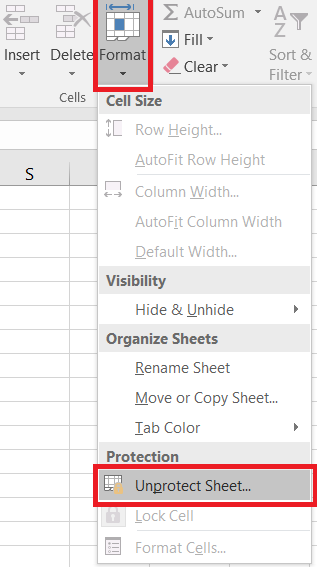
Step 2: Type the password and click OK to unprotect the sheet.

How to Protect Workbook in Excel
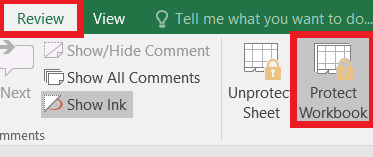
Step 1: In the Review Tab, select “Protect Workbook“.

Step 2: A popup of “Protect Structre and Windows” will appear.
- Check on Structure if you want to prevent the renaming, hiding, inserting, moving and copying new sheets.
- Check on Windows if you want to prevent the resizing and closing of the windows’ workbook.
- Enter the Password (optional).
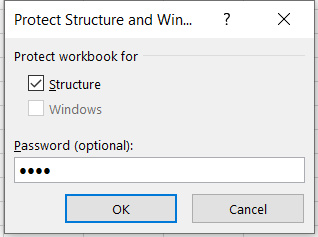
Step 3: Click OK to protect the Workbook.
How to Unprotect a Workbook in Excel
Step 1: Select the “Protect Workbook” option again.
Step 2: Enter the password and click OK to unprotect the workbook.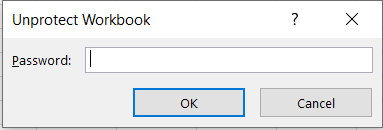
Conclusion
In conclusion, password protecting an Excel file or sheet is a crucial step for anyone looking to secure sensitive data, from personal finance information to confidential business reports. Whether you’re a beginner or an advanced user, understanding how to implement Excel’s password protection features can make a significant difference in safeguarding your documents.
How to Password Protect an Excel File – FAQs
How to password protect a File?
To password protect a file:
- Open the file.
- Go to “File” > “Info” > “Protect Document” (or similar option).
- Select “Encrypt with Password.”
- Enter a strong password, confirm it, and save the changes.
How do I password protect and hide a sheet in Excel?
To password protect and hide a sheet in Excel:
- Right-click the Sheet tab you want to hide and protect.
- Click
Protect Sheet.
- Enter a password, check the actions you’re allowing, and click
OK.
- Re-enter the password to confirm, and click
OK.
- Right-click the sheet tab again, select
Hide to hide the sheet.
What are the two 2 methods for protecting the password file?
The two 2 methods for protecting the password file are:
- Encryption: Encrypt the file to make it readable only with a key.
- Hashing and Salting: Convert passwords into unique hashes, adding salts to enhance security.
What is the shortcut for protect sheet in Excel?
ALT + T + P + P is the shortcut key to protect sheet in Excel.
Share your thoughts in the comments
Please Login to comment...