How To Install the Apache Web Server on CentOS 7
Last Updated :
27 Mar, 2024
Apache Web Server, commonly known as Apache is a free, open-source, and one of the most widely used web servers in the world. Apache web server is developed and maintained by Apache Software Foundation. Apache is not any physical server, it is a software application running either on a physical/virtual machine, that facilitates web-hosting.
Apache acts as a mediator between you (the client/user) and the resources stored in the server. We can understand this by considering a restaurant analogy. You are the customer, who places an order, and the kitchen is the server (host) where all the dishes are cooked. Apache can be considered as a waiter, who carries your order to the kitchen and gets it to your table.
How to Install Apache Web Server on CentOS 7?
Prerequisites:
- Root (sudo) privileges.
- CentOS 7 Installed Machine
Steps to Install Apache Web Server
Follow the below steps to install Apache Web Server on CentOS 7 without encountering any issues or problems.
Step 1: Initial Set-Up
Before installing the Apache server on CentOS, let us do some initial setup. Open a terminal on your CentOS (Right Click > Open Terminal)

Opening Terminal
Type the command: “sudo su” and enter the root password in the terminal to get root privileges.
$ sudo su

Getting Root Privileges
Once you enter into the root, there will be a change in the terminal prompt: [root@localhost/vm-name username]#
Step 2: Update the System
While you are in root, update the system by executing the yum update command in the terminal.
$ yum update
The above command updates the system’s package repository and installs any available updates for the CentOS 7 system, ensuring that you have the latest software versions. ‘yum‘ is a package management utility for RPM-compatible Linux operating systems.

Updating all the packages using the ‘yum update’ command.
Step 3: Install Apache
After successful installation and updation of packages, let us install the Apache web server using the following command.
$ yum install httpd

Enter the command ‘yum install httpd’ and press Enter
Enter the command and press Enter, it will gather all the dependencies from the mirrors and you will prompted to confirm the download. Enter ‘y‘ and to confirm the installation.

Execute the command and press ‘y’
Once the installation is completed, you will see the prompt, “Complete!“.

Successful installation of Apache Web server
Step 3: Configure Firewall
To allow the HTTP Traffic, open the default HTTP port, i.e., port 80, by executing the following commands in the terminal. To enable Apache to serve content over HTTPS, open the default HTTPS port, i.e., port 443 by executing the second command below.
$ firewall-cmd --permanent --add-service=http
$ firewall-cmd --permanent --add-service=https //execute to open port 443.
$ firewall-cmd --reload   //reloading to apply the new rules.

Enable HTTP and HTTPS
Step 4: Start Apache
When you first install the Apache Web Server on CentOS 7, the Apache server is set to inactive by default. Possibly, setting it to inactive initially aims to prevent unintended behavior and abnormal resource usage.
$ systemctl status https
The above command displays the status of the Apache web server.

Status: ‘inactive’
To start the Apache server, execute the following commands in the terminal.
$ systemctl start httpd         //starts the apache server
$ systemctl status httpd      //displays the status of the apache server

Starting the Apache Web server
For Apache to start automatically on system boot, enable it using the following command
$ systemctl enable httpd

creates a symbolic link to enable Apache on boot
This command creates symbolic links to the Apache service, enabling it to start during the system’s boot sequence.
Step 5: Test Apache
Once the Apache is installed and running, it displays a test page when we try to access the IP Address of the server. Executing curl command to your host at port 80, which will return the test page of Apache Web Server.
$ curl `hostname`:80

Part of the output of the above command.
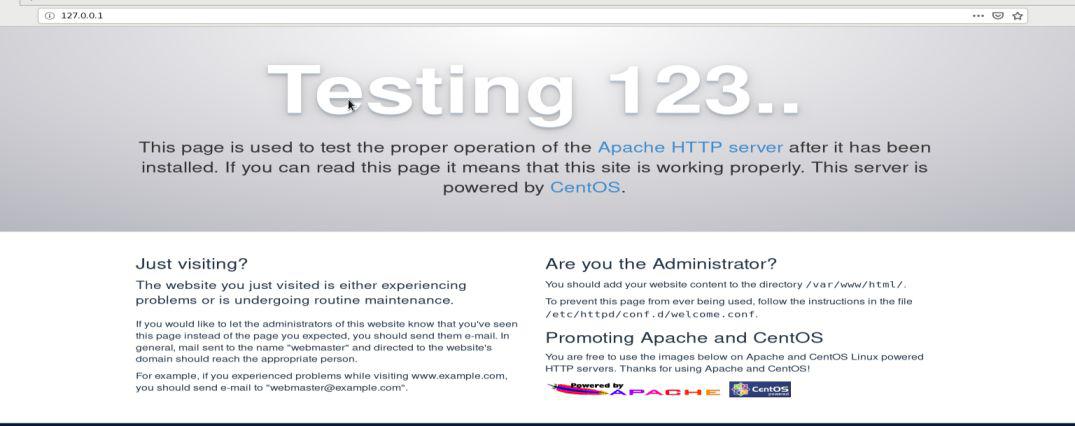
Open: ‘host-ip:80 ‘ in the browser on your CentOS.

Screenshot of the test page in the browser
Conclusion
In conclusion, the Apache Web server serves as a great foundation for hosting web applications and installing it includes multiple simple steps. Following the steps discussed in this guide ensures a reliable server setup. With Apache set-up, you can now host your web applications. As you further move with Apache server and web hosting, consider exploring Apache configuration files and the concept of Virtual Hosts.
In addition to the above commands, the below commands are helpful: (execute them as a root user)
- systemctl stop httpd: Stops the Apache server, ensuring the server doesn’t handle any requests.
- systemctl disable httpd: Removes the associated symbolic link in the relevant system directories, preventing Apache from starting automatically during system boot.
- systemctl restart httpd: Restarts the Apache server.
- journalctl -xe | grep httpd: Gives the ERRORS related to the Apache web server.
Share your thoughts in the comments
Please Login to comment...