How to Create Virtual Machines in Linux Using KVM (Kernel-based Virtual Machine)?
Last Updated :
26 Mar, 2022
In this tutorial, we are going to see how we can create a virtual machine in Linux using a Kernel-based Virtual Machine. Virtual machines are based on computer architectures and provide the functionality of a physical computer but first, we need to understand what is a kernel-based virtual machine. The Information Technology field is complex it needs proper scalability and reliability to operate, virtualization is one way to increase efficiency and reduce downtime.
So basically virtualization is obtaining a virtual version of features such as hardware, software and that virtual version will be independent of the normal working of the device. Virtual machines are examples of Virtualization.
Kernel-Based Virtual Machine
The purpose of Kernel-Based Virtual Machine (KVM) is to provide the ability of virtualization to Linux. It is an open-source technology which provides which allows Linux machines (host) to run different environments called virtual machines. Each virtual machine represents a different Linux process. Each Virtual Machine has its own copy of hardware such as memory, processor, and also software this allows to use of resources to a greater extent causing more reliability.
Steps for creating Virtual Machine in Linux using KVM
Note: We are going to use ubuntu os throughout this tutorial,
- Checking if virtualization is enabled or not
- Installing KVM on Ubuntu
- Adding a user to KVM
- Creating Virtual Machine
- Using command line
- Using interface
Virtualization Inability
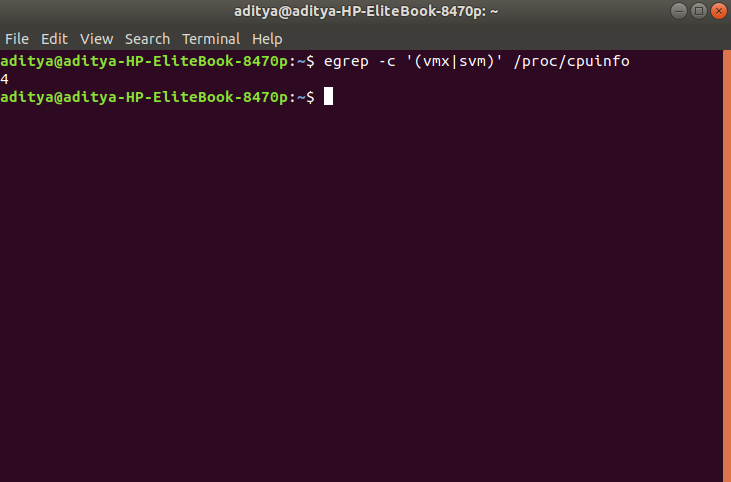
To create a virtual machine first we need to ensure that virtualization is enabled on our system. It is mandatory to create virtual machines. There are multiple ways to check if virtualization is enabled,
$ egrep -c ‘(vmx|svm)’ /proc/cpuinfo
The above command /proc/cpuinfo gives information about the processor. The output of the command will be a number. The output number 1 or more than that represents that virtualization is enabled, output 0 says you need to enable virtualization on your system.
Virtualization Inability
$ lscpu | grep Virtualization
This command is used to check which type of virtualization your processor supports. If the system contains a CPU with Intel VT support, the above command will provide the following output
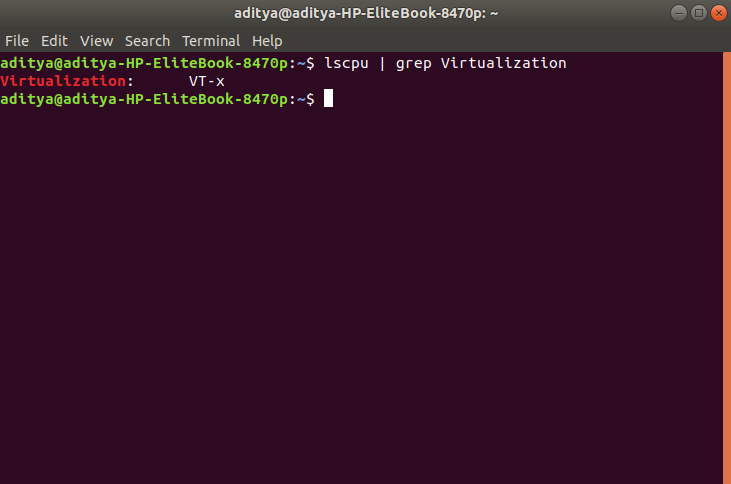
Virtualization Type
Installing KVM on Ubuntu
Now we know our system is capable of creating and running virtual machines, it’s time to install tools which will create our virtual machines. To install KVM and other KVM dependencies such as virt-manager, bridge-utils enter command:
$ sudo apt -y install bridge-utils cpu-checker libvirt-clients libvirt-daemon qemu qemu-kvm
- bridge-utils: The bridge-utils package contains a utility needed to create and manage bridge devices. This is useful in setting up networks for a hosted virtual machine (VM).
- cpu-checker: Outputs the specifications of CPU
- libvirt-clients: a toolkit to manage virtualization platforms/clients and hypervisors
- qemu: A program that can run the operating system of the machine on different machines
- qemu-kvm: Runs process using KVM module
All dependencies are installed now run command its time to check if KVM ins installed successfully:
$ sudo kvm-ok
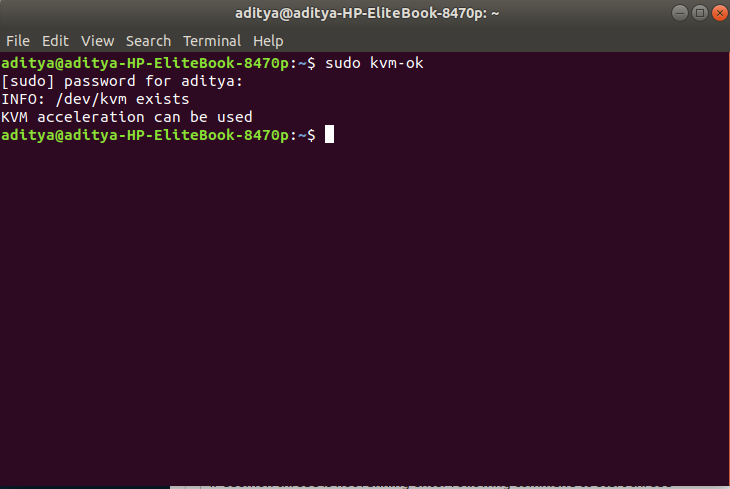
Check if KVM is Installed properly
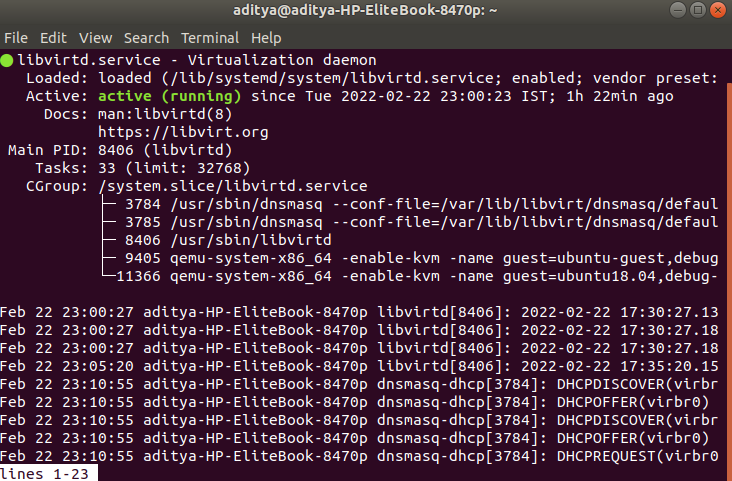
Also, we need to confirm if the virtualization daemon – libvritd-daemon – is running, to do so enter the command.
$ sudo systemctl status libvirtd
If the output is not active: running you need to start daemon thread
If the daemon thread is not running enter the following command to start the thread,
$ sudo systemctl enable –now libvirtd
Adding a user to KVM
In this part, we are going to create a user for KVM. To prevent root user from using KVM and root user is only available when root user is a part of libvirt/libvirtd group.
To add a new user to KVM, use the following command,
sudo adduser [username] libvirtd
[username] enter the username of your choice if the output is
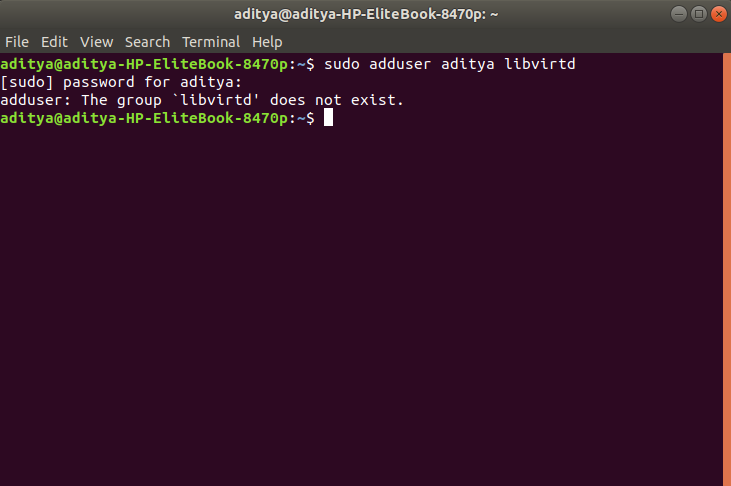
Adding User to KVM
Then your KVM is already a member of the non-root user and serves the same purpose as libvirtd group then you don’t need to add yourself to the group.
Creating Virtual Machine
There are two ways to create a virtual machine
- Using the command line
- Using the graphical interface
- Create a Virtual Machine via Command Line
virt-install is a command which is used to create virtual machines in Linux, following is the command which creates a VM.
sudo virt-install –name=ubuntu-guest –os-variant=ubuntu20.04 –vcpu=2 –ram=2048 –graphics none –location=[local path to iso file] –network bridge:vibr0
The above command creates a Ubuntu virtual machine with version 20.04 and the name ubuntu-guest.
- Name: specify the name of the virtual machine being created
- vcpu: Number of virtual CPUs to configure for the guest.
- Ram: Memory to allocate for guest instance in megabytes. According to your machine, you can specify the given memory of the VM.
- Graphics spice: If no graphics option is specified, “virt-install” will default to ‘–graphics vnc’ if the display environment variable is set, otherwise ‘–graphics none’ is used.
- Location: location of iso file on which virtual machine will be built. It can be the path to an ISO image, or to a CDROM device. It can also be a URL from which to fetch/access a minimal boot ISO image.
- Network-bridge: Connect the guest to the host network, Connect to a bridge device in the host called “BRIDGE”.
Create a Virtual machine using a graphical interface
If you are not much familiar with the command line don’t worry there’s another way to create a virtual machine using a tool called virt-manager you can easily create virtual machines. Steps to create VM using virt-manager,
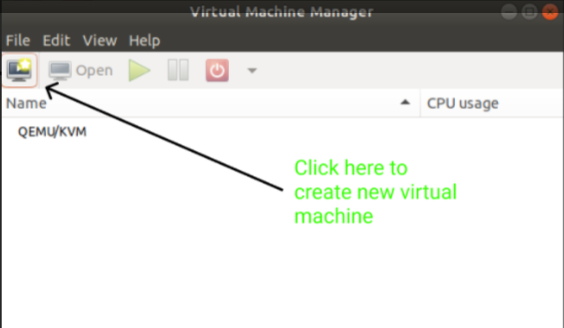
Step 1: Launch virt-manager
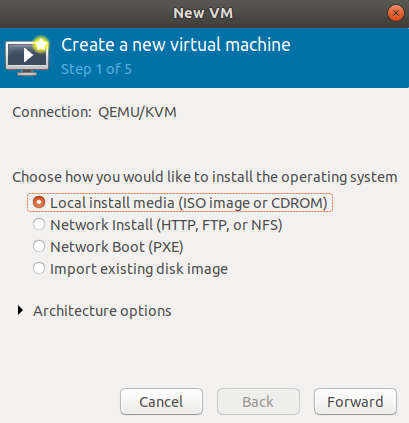
Step 2: Choose installation media it can be an iso file of OS, you can install from the network or can be a disk copy
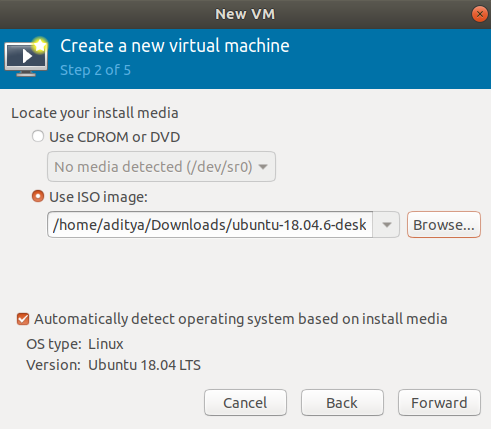
Step 3: Enter the path/URL of your file click next
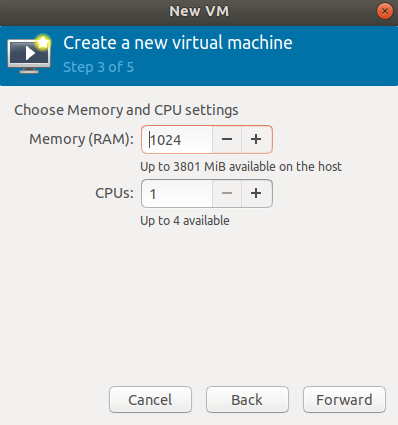
Step 4: Enter memory and CPU requirements
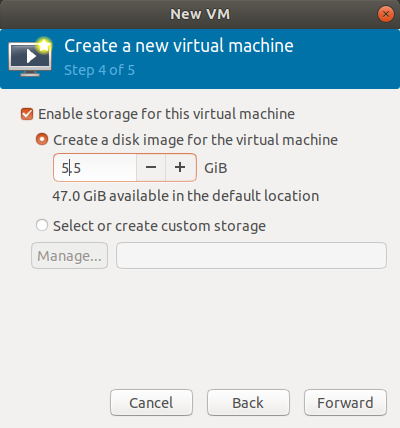
Step 5: Enter required disk space
Step 6: Enter the name of VM and check specifications and hit the finish
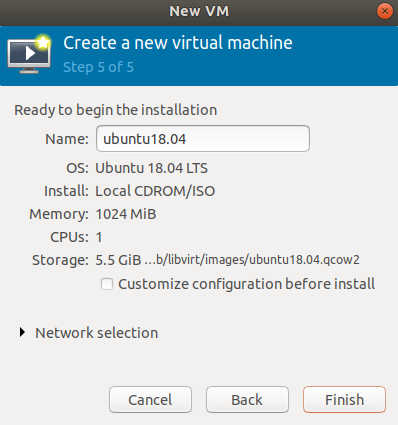
Now the installations should be completed and the virtual machine should start running.
Like Article
Suggest improvement
Share your thoughts in the comments
Please Login to comment...