How to Export and Share Jupyter Jootbooks ?
Last Updated :
09 Oct, 2023
In this article, we will cover How to export and share Jupyter Notebooks there are different options available in Jupyter Notebook to export/download the notebook in different formats like PDF, Markdown, HTML, etc, we will consider both methods web-based user interface and command-line interface to export the notebook, further we cover an example to get a better understanding and later in the article, we will discuss different options available to share Jupyter Notebooks.
Export Jupyter Notebooks
Jupyter Notebook provides a lot of options to users to export their notebooks in different formats which are as follows:
- PDF (.pdf)
- Python (.py)
- Notebook (.pynb)
- Markdown (.md)
- HTML (.html)
- LaTeX (.tex)
- Rest (.rst)
- Acsciidoc (.asciidoc)
- Reveal.js slides (.slides.html)
Export Notebook via Web-Based User Interface
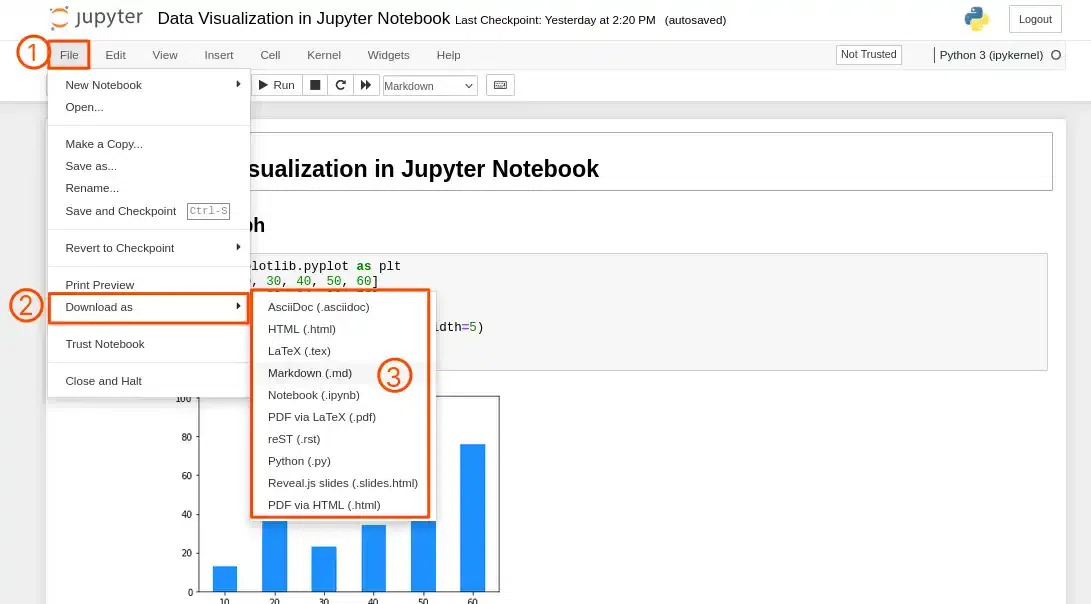
To export or download your notebook in any above-mentioned formats follow the below steps:
- Click on the Files button on the Menu Bar
- Click on Download as button
- You will see different options to download you notebook in different formats which are mentioned in this article earlier.
- Select the format which suits you best
Output
Export Notebook via Command Line Interface
To export the jupyter notebook via command line you must install the nbconvert module, to install the nbconvert module you the below code block and run it in either terminal or jupter notebook.
pip install nbconvert
Syntax for the command is as follows
jupyter nbconvert –to [format] [notebook_name].ipynb
Replace,
[format] with any format mentiond in the list [‘asciidoc’, ‘custom’, ‘html’, ‘latex’, ‘markdown’, ‘notebook’, ‘pdf’, ‘python’, ‘rst’, ‘script’, ‘slides’, ‘webpdf’]
[notebook_name] with the name of you notebook
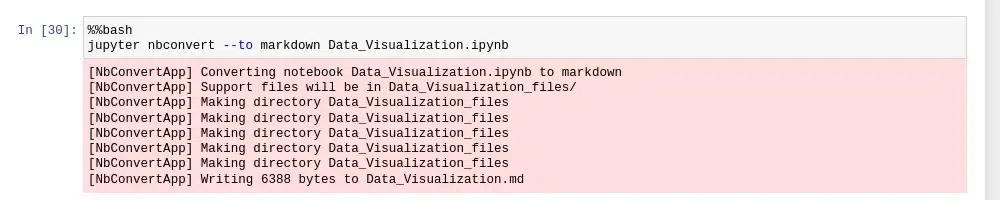
Example: Convert the notebook to Markdown
jupyter nbconvert --to markdown notebook.ipynb
Output
In the below screenshot %%bash magic cell function is used because command is running in the Jupyter notebook, if you directly run the command in terminal you have to only write the command.
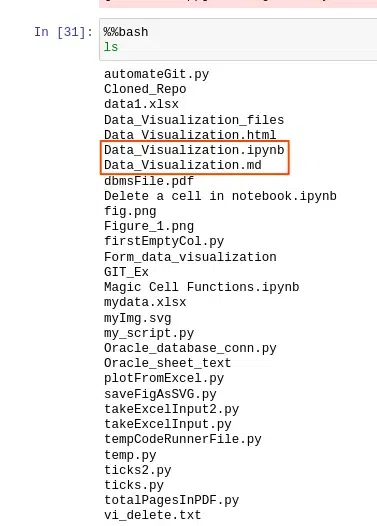
Verify if the notebook is exported as markdown or not, in the below screenshot you can clearly see the exported notebook in markdown format highlighted in the red box.
Sharing Jupyter Notebook
After you download the notebook you can share the notebook using any platform E-Mail, GitHub or any messaging apps. But we will discuss three best options to share the notebooks:
- Using GitHub
- Using GitHub Gist
- Using nbviewer
Share using GitHub
To share the notebook using GitHub follow the below simple steps:
- Go to your GitHub profile (https://github.com/username)
- Create or Open any repository
- Add the notebook .ipynb file to the desired location in the GitHub repository
- Click on Preview to get the preview of your notebook
- Copy the URL of the notebook and share it.
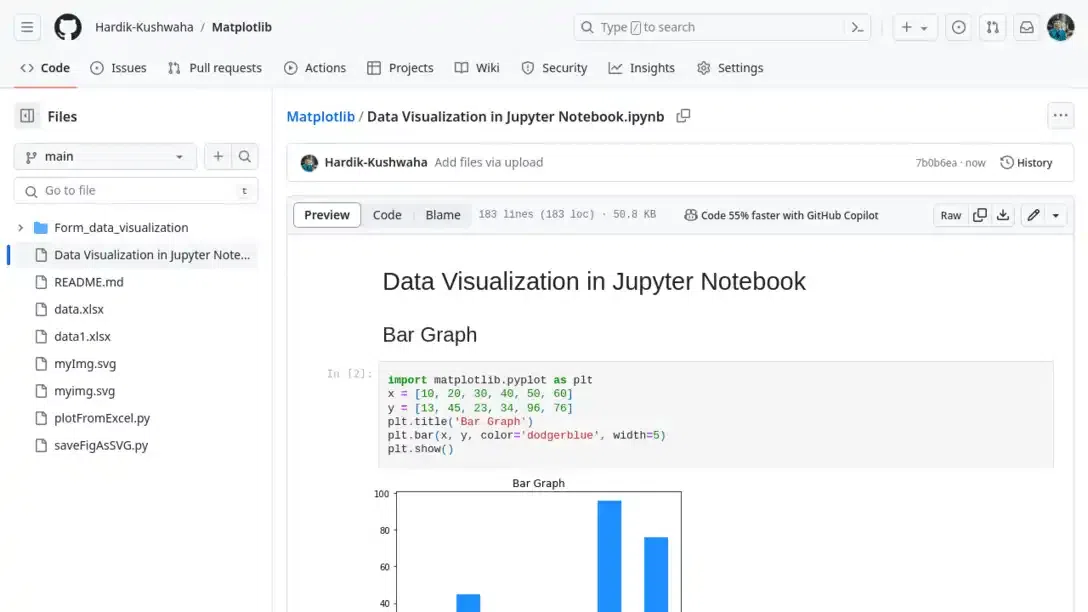
In the below screenshot you can see the notebook preview in GitHub:
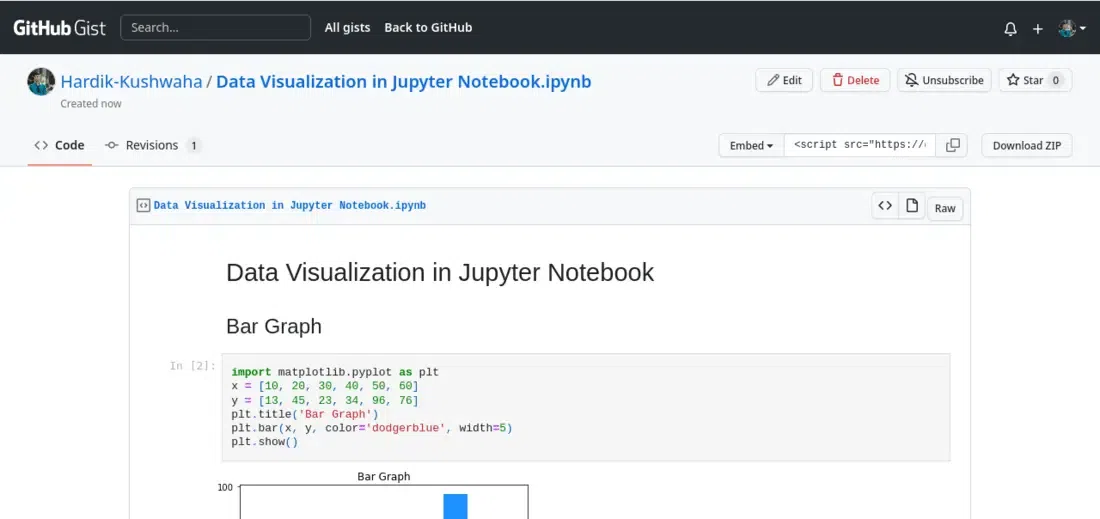
Share using GitHub Gist
Follow the below steps to share the notebook via GitHub Gist:
- Go to GitHub Gist (https://gist.github.com/)
- Drag and drop the notebook file in the gist
- Add the title and description of you gist file
- Gist will get prefill with the notebook content
- Click on Create Public Gist
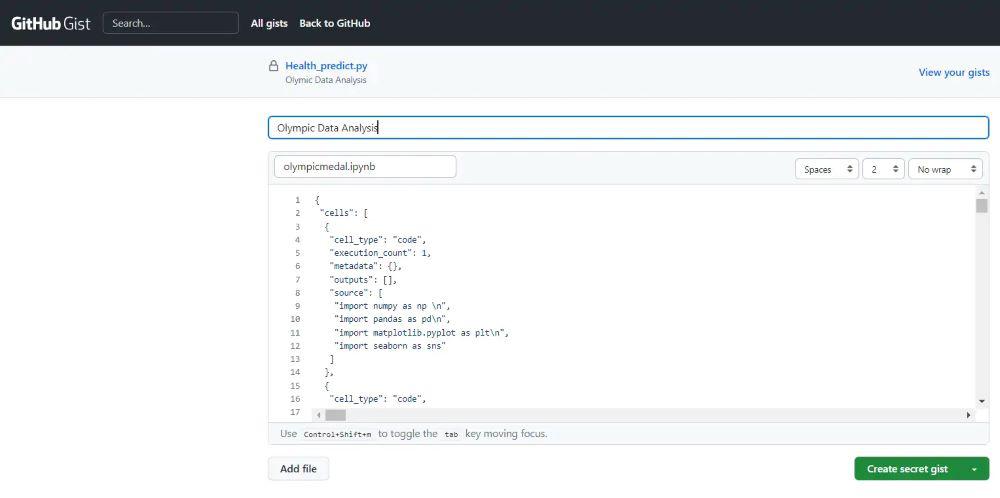
- After creating the gist file it will show on your profile (https://gist.github.com/username)
- Click on your gist file and it will show your notebook preview
- Share the URL of your gist file with others
In the below screenshot you can see the preview of notebook in the GitHub gist:
NbViewer to Access Notebooks
NbViewer is a web based service which helps the users to share the Jupyter Notebooks, all you have do it is to paste the URL of the notebook and nbviewer will render the notebook.
- Go the nbviewer website (https://nbviewer.org/)
- In the nbviewer interface, there is a text box where we can enter the URL.
- Paste the URL of notebook

After entering the URL, press “GO!” button. Nbviewer will fetch and render the notebook. In the below screenshot you can see the preview of notebook in the Nbviewer:
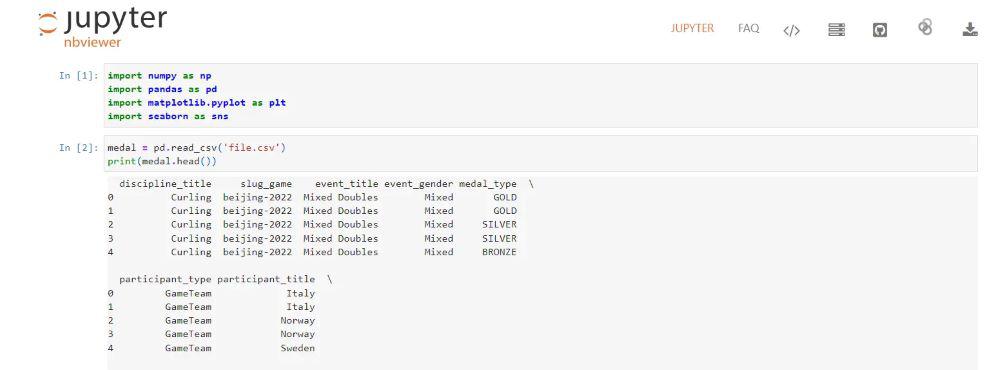
NbViewer provides a unique URL for our notebook, which you can share with others. This link allows anyone with the URL to view our notebook in their web browser, even if they don’t have Jupyter Notebook installed.
Share your thoughts in the comments
Please Login to comment...