Using Jupyter Notebook in Virtual Environment
Last Updated :
14 Sep, 2021
In this article, we are going to see how to set Virtual Environment in Jupyter. Sometimes we want to use the Jupyter notebook in a virtual environment so that only selected packages are available in the scope of the notebook. To do this we have to add a new kernel for the virtual environment in the list of kernels available for the Jupyter notebook. Let’s see how to do that:
Step 1: Create a virtual environment
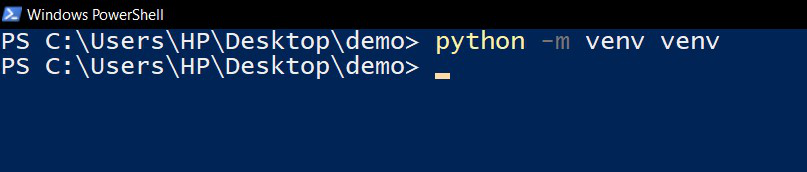
Open the directory where you want to create your project. open cmd/powershell and navigate to the same directory and run the following commands to create a virtual environment.
python -m venv venv
Step 2: Activate the virtual environment
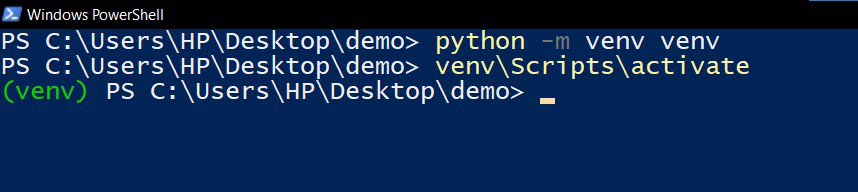
Now as we have our virtual environment let’s activate it.
venv\Scripts\activate
Step 3: Install jupyter kernel for the virtual environment using the following command:
Running the following command will create a kernel that can be used to run jupyter notebook commands inside the virtual environment.
ipython kernel install --user --name=venv

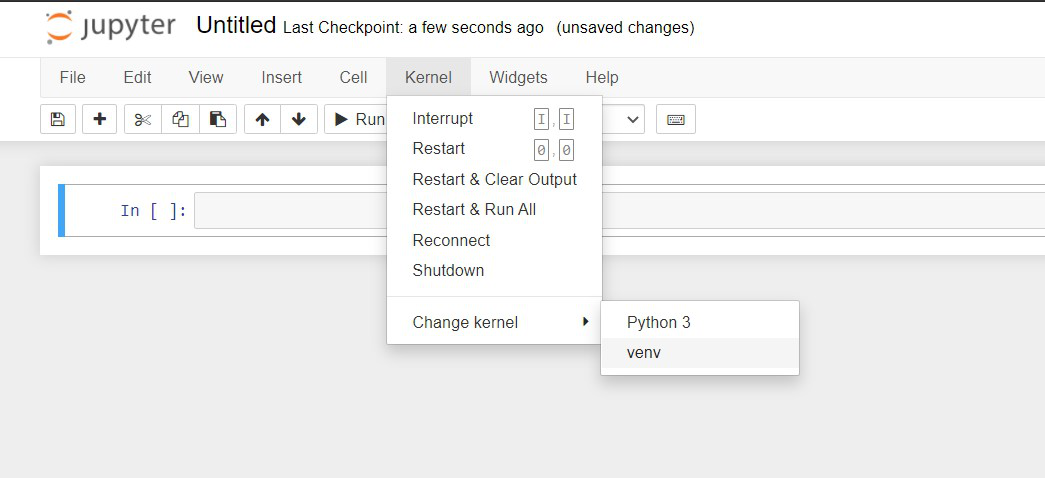
Step 4: Select the installed kernel when you want to use jupyter notebook in this virtual environment
Let’s now check if our kernel is created. Just run “jupyter notebook” command in the command prompt or Powershell and the jupyter environment will open up. Click on the kernel and click change kernel you will be able to see the kernel you just created.
You can see now you have the kernel in the list of kernels and now you can have separate dependencies for the jupyter notebook and be more organized. After you are done with the project and no longer need the kernel you can uninstall it by running the following code:
jupyter-kernelspec uninstall venv

Like Article
Suggest improvement
Share your thoughts in the comments
Please Login to comment...