Do you want to disable Cortana because of your privacy and personal preference? Disabling Cortana will give you more control of your computer and prevent it from consuming too much of memory. In this article, we will see how to disable Cortona temporarily or even permanently. we will provide you an with easy step-by-step process to help you get rid of unwanted interference by Cortana.
Before deep diving into the methods to disable Cortana in Windows 10, let us understand a little about what is Cortana and why it should be disabled.
What is Cortana?
Cortana is a virtual assistant that was created by Microsoft back in 2014 to compete with rivals like Apple’s Siri, Amazon’s Alexa, and Google’s voice assistant.
Do you know? Cortana was named after the AI character in the famous video game Halo where it served as an AI assistant to the protagonist in the game.
Microsoft aimed to create a helpful assistant for users across different devices and platforms that could respond to voice commands and assists users with various task such as setting reminders, and alarms, searching the web directly through their voice, sending emails, and many more tasks.

Cortana
Why Cortana Failed?
Like other AI assistants, Cortana couldn’t gain as much popularity and users as it was expected due to the following reasons:
- It faced stiff competition from Amazon’s Alexa, Apple’s Siri, and Google’s voice assistant.
- It needed a better user interface.
- Poor marketing by Microsoft.
- Consumed too much memory and caused trouble for the users by making their systems slow.
As a result in 2023, Microsoft finally gave up and decided to end up support service for Cortana in the latest version of Windows, and from now on Cortana might be available as an integrated service in other Microsoft apps but not as a standalone app.
However, if you are not using the latest version of Windows and want to disable Cortana and get rid of it follow the detailed methods mentioned below.
Why You Should Disable Cortana?
Here are a and few reasons why you should disable Cortana in your Windows 10:
1. Resource Usage: Cortana always runs in the background waiting for your voice commands. This process consumes a lot of your RAM and makes your system slower if you have limited resources. So you should disable Cortana to make your system work faster.
2. Privacy Concerns: Cortana collects and processes user Data and personal information to improve user experience. If you are not comfortable sharing your data then you can disable Cortana to enhance your privacy.
3. Personal Choice: Some of the users may prefer other AI voice assistants over Cortana so it’s up to their choice if they want to disable Cortana or not.
4. Lack of Usefulness: Many people have found that Cortana is not very useful as compared to other AI voice assistants in the market. It failed to recognize the user’s voice in many test cases and also failed to provide useful information about a certain topic. Thus if you find that Cortana is not very helpful for you and not enhancing your productivity then you can simply disable it.
How to Disable Cortana Temporarily?
Rather than completely removing Cortana you can disable it temporarily and here is how:
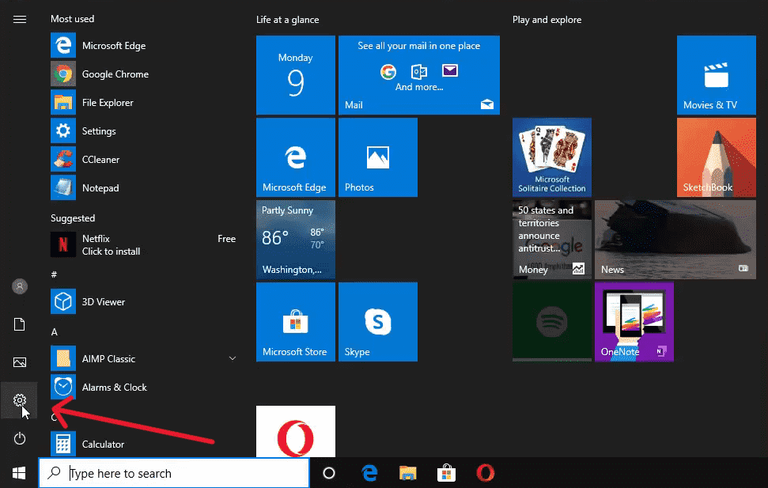
Step 1: Go to Windows Settings.
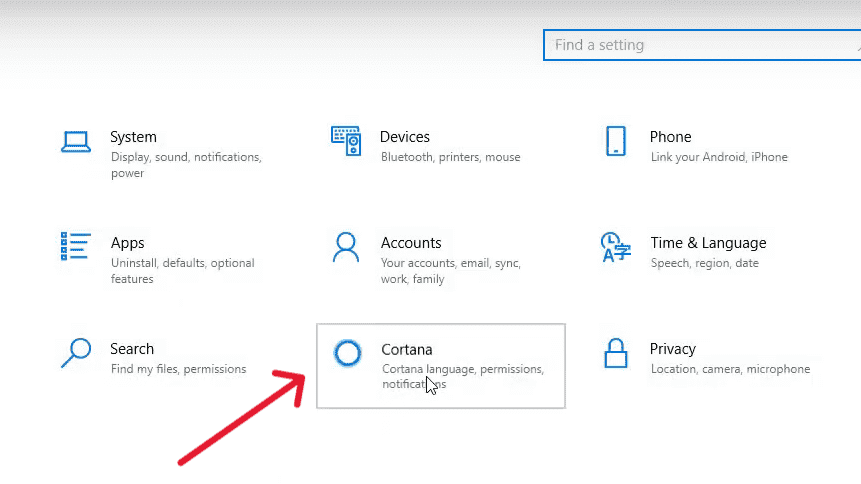
Step 2: Select Cortana.
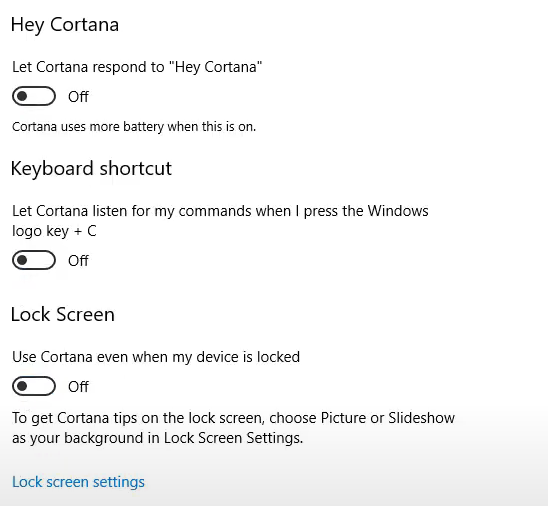
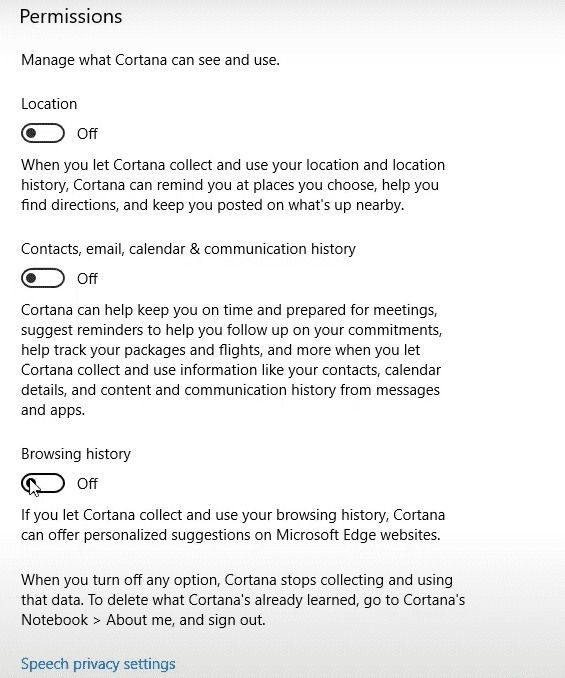
Step 3: Disable the following options.
Step 4: Select this option.
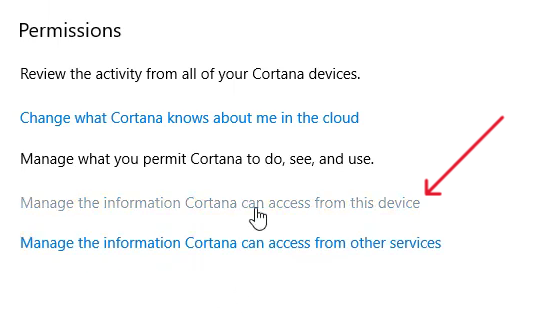
Step 5 Disable the following permissions.
Step 6: Restart your PC and Cortana will be disabled. But it can be enabled automatically after certain Windows updates.
How to Disable Cortana Permanently?
If you want to disable Cortana permanently, always create a system restore point to revert the changes to be on the safe side. So first, make up your mind and if you a want to disable it, Do it by using the following steps.
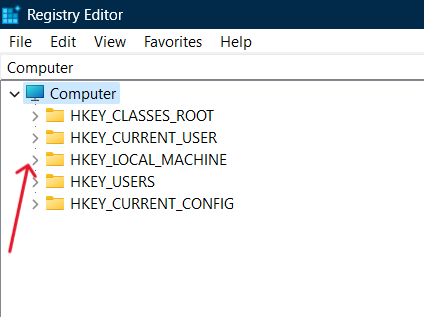
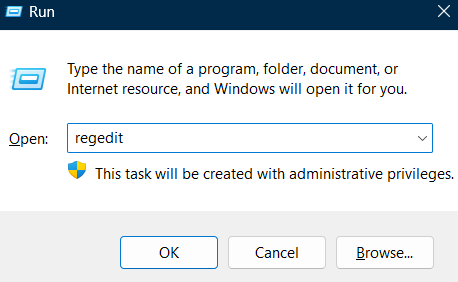
Step 1: Press windows+ R to open the Run dialog box and type regedit to open the registry editor.

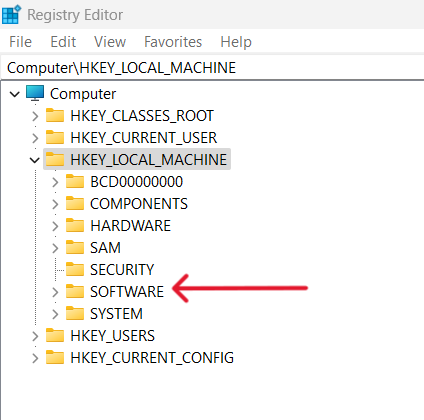
Step 2: Click on HKEY_LOCAL_MACHINE to expand it.
Step 3: Click on Software and expand it.

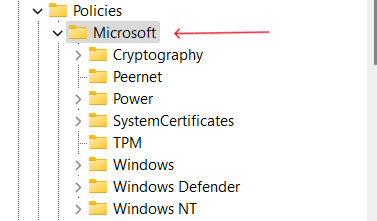
Step 4: Click on Policies and expand it.

Step 5: Select Microsoft under Policies.

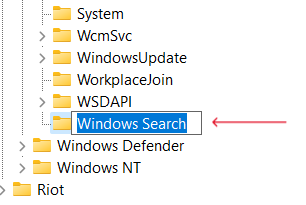
Step 6:Right-click namedRight-click on the right side of the screen and create a New Key.
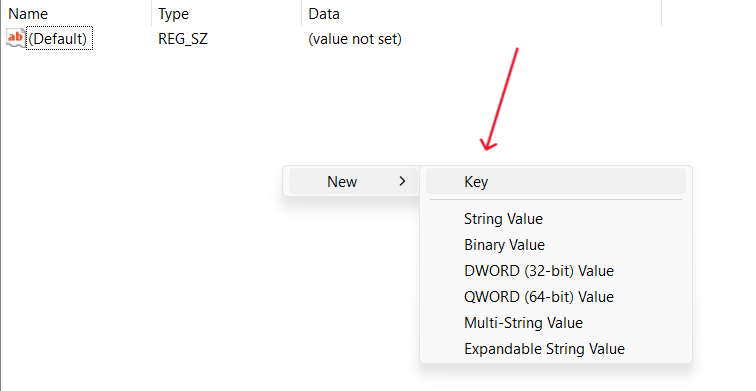
Step 7: You will be allowed to create a folder named it Windows Search.
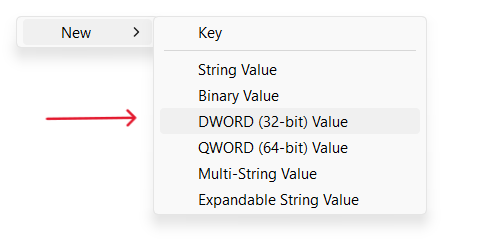
Step 8: Select the Windows Search folder and click on the right side of the screen again and now click on the DWORD (32-bitRight-click) value.
Step 9: You will be allowed to create a file name the as AllowCortana. Make sure you don’t make any typing mistakes or else this will not work.
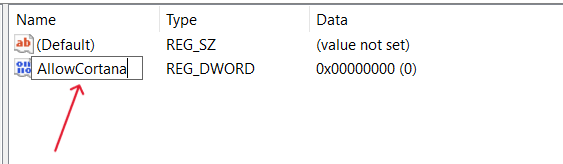
Step 10: Set the value data as 0 and click on ok. Here 0 denotes disabled and 1 denotes enabled.

Step 11: Restart your PC and now you will see that Cortana is no longer functioning and it will be disabled.
How to Re-activate Cortana in Windows 10?
If you have changed your mind and now you want to enable Cortana again then follow the below steps:
Step 1: Press windows+ R to open the Run dialog box and type regedit to open the registry editor.
Step 4: Click on HKEY_LOCAL_MACHINE to expand it.

Step 4: Click on Software and expand it.
Step 4: Click on Policies and expand it.

Step 4: Select Microsoft under Policies.
Step 4: Select the AllowCortana policy and set the value data as 1. Here, 1 denotes enabled and 0 denotes disabled.

Step 4: Restart your PC and now you will see that Cortana is enabled again!
How to Uninstall Cortana?
If you want to uninstall Cortana and remove it completely from your PC, then follow the below steps:
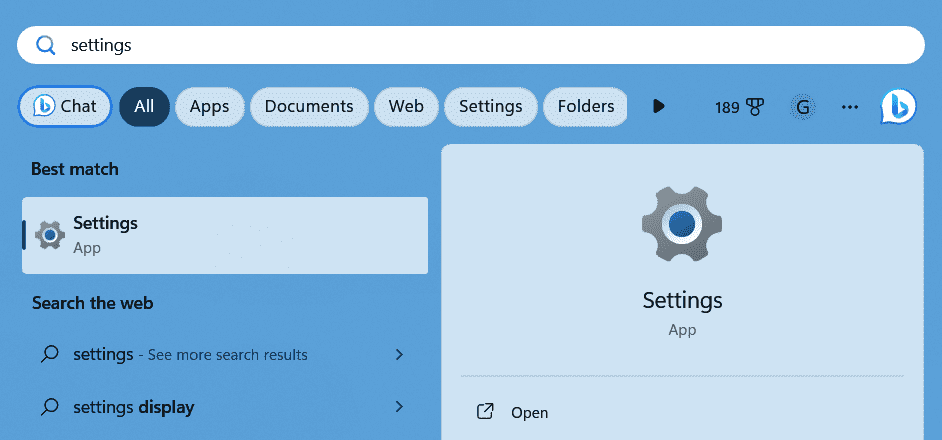
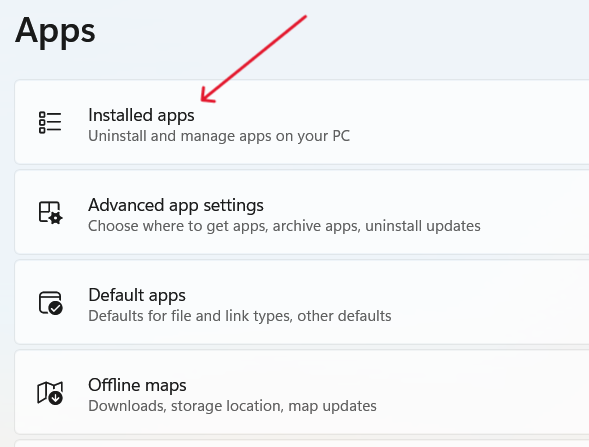
Step 1: Go to Start Windows and search for settings and open it.
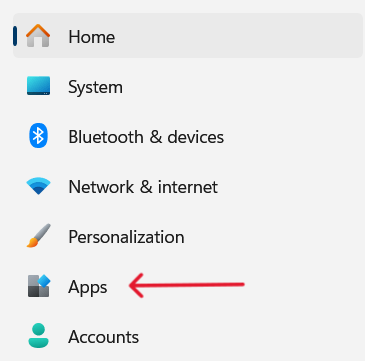
Step 2: Click on Apps.
Step 3: Click on Installed apps.
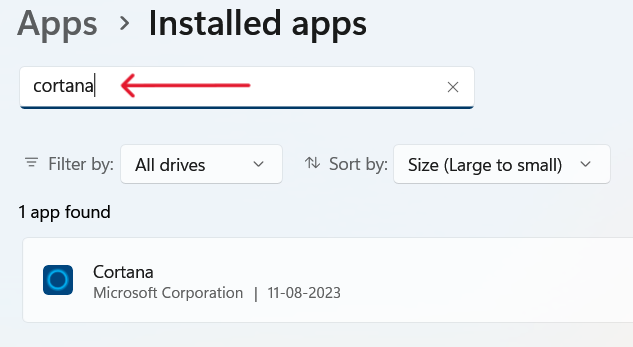
Step 4: In the search bar, search for Cortana.
Step 5: Click on the three dots on Cortana, a drop-down will appear, and then click on uninstall.
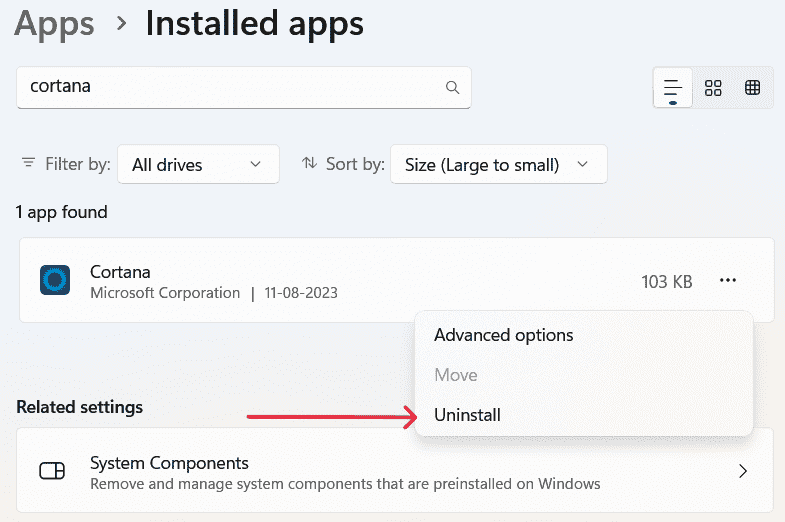
Once the uninstallation is complete, Cortana will be removed completely from your Windows 10.
Conclusion
Whether to disable Cortana temporarily or permanently depends on your personal choice. If you think that Cortana is not enhancing your productivity and wasting your CPU resources then we would recommend you to disable it following the above methods. Ultimately, we hope that the methods and solutions we’ve suggested in this article will prove helpful in disabling Cortana in your Windows 10.
Also Read
FAQs to Disable Cortana in Windows 10
1. Will uninstalling Cortana improve system performance?
Yes, uninstalling Cortana will free up some of your system resources which will ususally improve your system performance.
2. Can I reinstall Cortana if I change my mind?
You can’t reinstall Cortana once uninstalled, However if you disable it you can enable it again if you want.
3. Are there any risks associated with uninstalling Cortana?
No , there are no risks associated with uninstalling Cortana as it is not a core Windows functionality.
Share your thoughts in the comments
Please Login to comment...