How To Add Strike Through On Text In React Native ?
Last Updated :
06 Oct, 2023
In this article, we will explore two different approaches to adding a strike-through effect to text in React Native. It is also known as crossed-out text used to display the text as cross-marked.
Prerequisites
- Introduction to React Native
- React Native Components
- React Hooks
- Expo CLI
- Node.js and npm
Syntax
<Text style={{ textDecorationLine: 'line-through' }}>Original Price: $50</Text>
Steps to Create React Native Application
Step 1: Create React Native Application With Expo CLI
Create a new React Native project for <<Project Name>>.
npx create-expo-app <<Project Name>>
Step 2: Change the directory to the project folder:
cd <<Project Name>>
Project Structure
Approach 1: Using CSS styling
In this approach, we’ll add a strike-through effect to a product card’s original price using CSS styles.
Example 1: This React Native example showcases an product card that combines fetching an image from a URL. The card rounded corners, a white background, and a shadow. To indicate a discount, the original price is displayed with a striking red strike-through effect, while the sell price is presented in black.
Javascript
import React from "react";
import {
Text,
View,
StyleSheet,
Image,
} from "react-native";
function App() {
const imageUrl =
return (
<View style={styles.card}>
<Image
source={{ uri: imageUrl }}
style={styles.image}/>
<View style={styles.details}>
<Text style={styles.title}>
Product Name
</Text>
<Text style={styles.price}>
Original Price: $50
</Text>
<Text style={styles.sellprice}>
Sell Price: $40
</Text>
</View>
</View>
);
}
const styles = StyleSheet.create({
card: {
margin: 25,
backgroundColor: "#ffffff",
borderRadius: 10,
shadowColor: "black",
shadowOffset: {
width: 1,
height: 3,
},
shadowOpacity: 1,
shadowRadius: 15,
elevation: 5,
overflow: "hidden",
},
image: {
width: "100%",
height: 200,
resizeMode: "cover",
},
details: {
padding: 16,
},
title: {
fontSize: 20,
fontWeight: "bold",
marginBottom: 8,
},
price: {
fontSize: 18,
textDecorationLine: "line-through",
color: "red",
},
sellprice: {
fontSize: 20,
color: "black",
padding: 5,
},
});
export default App;
|
Step 3: To launch the React native application, navigate to the terminal or command prompt and execute the necessary command.
npx expo start
npx react-native run-android
npx react-native run-ios
Output:
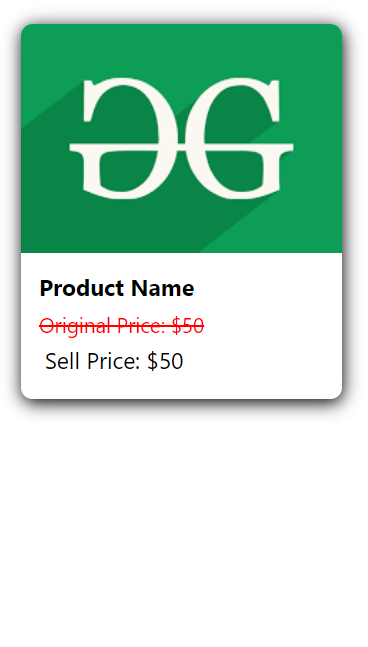
In this approach, we’ll create a product card, featuring an original price. when the user clicks on a button, , the original price will appear with a visually striking line across it.
Example 1: In this example, we are using the useState hook that to allow us for toggling between displaying an original price and a discounted price. The card consists of an image, the name of the product, and a button that facilitates switching between prices. The image is retrieved from a specified URL, while the card’s appearance is enhanced using features like a white background, rounded corners, shadows, and appropriately formatted text. By pressing the button, users can seamlessly alternate between viewing the original price with a strike-through effect—a feature designed to facilitate easy comparison of prices.
Javascript
import React, { useState } from "react";
import {
Text,
View,
Button,
StyleSheet,
Image,
} from "react-native";
function App() {
const [strikeThrough, setStrikeThrough] =
useState(false);
const toggleStrikeThrough = () => {
setStrikeThrough(!strikeThrough);
};
const imageUrl =
return (
<View style={styles.card}>
<Image
source={{ uri: imageUrl }}
style={styles.image}/>
<View style={styles.details}>
<Text style={styles.title}>
Product Name
</Text>
<Text
style={
strikeThrough
? styles.strikeThroughPrice
: styles.price}>
{strikeThrough
? "Original Price: $50"
: "Discounted Price: $40"}
</Text>
<Button
title="See Original Price"
onPress={toggleStrikeThrough}/>
</View>
</View>
);
}
const styles = StyleSheet.create({
card: {
backgroundColor: "#ffffff",
borderRadius: 10,
shadowColor: "#000",
shadowOffset: {
width: 1,
height: 3,
},
shadowOpacity: 1,
shadowRadius: 15,
elevation: 5,
margin: 25,
overflow: "hidden",
},
image: {
width: "100%",
height: 200,
resizeMode: "cover",
},
details: {
padding: 16,
},
title: {
fontSize: 20,
fontWeight: "bold",
marginBottom: 8,
},
price: {
fontSize: 18,
color: "black",
},
strikeThroughPrice: {
fontSize: 18,
textDecorationLine: "line-through",
color: "red",
},
});
export default App;
|
Output:
Share your thoughts in the comments
Please Login to comment...