Suspense, first introduced in React 16, is a feature that aims to enhance the user experience by managing asynchronous operations. It simply lets you render a fallback UI decoratively while the child component is waiting for any asynchronous task to be completed.
Prerequisites:
What is React Suspense?
Suspense allows developers to display a temporary fallback UI when the component is doing the asynchronous operation. When the operation is completed, the actual UI is rendered. Suspense can be used when a child component is lazily loaded or fetching data.
Syntax:
<Suspense fallback={<div>Loading...</div>}>
    <AsyncComponent /> //ChildComponent
</Suspense>- children: The actual UI that you intend to render
- fallback: An alternate UI if actual UI is loading.
Project Initialisation
Initialise a react project. In this example project, we will use TypeScript, but if you are not comfortable with it, use JavaScript.
Step 1: Create the project using vite by running the below command.
npm create vite@latest
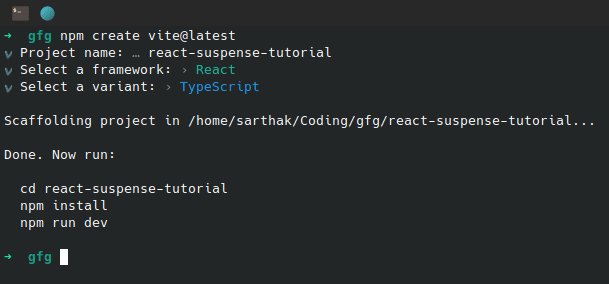
Project initialisation
Step 2: Install node_modules folder
npm install
Step 3: Start the development environment.
npm run dev
Traditional Data Fetching Techniques
Fetch on Render:
Data fetching starts only when component is being rendered on the page.
This is the most widely used data fetching method, usually used with useState to manage loading state.
Key features and concepts:
- Data fetching starts after the page is being rendered.
- useState is used to manage loading and error state.
- Network waterfall is longer than Fetch on Render.
Disadvantages:
- Only one fetch call happen at time which severely damages website performance.
- Error handling becomes difficult.
- Child component’s API call will start only after the completion of parent component.
- This method is not SEO friendly.
Example: To demonsrtate using Fetch on Render technique from the component.
Node
import { useState, useEffect } from 'react';
import "./App.css";

function App() {
  const [data, setData] = useState<{ title: string }[]>([]);
  const [isLoading, setIsLoading] = useState(true);

  useEffect(() => {
    (async () => {
      setIsLoading(true);
      const resData: { title: string }[] =
      await fetch("https://jsonplaceholder.typicode.com/todos")
      .then(res => res.json());
      setData(resData);
      setIsLoading(false);
    })()
  }, [])

  return (
    <main>
      {isLoading && <div>Loading...</div>}
      {!isLoading && data.map((item, index) => (
        <div key={index}>
          {item.title}
        </div>
      ))}
    </main>
  );
}

export default App;
Fetch then Render
Data is fetched before rendering the component outside the react component.
Key features and concepts:
- Rendering starts after all the data is fetched.
- useState is used to manage loading and error state.
- Network waterfall is shorter than Fetch on Render.
Disadvantages:
- Website performance is impacted as only one API call can occur at a time.
- Child component’s API call will start only after the completion of parent component.
- Rendering will start after all the data fetching is completed.
Example: To demonsrtate creating a react component which is using Fetch then Render technique.
Node
import { useState, useEffect } from 'react';
import "./App.css";

async function fetchTodo() {
  const data: { title: string }[] =
  await fetch("https://jsonplaceholder.typicode.com/todos")
  .then(res => res.json());
  return data
}

const allData = fetchTodo();

function App() {
  const [data, setData] = useState<{ title: string }[]>([]);
  const [isLoading, setIsLoading] = useState(true);

  useEffect(() => {
    (async () => {
      setIsLoading(true);
      const resData = await allData;
      setData(resData);
      setIsLoading(false);
    })()
  }, [])

  return (
    <main>
      {isLoading && <div>Loading...</div>}
      {!isLoading && data.map((item, index) => (
        <div key={index}>
          {item.title}
        </div>
      ))}
    </main>
  );
}

export default App;
How Suspense works?
React Suspense uses exception control flow. It is related to JavaScript Promise. Regardless, whether if you are using traditional new Promise() or async/await syntax, a JavaScript Promise always has 3 states.
If code is throwing exception (while loading data or if rejected), react suspense shows fallback UI. If resolved successfully, it will show the child component.
Working example of React Suspense
Example: To demonsrtate using <Suspense /> component to manage our loading state.
Node
//App.tsx

import { Suspense } from "react";
import "./App.css";
import AsyncComponent from "./async-comp";

function App() {
  return (
    <Suspense fallback={<div>Loading...</div>}>
      <AsyncComponent />
    </Suspense>
  );
}

export default App;
Node
//async-comp.tsx

import fetchData from "./api/fetch-data";

const promise = fetchData<{ title: string }[]>(
  "https://jsonplaceholder.typicode.com/todos"
);

export default function AsyncComponent() {
  const data = promise.read();

  return (
    <ul>
      {data.map((item, index) => (
        <li key={index}>{item.title}</li>
      ))}
    </ul>
  );
}
Node
//fetch-data.ts

export default function fetchData<T>(url: string) {
  const promise: Promise<T> = fetch(url)
    .then((res) => res.json())
    .then((data) => data);

  return wrapPromise(promise);
}


function wrapPromise<T>(promise: Promise<T>) {
  let status = "pending";
  let response: T;

  const suspender = promise.then(
    (res) => {
      status = "success";
      response = res;
    },
    (err) => {
      status = "error";
      response = err;
    }
  );

  const read = () => {
    switch (status) {
      case "pending":
        throw suspender;
      case "error":
        throw response;
      default:
        return response;
    }
  };

  return { read };
}
In fetchData function, we are creating a promise and chaining it with .then() to parse JSON. Then passing the promise to wrapPromise which initialises status.
Output

Fallback Loading UI using suspense
Using Suspense gives some major improvements compared to previous approaches.
- Data fetching starts as soon as possible and rendering of components starts immediately.
- We do not have to manage loading state, react does that for us.
- Child components do not need to wait for their parent component’s data to finish fetching before they can fetch their data.
Use cases of React Suspense
1. Revealing nested components while data is loading
When component suspends, the closest parent suspense shows the fallback. So, we can use multiple Suspense components to show multiple loading states.
Node
//App.tsx

import { Suspense } from "react";
import "./App.css";
import AsyncComponent from "./async-comp";
import AnotherAsyncComponent from "./another-async-comp";

function App() {
  return (
    <Suspense fallback={<div>Loading 1 ...</div>}>
      <AnotherAsyncComponent />
      <Suspense fallback={<div>Loading 2 ...</div>}>
        <AsyncComponent />
      </Suspense>
    </Suspense>
  );
}

export default App;
Node
//another-async-comp.tsx

import fetchData from "./api/fetch-data";

const promise = fetchData<{ title: string; userId: string }>(
  "https://jsonplaceholder.typicode.com/todos/1"
);

export default function AnotherAsyncComponent() {
  const data = promise.read();

  return (
    <div>
      <h1>{data.title}</h1>
      <p>User Id: {data.userId}</p>
    </div>
  );
}
React.lazy() with React Suspense
In react, Lazy loading means when a component react only renders the component we it is needed.
- When the button is clicked for the first time and show becomes true, <LazyComp /> is displayed.
- lazy () creates a dynamic import for <LazyComponent />. Loading lazy components is an asynchronous task and while the code for the lazy component is still loading, attempting to render it will suspend.
- We are wrapping it with Suspense to show the fallback UI while it is loading.
The syntax for lazy loading a component is given below.
Node
//App.tsx

import { Suspense, lazy, useState } from "react";
import "./App.css";
const LazyComp = lazy(() => import('./LazyComp.ts'));

function App() {
  const [show, setShow] = useState(false)
  return (
    <main>
      <h1>React Lazy Demo</h1>
      <button onClick={() => setShow(!show)}>
        {show ? "Hide" : "Show"}
      </button>
      <Suspense fallback={<p>Loading...</p>}>
         <LazyComp />
       </Suspense>
    </main>
  );
}

export default App;
2. Using Error Boundary to show error state
Suspense is for showing fallback UI while component is doing an asynchronous operation but what if operation fails. React gives use <ErrorBoundary /> to show fallback UI when error occurs. Currently can only define this using class component but we have libraries to do the same in functional components.
Install the the library using the command
npm i react-error-boundary
In the below example, if the asynchronous operation fails, error will render the fallback UI.
Node
//App.tsx

import { Suspense } from "react";
import { ErrorBoundary } from 'react-error-boundary';
import "./App.css";
import AsyncComponent from "./async-comp";


function App() {
  return (
    <ErrorBoundary
      fallback={<div>Error occured.</div>}>
       <Suspense fallback={<p>Loading...</p>}>
         <AsyncComponent />
       </Suspense>
    </ErrorBoundary>
  );
}

export default App;
3. Suspense with Concurrent Rendering
Concurrent rendering in React, introduced in React 18, allows for simultaneous handling of multiple tasks, improving performance and responsiveness. With a priority-based scheduler, high-priority tasks are executed first, optimizing resource utilization and enhancing user experience. Concurrent rendering is particularly beneficial in applications where UI rendering and data processing occur together, resulting in smoother transitions and faster load times.
Server-side applications can utilize Suspense to stream data efficiently, displaying content as it becomes available. However, due to its experimental nature and ongoing changes, concurrent rendering should be approached with caution in production applications. Developers should stay informed about updates and modifications for compatibility and stability.
Concurrent rendering addresses previous limitations in React’s rendering model, enabling interruptible rendering and improved handling of complex UI updates. But for now developers should not use it in production application as it is constantly changing.
Suspense with Server Components in Next.js
In next.js, we can create a special file called loading.js (or .jsx) for specific route or in root level that automatically wraps page.jsx and other nested routes. We can have small components like spinner, skeleton that are pre-rendered and can be instantly shown while page is loading data. We can define define laoding.jsx in for every route. We can even change the behaviour by defining our own suspense.
Root level loading
import { Suspense } from 'react'
import { Posts } from './Components'

export default function Posts() {
  return (
    <main>
      <Navbar />
      <Suspense fallback={<p>Loading posts...</p>}>
        <Posts />
      </Suspense>
      <Footer />
    </main>
  )
}
In the above code, <Posts/> component is wrapped in suspense. <Navbar /> and <Footer /> typically do not require data fetching, so they can be instantly displayed. By wrapping <Posts /> in our custom suspense boundary, <Navbar /> and <Footer /> will instantly appear for the user.
Conclusion
In this article, we have explored React Suspense, its benefits, functionality, and practical application through a hands-on React project demonstration. We have covered how Suspense redefines data fetching patterns, addresses loading state challenges, how Suspense works under the hood, and how to use it with React meta-frameworks like Next.js. By mastering Suspense, we have elevated our React development skills and streamlined our application’s performance.
Share your thoughts in the comments
Please Login to comment...