Getting Started with Figma
Last Updated :
03 Apr, 2024
Figma is the most popular and highest-rated design tool in the world. For the past few years, it has constantly been the top choice of designers for creating designs and prototypes. According to a survey done in 2021, more than 75% of the designers were using Figma for designing websites and applications. Figma is a browser-based UI/UX design application with design, prototyping, and code generation tools. Figma can be used to create Prototypes, Flowcharts, and Presentations, User Interfaces, Website Designs, Mobile App Designs, Social Media Graphics, and a lot more stuff. In this article, we will discuss how you can get started with designing using Figma but before that let’s discuss the basics.
What is Figma?
Figma is a browser-based UI/UX design application with design, prototyping, and code generation tools. Figma can be used to create Prototypes, Flowcharts, and Presentations, User Interfaces, Website Designs, Mobile App Designs, Social Media Graphics, and a lot more stuff. It comes with a desktop application and a web application that can be accessed anywhere from any device. Figma is famous primarily for two reasons – firstly, it is known for its browser-compatible seamless experience and secondly, the principles behind the desktop application and the web application remain the same i.e. it provides the same experience across the desktop and the web application.
Figma is not just the most used UI/UX design tool, it is also the highest rated among all UI/UX design tools. Figma is moving from being used for rapid prototyping and designing tool to a general design tool for everyone.
Why Figma?
There are many reasons on why you should choose Figma as your designing and prototyping tool, some of the many compelling reasons to are as follows:
- Rapid Prototyping: Figma is exceptional when it comes to creating prototypes with overlays, animations, and various functionalities.
- Cloud Benefits: Since Figma is a could based web application, it provides autosaving files in the cloud which ensures that no accidental data is lost and enables teams to work from anywhere, on any device.
- Real-time Collaboration: Figma also allows teams to collaborate in real-time, viewing and interacting with the latest designs through a single, live URL.
- Browser-Based Convenience: Figma is available across operating systems via the browser, making it lightweight and easy to export files.
- Vibrant Community: Figma has a large and supportive community that offers resources and assistance, ideal for beginners and professionals alike.
- Ease of Learning and Use: Figma comes with one of the most simplest interface that makes it easy to work with. It also has vast tutorial resources that make it easy to learn and master.
- Versatility: Beyond UI/UX, Figma serves various design needs, from creating thumbnails to presentations, positioning itself as a comprehensive graphic design tool.
To learn more: Benefits of using Figma for UI/UX Design
Getting Started with Figma
Step 1. Create a Figma account
The first step to work with Figma would be to create a free account on the Figma website. You can simply go to https://www.figma.com , click Sign up ad add your details to get your Figma account ready.

Once you have completed the registration process and you have your Figma account, you can Login to Figma using your account.
Step 2. Understand the Figma interface
The Figma Interface is divided into multiple sections, following are the sections in the Figma application:
- Toolbar: This section is used to get quick access to all the essential tools for creating a design.
- Canvas: Canvas is the workspace where your designs are displayed and are created.
- Layers Panel: This section displays all the visual elements or layers of your design in an hierarchical manner.
- Assets Panel: This section displays all the reusable assets of your design in an hierarchical manner.
- Properties Panel: This section is used by designers to fine tune the components, layers or assets they are working on by editing their properties.
Before moving to the next step make sure to familiarize yourself with all these sections of Figma interface.
.png)
Step 3. Go through a Figma tutorial
Now that we have a basic understanding of what Figma is and how the Figma interface appears to be, we can start learning how to create designs using Figma. For that, you choose a tutorial among multiple tutorials available online and start learning designing with Figma.
“Figma for Beginners tutorial” is a tutorial provided by Figma itself for the beginners who want to get started in design using Figma. You can check that out if you are confused among various tutorials present online.
Step 4. Designing a basic design
The next step to get started with Figma would be to create a basic design using Figma so that you can know how the application works. For that follow the steps given below:
Step 4.1 Click on the “Design file” dropdown menu is your Figma interface and click on Drafts to create your first Figma project.
.png)
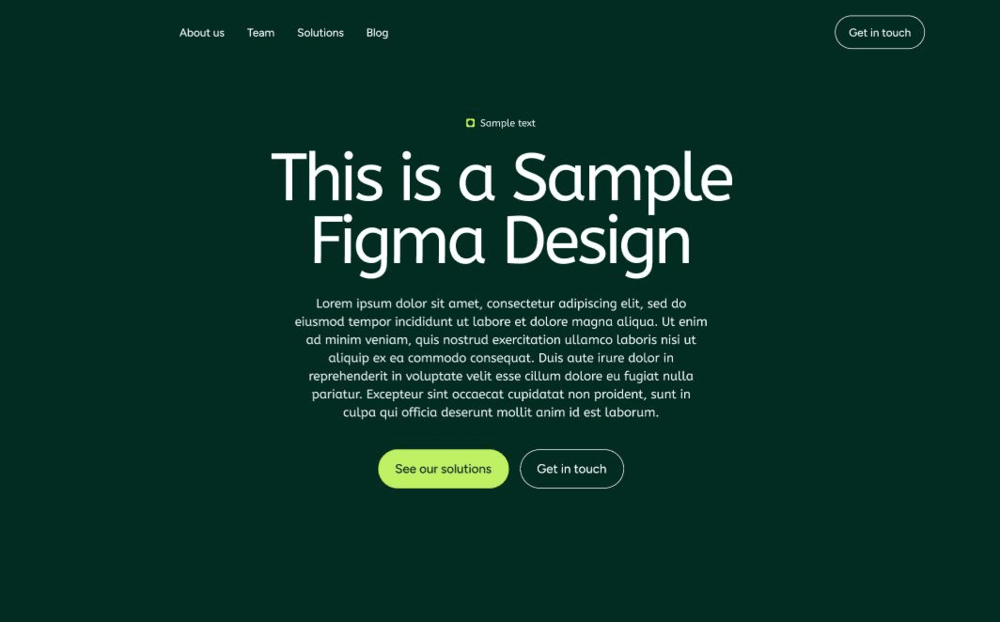
Step 4.2 Using various tools that were explained you in the Figma tutorial you completed in the previous step, try recreating this design (or you can choose any simple design for web):
Once you have recreated this design on your own, you have grasped solid fundamentals of Figma are you can now move on to much more advanced stuff in Figma.
To learn more:
Step 5. Working in a team using Figma
The next step after learning and practicing the fundamentals of Figma would be to understand how teams work using Figma, this is important because as a professional designer you will have to work in a team of designers and collaborate with them.
For this you can click on the Share button on the top right corner of Figma application and invite other designers to collaborate in your project. A better way o do it would be to become a collaborator in someone else’s design. Also learn about ho to change the permission level to view or edit and how other collaborators are represented by colors are avatars in the application.
Step 6. Styling using Figma
The next step would be to get understanding about how to Style elements using Figma as that would be a skill that would come in handy when you start your professional journey. To get started with styling and formatting you have to learn the following skills:
- Learn how to apply colors and gradients and use properties panel to customize properties like Fill, Stroke etc.
- Learn how to use typography for hierarchy, learn about Serif and Sans Serif typefaces.
- Learn about how to implement line spacing, alignment, repetition, and design patterns.
- Learn how to work with images and how to apply effects on Figma components.
Step 7. Dive Deeper into Prototyping
After finishing all the above steps, you have a decent knowledge about Figma as a prototyping tool, now you can focus on building projects to revisit all the concepts and know how to implement them on real world projects. As the final step of getting started with Figma, Switch to Prototype tab and start designing prototypes. Learn how to connect frames to create a prototype and use smart animations to draw the user’s attention.
Once you have created a prototype, try to match it with professional prototypes and see what are the improvements you can make in your Prototype. This process of creating a prototype and iterating it to make it better will make you a better designer and will make you proficient in Figma.
Conclusion
In this article we discussed how to get started with Figma which is the most popular prototyping tool since a few years now. To get started with Figma, create an account, go through some Figma tutorials and then practice basic design projects on Figma. Figma is a browser based UI/UX design application with design, prototyping and code generation tools. Figma can be used to create Prototypes, Flowcharts and Presentations, User Interfaces, Website Designs, Mobile App Designs, Social Media Graphics and a lot more stuff. Make sure to follow the step by step guide we discussed in the article we get started with Figma.
Share your thoughts in the comments
Please Login to comment...