Face Recognition with Local Binary Patterns (LBPs) and OpenCV
Last Updated :
22 Aug, 2023
In this article, Face Recognition with Local Binary Patterns (LBPs) and OpenCV is discussed. Let’s start with understanding the logic behind performing face recognition using LBPs. A beginner-friendly explanation of LBPs is described below.
Local Binary Patterns (LBP)
LBP stands for Local Binary Patterns. It’s a technique used to describe the texture or patterns in an image. For example, take a fingerprint that captures the unique features of different textures like rough, smooth and patterned surfaces.
To understand LBP, imagine looking at a grayscale image pixel by pixel. For each pixel, we examine its neighbourhood, which consists of the pixel itself and its surrounding pixels. To create the LBP code for a pixel, we compare the intensity value of that pixel with the intensity values of its neighbours. We assign a value of 1 if a neighbour’s intensity is equal to or greater than the central pixel’s intensity, and a value of 0 if it’s smaller.
Starting from a reference pixel, we go around the neighbourhood in a clockwise or counterclockwise direction. At each step, we compare the intensity of the current neighbour with the central pixel’s intensity and assign a 1 or 0 accordingly. Once we complete the comparisons for all the neighbours, we obtain a sequence of 1s and 0s. This sequence is the LBP code for the central pixel. It represents the texture pattern in that neighbourhood.
By repeating this process for every pixel in the image, we generate a complete LBP representation of the image. We can then use this representation to describe and analyze the texture properties of the image. Here we utilize this LBP technique for recognizing facial features.
Prerequisite
! pip install opencv-python
! pip install numpy
Step 1: Import the necessary libraries
Python3
import cv2
import os
import numpy as np
|
Step 2: Generate a Face Recognition Model
- Face Detector: We use the Haar cascade classifier to detect faces which we are going to capture in the next step. The Haar cascade classifier is a pre-trained model that can quickly detect objects, including faces, in an image. The CascadeClassifier class from OpenCV is used to build the face_cascade variable. To recognise faces in images, it employs the Haar Cascade Classifier. The XML file ‘haarcascade_frontalface_default.xml’ contains the pre-trained model for frontal face detection. This file is usually included with OpenCV and can be found in the cv2.data.haarcascades directory.
- Face Recognition Model: The recognizer variable is created with OpenCV’s cv2.face module’s LBPHFaceRecognizer_create() method. LBPH (Local Binary Patterns Histograms) is a well-known face recognition system that employs LBP descriptors to express facial features and histograms to recognise faces.
Python3
face_cascade = cv2.CascadeClassifier(cv2.data.haarcascades + 'haarcascade_frontalface_default.xml')
recognizer = cv2.face.LBPHFaceRecognizer_create()
|
Step 3: Defining Function to Capture and Store Images
Here, create a function to detect the faces from live camera-captured frames. And crop and store in the folder name ‘Faces’ directory. using the following steps.
- Create a directory name ‘Faces’ to store the captured images.
- The cv2.VideoCapture(0) function launches the default camera (often the primary webcam) for image capture. The video capture object is represented by the cap variable.
- The variable count is set to zero. It will be used to keep track of how many images are collected.
- The function starts a loop that takes photographs from the camera until the user presses the ‘q’ key or 1000 images are captured.
- Within the loop, the function reads a single frame from the camera using cap.read(). The return value ret indicates whether the frame was successfully read, and the frame data is stored in the frame variable.
- cv2.cvtColor(frame, cv2.COLOR_BGR2GRAY) is used to convert the frame to grayscale. Grayscale images are easier to process and commonly used in face detection tasks.
- To detect faces in the grayscale frame, the programme use the previously constructed face_cascade classifier. face_cascade.detectMultiScale() detects faces in images at various scales. The recognised faces are returned as a list of rectangles (x, y, width, height), which is saved in the faces variable.
- Using cv2.rectangle(), the function draws a green rectangle around each detected face on the original colour frame. The face images are then cropped from the grayscale frame and saved in the “Faces” directory with filenames in the format “userX.jpg”, where X is the value of the count variable. After each image is saved, the count is increased.
- cv2.imshow() is used to display the frame with face detection and the green rectangles. On the screen, the user can watch the real-time face detection process.
- The loop can be terminated in two ways:
- If the user presses the ‘q’ key, the loop is broken since cv2.waitKey(1) & 0xFF == ord(‘q’) evaluates to True.
- The loop ends after capturing 1000 images, as indicated by the condition if count >= 1000.
Python3
def capture_images(User):
if not os.path.exists('Faces'):
os.makedirs('Faces')
cap = cv2.VideoCapture(0)
count = 0
while True:
ret, frame = cap.read()
gray = cv2.cvtColor(frame, cv2.COLOR_BGR2GRAY)
faces = face_cascade.detectMultiScale(gray, scaleFactor=1.1, minNeighbors=5, minSize=(30, 30))
for (x, y, w, h) in faces:
cv2.rectangle(frame, (x, y), (x + w, y + h), (0, 255, 0), 2)
cv2.imwrite(f'Faces/{User}_{count}.jpg', gray[y:y + h, x:x + w])
count += 1
cv2.imshow('Capture Faces', frame)
if cv2.waitKey(1) & 0xFF == ord('q'):
break
if count >= 3000:
break
cap.release()
cv2.destroyAllWindows()
|
Face Capture and Storing:
Next, we will run the capture_images() function, it will launch the camera and capture the images, then convert them into grayscale and save the images for further extraction of facial features and train the model. All the images are stored in the local dataset folder names ‘Faces’, to access it easily.
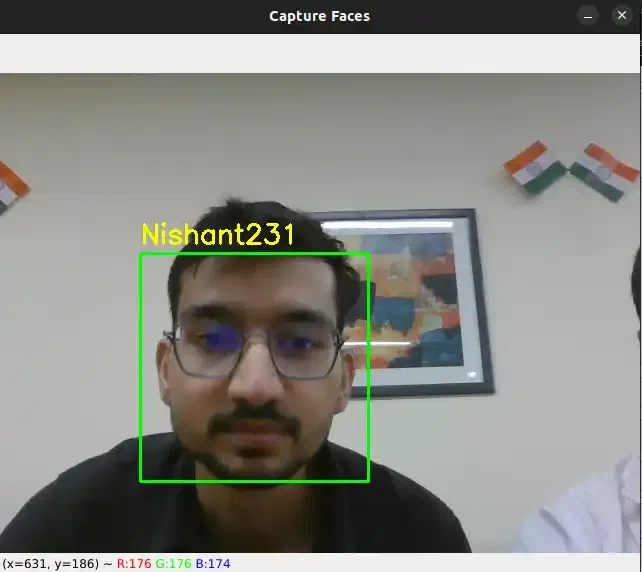
Capture the first Person Image
Python3
capture_images('Nishant')
|
Output:
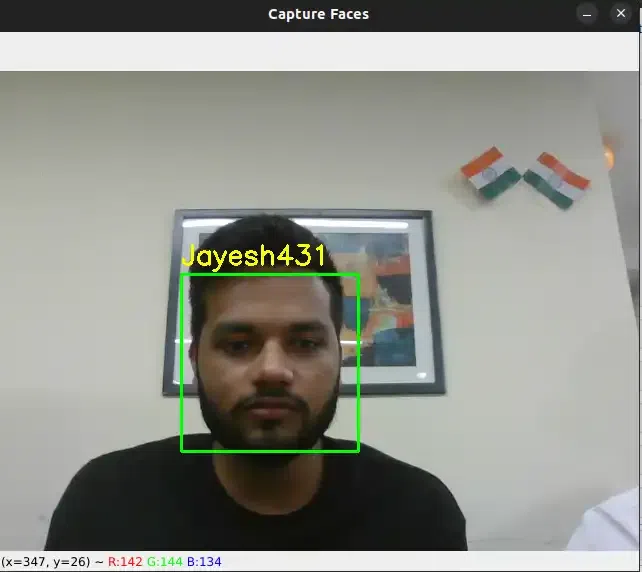
Capture the Second Person Image
Output:
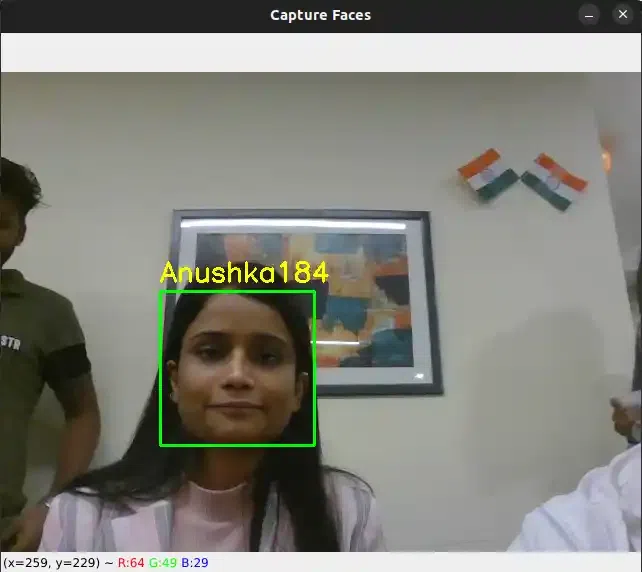
Capture the Third Person Image
Python3
capture_images('Anushka')
|
Output:
Similarly We can capture more persons images
capture_images('Shivang')
capture_images('Nishant')
capture_images('Laxmi')
capture_images('Jayesh')
capture_images('Abhishek')
capture_images('Suraj')
These all images are saved with their respective names
Create a dictionary of respective Usernames to encode into the numerical vector
Python3
label = {'Shivang':0,'PawanKrGunjan':1,'VipulJhala':2,
'Nishant':3,'Laxmi':4, 'Jayesh':5,'Abhishek':6,
'Anushka':7,'Suraj':8}
label
|
Output:
{'Shivang': 0,
 'PawanKrGunjan': 1,
 'VipulJhala': 2,
 'Nishant': 3,
 'Laxmi': 4,
 'Jayesh': 5,
 'Abhishek': 6,
 'Anushka': 7,
 'Suraj': 8}
Step 4: Defining the Function to Train the Model
The code expects the existence of a correctly populated “Faces” directory containing grayscale face images labelled with the user number as part of the file name (e.g., “user1.jpg”, “user2.jpg”, etc.). Here we will train the LBPH face recognizer model i.e. recognizer using this dataset.
- The function creates two empty lists, faces and labels, to store the face samples and labels, respectively. These lists will be used to collect the information needed to train the face recognition model.
- The function iterates through the files in the “Faces” directory using a loop. It is assumed that the face images are saved in this directory as ‘.jpg’ files. The command os.listdir(‘Faces’) returns a list of filenames in the “Faces” directory.
- Extract Label from File Name: The function extracts the label from the file name of each image file in the “Faces” directory. It assumes the file name format is “user_X.jpg,” where, ‘user’ is the name of the faces X represents the image’s counts to save the image.
- Then we create a dictionary of name label which converts the user name string value into numericals values.
- The function reads the image from the file path returned by os.path.join() using cv2.imread().
- To detect faces in a grayscale image, use the face_cascade.detectMultiScale() method. This approach looks for faces at various scales in an image. The recognised faces are returned as a list of rectangles (x, y, width, height), which are saved in the face variable.
- Before appending the face sample and label to the lists, the programme scans the image for any faces. This is accomplished by determining whether the length of the face variable is larger than zero, indicating that at least one face was spotted in the image.
- If a face is discovered (len(face) > 0), the face sample is cropped from the grayscale image using information from the first entry of the face list (face[0]). The cropped face sample is added to the faces list, and the label associated with it is added to the labels list.
- The function calls recognizer.train(faces, np.array(labels)) to train the face recognition model after iterating through all of the images in the “Faces” directory. The face samples are stored in the faces list, and the accompanying labels are stored as a NumPy array in np.array(labels).
Training
Next we split the dataset into training and testing subsets, it can be done by creating two lists named faces and labels for training the datasets. Then use the training subset to train a classifier on the extracted features. From the datasets, the model is trained to recognize the features.
Python3
def train_model(label):
faces = []
labels = []
for file_name in os.listdir('Faces'):
if file_name.endswith('.jpg'):
name = file_name.split('_')[0]
image = cv2.imread(os.path.join('Faces', file_name))
gray = cv2.cvtColor(image, cv2.COLOR_BGR2GRAY)
detected_faces = face_cascade.detectMultiScale(gray, scaleFactor=1.1, minNeighbors=5, minSize=(30, 30))
if len(detected_faces) > 0:
face_crop = gray[detected_faces[0][1]:detected_faces[0][1] + detected_faces[0][3],
detected_faces[0][0]:detected_faces[0][0] + detected_faces[0][2]]
faces.append(face_crop)
labels.append(label[name])
recognizer = cv2.face.LBPHFaceRecognizer_create()
recognizer.train(faces, np.array(labels))
recognizer.save('trained_model.xml')
return recognizer
Recognizer =train_model(label)
Recognizer
|
Output:
< cv2.face.LBPHFaceRecognizer 0x7fe13ef3bef0>
Step 5: Defining the Function to Recognize Faces
- cv2.VideoCapture(0) is used to launch the default camera (typically the primary webcam) for live video capture. The cap variable represents the video capture object.
- Reverse keys and values in the label dictionary to convert the numerical label to user name
- The function enters a loop that captures frames from the camera, analyses them, and recognises faces in real-time.
- Using cap.read(), the function reads a single frame from the camera within the loop. The return value ret shows if the frame was successfully read, and the frame data is kept in the frame variable.
- cv2.cvtColor(frame, cv2.COLOR_BGR2GRAY) is used to convert the frame to grayscale.
- The function detects faces in the grayscale frame using the previously developed face_cascade classifier. face_cascade.detectMultiScale() recognises faces at various scales in an image. The detected faces are returned as a list of rectangles (x, y, width, height), and this information is saved in the faces variable.
- The function uses the trained facial recognition model (recognizer) to predict the label and confidence level for each face sample. Using recognizer.predict(), we can get the predicted label and confidence on the cropped face region in the grayscale frame.
- The recognised face label is printed on the console. If the label is 0, it signifies the face is unrecognised or unknown. Otherwise, the recognised label (e.g., “1”, “2”, etc.) is printed. In addition, the recognised label and confidence level are displayed on the frame using cv2.putText() to demonstrate real-time recognition results.
- To highlight the recognised face, a green rectangle has been drawn around the identified face on the original colour frame using cv2.rectangle().
- Using cv2.imshow(), the frame with the face recognition results is displayed on the screen.
- The loop can be ended by pressing the ‘q’ key. The code uses cv2.waitKey(1) to wait for a short period of time (1 millisecond) before checking for the presence of the ‘q’ key (cv2.waitKey(1) & 0xFF == ord(‘q’)). If the ‘q’ key is pressed, the loop is broken, and the function continues to release the camera and dismiss all OpenCV windows.
- After breaking the loop, the code uses cap.release() and cv2.destroyAllWindows() to release the camera and close all OpenCV windows.
Python3
def recognize_faces(recognizer, label):
cap = cv2.VideoCapture(0)
label_name = {value: key for key, value in label.items()}
while True:
ret, frame = cap.read()
gray = cv2.cvtColor(frame, cv2.COLOR_BGR2GRAY)
faces = face_cascade.detectMultiScale(gray, scaleFactor=1.1, minNeighbors=5, minSize=(30, 30))
for (x, y, w, h) in faces:
label, confidence = recognizer.predict(gray[y:y + h, x:x + w])
if confidence > 50:
cv2.putText(frame, label_name[label], (x, y - 10), cv2.FONT_HERSHEY_SIMPLEX, 0.9, (0, 255, 0), 2)
cv2.rectangle(frame, (x, y), (x + w, y + h), (0, 255, 0), 2)
else:
print('Unrecognized')
cv2.imshow('Recognize Faces', frame)
if cv2.waitKey(1) & 0xFF == ord('q'):
break
cap.release()
cv2.destroyAllWindows()
|
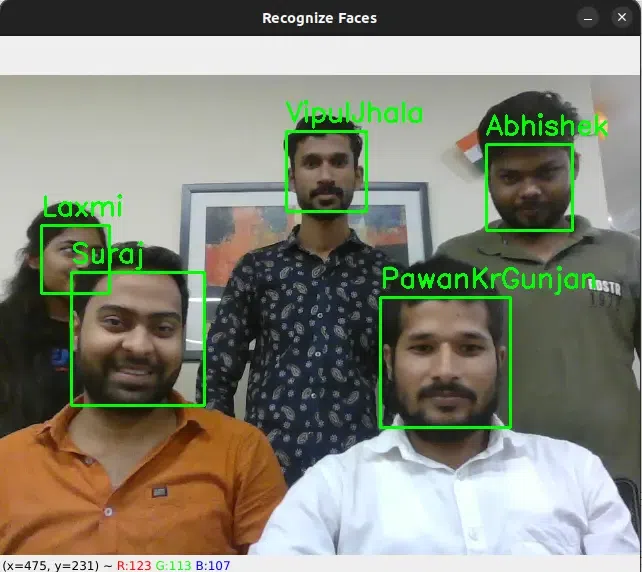
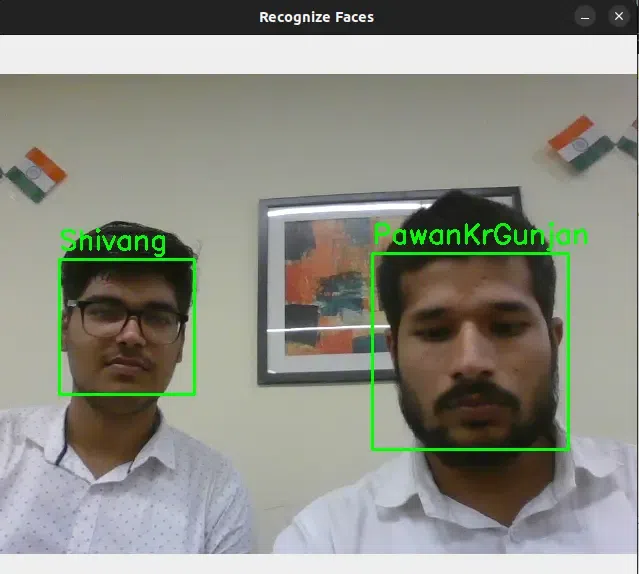
Feature Recognition:
Again we open the camera to capture an image, now it compares the detected grayscale frame with the trained model. If the face is not recognized (label equals 0) then the captured faces are not present in the label which we trained earlier. So this prints “Unknown Face”, else (label equals to a value) it recognized the face from the trained label and prints “Recognized Face: 1”. If we train the ‘n’ number of faces, then it stores it with label values 1,2,3., and so on.
Python3
recognize_faces(Recognizer, label)
|
Output:
Conclusions
The Local Binary Patterns (LBPs) face recognizer model given in the code is a practical implementation for real-time face identification. It starts by capturing face images with the capture_images() function, allowing users to create a dataset with labelled faces. The train_model() function then extracts and trains facial features with the LBPs technique and OpenCV’s Haar Cascade Classifier. Following that, the recognize_faces() method employs the trained model to recognise faces in the webcam feed, providing real-time face labels and confidence ratings.
Share your thoughts in the comments
Please Login to comment...